Unpacking the Unexpected: Crafting a High-Gravity Homebrew Belgian Pale Ale
In the vibrant world of homebrewing, creativity and adaptability often lead to the most memorable batches. The video above captures a fascinating homebrewing journey in Bremerton, Washington, where a seemingly simple **Belgian Pale Ale homebrew** project unexpectedly yielded a robust, high-gravity brew. Initially aiming for a modest 5% ABV, the final original gravity clocked in at an astonishing 1.081, translating to an estimated 8.3% ABV. This significant deviation, representing an 87% mash efficiency, illustrates the unpredictable yet rewarding nature of the brewing process, especially when improvising with limited equipment and an unknown water profile.
The Heart of the Brew: Ingredients and the Unconventional Recipe
Crafting a **Belgian Pale Ale homebrew** is often about balance and nuance. The brewer’s ingredient list for this particular batch was intentionally streamlined due to logistical constraints, yet it formed a solid foundation for a flavorful beer. A foundational grain bill was utilized, emphasizing simplicity and accessibility.
Building the Grain Bill: Simplicity with Character
The malt selection forms the backbone of any beer, providing fermentable sugars and contributing to color and flavor. For this **Belgian Pale Ale homebrew**, a straightforward yet effective grain combination was chosen. Primarily, 10 pounds of 2-row malt were employed, serving as the main source of fermentable sugars and contributing a clean, bready base.
To introduce complexity and depth, specialty grains were incorporated. Four ounces of Caramel 10 malt were added, known for imparting notes of caramel, toffee, and a richer body. Additionally, two ounces of honey malt were used, which contributes a unique, delicate honey-like sweetness and aroma, enhancing the overall character of the beer without overpowering it. These specialty grains were chosen to complement the desired “Belgenie fruitiness” without making the beer overly sweet.
Hops and Flavor Accents: A Tropical Twist
Hops are crucial for bitterness, aroma, and flavor. For this **Belgian Pale Ale homebrew**, the hop schedule was designed to provide a tropical and fruity profile. Tropica hops, known for their strong tropical fruit notes, were added at the 20-minute mark of the boil to contribute flavor and aroma. Another addition, Mighty Axe Julius hops, was made at the 5-minute mark, further intensifying the tropical fruit characteristics.
A distinctive touch was also introduced with 8 grams of lemon peel during the late boil. This addition was intended to amplify the inherent fruity esters often found in Belgian-style beers, providing a bright, zesty aroma that complements the tropical hops. The inclusion of lemon zest aimed to mimic and enhance the “Belgenie fruitiness” that was desired from the outset.
Yeast Selection: The Belgian Character
The choice of yeast is paramount in defining the character of a **Belgian Pale Ale homebrew**. SafBrew S-33, a popular Belgian ale yeast, was selected for this batch. This yeast strain is known for producing a balanced flavor profile, often contributing fruity and slightly spicy esters that are characteristic of Belgian ales. It is a robust yeast, capable of handling a wide range of temperatures, which was particularly useful given the cold brewing conditions encountered. The yeast’s ability to produce esters without being “super super estery” was a key consideration, especially given the brewer’s preference for balanced Belgian flavors.
Brew Day Logistics: The Brew-In-A-Bag (BIAB) Method
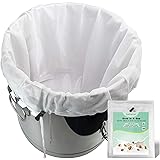
The Brew-In-A-Bag (BIAB) method was chosen for this **Belgian Pale Ale homebrew** due to its simplicity and reduced equipment requirements. This technique consolidates the mashing and lautering steps into a single vessel, making it an excellent choice for brewers with limited space or equipment, as was the case in this particular setup. The process of mashing in, a critical step where starches are converted into fermentable sugars, was carried out efficiently using this method.
Mashing for Success: Temperature and Time
The mash temperature is a vital factor influencing the final beer’s body and fermentability. For this **Belgian Pale Ale homebrew**, the strike water was heated to approximately 160°F, slightly above the target mash temperature of 157°F. This preheating was a strategic move, accounting for heat loss in the cold Bremerton environment and the uninsulated kettle. The mash settled at a consistent 152°F, a temperature favoring the production of both fermentable sugars and dextrins, contributing to a balanced beer with moderate body.
A mash duration of 45 minutes was observed, which, while shorter than some traditional mashes, proved highly effective. This timeframe was influenced by the improvisational nature of the brew day, but the consistent temperature control ensured efficient starch conversion. The final mash temperature of 151°F indicated a successful conversion process, promising a good yield of fermentable wort.
The Art of Lautering (BIAB Style): Extracting the Sugars
With the BIAB method, lautering, the process of separating the wort from the spent grains, is streamlined. After the mash, the grain bag was carefully lifted from the kettle and allowed to drain. This step ensures that as much sugary liquid (wort) as possible is extracted, maximizing the efficiency of the brew. Gentle squeezing or pressing of the bag can further aid in extracting remaining liquid, although it is important to avoid excessive squeezing which can sometimes extract undesirable tannins from the grain husks. This rustic approach demonstrated in the video highlights the practicality and hands-on nature of BIAB.
Measuring the Magic: Gravity Readings and Unexpected Efficiency
One of the most exciting aspects of any brew day is taking gravity readings. These measurements provide crucial insights into the sugar content of the wort and allow brewers to estimate potential alcohol content. For this **Belgian Pale Ale homebrew**, a refractometer was utilized for these vital readings, offering a quick and convenient way to measure Brix, a scale related to sugar concentration.
The Refractometer: A Glimpse into Sugar Content
A refractometer functions by measuring the bending of light as it passes through a liquid. In brewing, this tool provides a Brix reading, indicating the percentage of dissolved solids (primarily sugars) in the wort. While quick, refractometer readings during fermentation require a correction factor due to the presence of alcohol, but for pre-boil and original gravity readings, it offers a reasonably accurate initial assessment. The brewer meticulously took readings, emphasizing the need to hold the device towards a light source for clarity and utilizing the Brewfather app for accurate conversion from Brix to specific gravity, incorporating a personal correction factor.
From Expected to Excellent: A Surge in Efficiency
The initial pre-boil gravity reading of 15 Brix translated to an impressive 1.063 specific gravity, significantly higher than the target of 1.051. This early indicator hinted at an exceptional mash efficiency. Efficiency, in brewing terms, refers to how effectively the sugars are extracted from the grains. An 87% mash efficiency, as achieved in this **Belgian Pale Ale homebrew**, is considered outstanding, suggesting that the mashing process was incredibly effective at converting starches into fermentable sugars. This high efficiency meant that the beer would naturally be much stronger than initially planned, turning a standard pale ale into something more akin to a “double” Belgian, with a projected ABV leaping from 5% to 6% pre-boil, and then to 8.3% post-boil.
The Boil and Chill: Finalizing the Wort
The boil serves multiple critical functions in brewing: sanitizing the wort, concentrating sugars, isomerizing hop acids for bitterness, and driving off undesirable volatile compounds. After the boil, rapidly cooling the wort is essential to prevent unwanted bacterial growth and to prepare it for yeast pitching. For this **Belgian Pale Ale homebrew**, both stages were executed with the typical homebrewer’s blend of precision and resourcefulness.
Boil Duration and Hop Additions
A 60-minute boil is standard for many recipes, allowing enough time for proper hop isomerization and hot break formation. In this particular brew, the first hop addition was made at the 20-minute mark, using 1 ounce of Tropica hops. This timing ensures that the hops contribute significant bitterness while also imparting some flavor and aroma. Later in the boil, at the 5-minute mark, a second addition was made, combining 1 ounce of Mighty Axe Tropica, 1 ounce of Mighty Axe Julius, and 8 grams of lemon peel. These late additions are primarily for aroma and flavor, as the shorter contact time with heat preserves their delicate characteristics. The lemon peel was specifically added to enhance the fruity character, creating a symphony of citrus and tropical notes.
Chilling the Wort: Rapid Cooling for Yeast Health
Upon completion of the boil, the wort needs to be cooled quickly to pitching temperature, ideally around 70°F (21°C) for most ale yeasts. An immersion chiller was employed for this purpose. This device, connected to a cold water source, is submerged directly into the hot wort, rapidly transferring heat away. The local water in Bremerton, being exceptionally cold at approximately 50°F (10°C), significantly expedited the chilling process, bringing the wort down to 68°F (20°C) in a short amount of time. Rapid chilling is crucial; it minimizes the risk of infection and prevents the formation of chill haze, leading to a clearer final product. Furthermore, pitching yeast into wort that is too hot can shock the yeast, leading to off-flavors or a stalled fermentation. Conversely, pitching into wort that is too cold can result in a slow or incomplete fermentation, which is why hitting that specific temperature window is so important.
Preparing for Fermentation: Aeration and Yeast Pitching
With the wort chilled to the ideal temperature, the final steps before active fermentation are aeration and yeast pitching. These actions are fundamental to initiating a healthy and robust fermentation process for any **Belgian Pale Ale homebrew**.
The Critical Role of Aeration
Yeast, while capable of anaerobic respiration (fermentation without oxygen), requires oxygen during the initial growth phase to reproduce and build strong cell walls. Without sufficient oxygen, yeast struggles to multiply, leading to a sluggish or incomplete fermentation and potentially contributing to off-flavors. For this **Belgian Pale Ale homebrew**, aeration was achieved by splashing the wort vigorously as it was transferred into the carboy. This method, while simple, effectively introduces dissolved oxygen into the wort, setting the yeast up for success. It’s a bit like giving a marathon runner a good breakfast before a race; the fuel for the initial burst of energy is crucial.
Pitching the Yeast: Bringing the Brew to Life
Once the wort is aerated, the yeast is “pitched,” meaning it is introduced into the fermenter. For this batch, the S-33 Belgian ale yeast was simply sprinkled directly onto the wort, without prior rehydration. While rehydrating dry yeast is often recommended to ensure maximum viability, many homebrewers, including this one, find success pitching dry yeast directly, especially with robust strains. The yeast, once pitched, immediately begins its work, consuming the fermentable sugars and producing alcohol, carbon dioxide, and a myriad of flavor compounds that define the beer. The transformation from sweet wort to complex beer is initiated at this pivotal moment, setting the stage for the next few weeks of quiet fermentation.
Beyond the Brew: Sustainable Practices with Spent Grain
Homebrewing, while a resource-intensive hobby, also presents unique opportunities for sustainable practices. The process of making a **Belgian Pale Ale homebrew** or any other beer generates a significant byproduct: spent grain. This is the solid residue left after the mashing process, rich in fiber and nutrients, but no longer containing fermentable sugars. Instead of simply discarding this material, creative uses can transform it into valuable resources.
The brewer in the video highlights a fantastic way to minimize waste by repurposing spent grain. It is shown being used as a nutritious feed for chickens, who readily consume it, transforming it into eggs and sustenance. Moreover, a popular and heartwarming use is converting it into dog treats. The process is simple: spent grain is mixed with other ingredients like flour and eggs, formed into shapes, and then baked for several hours at 300°F (150°C). These treats are incredibly popular with canine companions, often leading neighbor dogs to eagerly seek them out, as affectionately recounted in the video. This commitment to recycling and finding new life for brewing byproducts is an inspiring aspect of the homebrewing community, demonstrating how a hobby can align with environmental consciousness.
Tapping into Knowledge: Your Belgian Pale Ale Q&A
What is the Brew-In-A-Bag (BIAB) method in homebrewing?
The BIAB method is a simple brewing technique where mashing and lautering happen in a single vessel. It’s a great choice for brewers with limited space or equipment.
Why are gravity readings important when brewing beer?
Gravity readings measure the sugar content of your wort, which helps you estimate the potential alcohol content of your finished beer. A refractometer is a common tool used for this.
What role does yeast play in making a Belgian Pale Ale?
Yeast is crucial because it ferments the sugars in the wort, producing alcohol, carbon dioxide, and flavor compounds that give the beer its distinct Belgian character.
What is spent grain, and what can you do with it after brewing?
Spent grain is the leftover grain from the brewing process that no longer contains fermentable sugars. It’s often repurposed as feed for chickens or used to bake nutritious dog treats.