Unlock Your Brewing Potential: A Deep Dive into the Coopers DIY Beer Kit
The journey into homebrewing can seem daunting, with complex recipes and specialized equipment often deterring newcomers. However, the path to crafting your own delicious beer at home is far more accessible than you might think. As expertly demonstrated in the video above, the Coopers DIY Beer Kit provides an all-in-one solution, equipping aspiring brewers with everything needed to produce their first batch of quality beer with remarkable ease. This comprehensive guide expands on the video’s insights, delving deeper into the nuances of each step and offering additional tips to ensure your homebrewing experience is both successful and rewarding.Unboxing Your Coopers Homebrew Kit: What’s Inside?
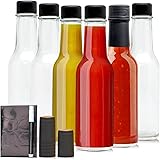
Opening a Coopers DIY Beer Kit reveals a carefully curated selection of essentials designed to simplify the brewing process. Paul Tower’s detailed unboxing highlights the fundamental components that eliminate the guesswork for beginners. Understanding each item’s purpose is crucial for a smooth brewing operation. Your Coopers DIY Beer Kit typically includes: * **Fermenter with Krausen Collar:** This robust vessel is where your beer will transform. The krausen collar is a clever addition, capturing the foam (krausen) produced during fermentation, making cleanup significantly easier. * **Spigot and Bottle Filler:** These work in tandem to transfer your fermented beer cleanly into bottles, minimizing mess and exposure to air. The bottle filler’s unique design allows for precise filling, stopping flow when removed from the bottle. * **Coopers Lager Beer Kit & Brew Enhancer:** The heart of your brew. The Lager kit provides the base malt extract, while the brew enhancer, a blend of dextrose, dry malt extract, and maltodextrin, boosts the alcohol content and body, preventing a watery, low-ABV beer (which would be around 2-3% without it). * **Bottle Caps:** Essential for sealing your beer and allowing carbonation to build. * **Strip Thermometer:** This stick-on thermometer attaches to the fermenter, allowing you to monitor the crucial fermentation temperature. * **Coopers Carbonation Drops:** These pre-portioned sugar tablets simplify the carbonation process in individual bottles, eliminating the need for measuring bulk priming sugar. * **Mixing Spoon:** A long-handled utensil for stirring ingredients thoroughly. * **Hydrometer and Test Jar:** Advanced tools for beginners, these allow you to measure the specific gravity of your wort (unfermented beer) and finished beer, providing an accurate calculation of your beer’s alcohol by volume (ABV). * **30 x 740 ml Beer Bottles:** A generous supply, perfectly sized to accommodate an entire 23-liter batch. These reusable bottles are a significant cost-saver for future brews. While the kit is exceptionally comprehensive, remember Paul’s crucial advice: after your first brew, you will need dedicated cleaning and sanitizing agents like Diversol (the “pink powder” for cleaning) and Star San (a no-rinse sanitizer) to maintain impeccable hygiene for subsequent batches. This vigilance is paramount; proper cleaning and sanitization prevent bacterial contamination, the most common culprit behind ruined homebrews.Mastering the Home Brewing Process: Step-by-Step
The video walks us through the initial brewing steps, emphasizing simplicity and precision. Each action contributes to the quality and flavor profile of your finished beer.Preparing Your Wort: The Foundation of Flavor
Your brewing journey begins with preparing the wort, which is essentially unfermented beer. First, heat approximately four liters of clean water to a boil, then turn off the heat and allow it to cool slightly. This hot water will effectively dissolve your brewing ingredients. While the water cools, take a practical tip from the video: submerge your Coopers brew can in a sink of hot tap water for about 30 minutes. This softens the thick, maple syrup-like extract, making it much easier to pour and rinse out. Next, add about five liters of hot, chlorine-free water to your fermenter. Chlorine can impart off-flavors, so using filtered tap water, RO water, or even adding a Camden tablet to tap water is highly recommended. Stir in the brew enhancer completely, ensuring no clumps remain. Then, add the softened brew can contents, using a sanitized spatula to scrape out as much extract as possible—aiming for roughly 98% as mentioned in the video. A thorough stir ensures all ingredients are fully integrated.Balancing Temperature and Volume
With the primary ingredients mixed, apply the stick-on thermometer to the lower portion of your fermenter. This placement ensures an accurate reading of the wort’s temperature. Top up the fermenter with additional clean, chlorine-free water until the total volume reaches 23 liters. Achieving the correct volume is important for hitting the target ABV, typically around 4% for a standard Coopers kit. If you prefer a stronger beer, you can reduce the water volume to 19 or 20 liters, or add additional dextrose or dry malt extract. Ensure the wort temperature is around 20-22°C before pitching your yeast.The Significance of Gravity Readings
Before pitching the yeast, take an initial specific gravity reading with your hydrometer and test jar. Carefully transfer a sample of wort into the test jar, ensuring the hydrometer floats freely. The video indicates an Original Gravity (OG) of approximately 1.040 to 1.042 for this Coopers Lager kit. Record this number diligently, as it is crucial for calculating the final ABV of your beer. This simple measurement provides valuable insight into the sugar content available for the yeast to convert into alcohol.Yeast Selection and Pitching
The Coopers kit comes with a generic ale yeast, which is perfectly functional and will produce good beer. However, as Paul wisely notes, upgrading your yeast can significantly enhance the flavor profile. While the kit is a “lager” kit, the included yeast and recommended fermentation temperatures are for ale production; true lagering requires specific cold fermentation conditions most homebrewers don’t have. Consider these popular alternative ale yeasts, which can elevate your brew: * **Safale US-05:** A clean-fermenting American ale yeast, ideal for a wide range of beers, including blonde ales and pale ales, due to its neutral flavor profile. * **Safale S-04:** A British ale yeast known for imparting fruity esters and a slightly malty character, excellent for darker beers like stouts, ESBs, or porters. * **Nottingham Ale Yeast:** A versatile, robust yeast that ferments well across various temperatures and produces clean, balanced beers. It’s truly a good all-rounder for almost any style. To pitch the yeast, simply sprinkle the entire packet evenly over the surface of the wort. Resist the urge to stir it in; the yeast will rehydrate and begin its work naturally. This ensures even distribution and minimizes oxygen exposure.Fermentation and Conditioning: The Waiting Game
Once the yeast is pitched, seal your fermenter with the lid and place it in a cool, dark location, away from direct sunlight. The ideal fermentation temperature is between 18-22°C (64-72°F). Fermenting hotter than this range can lead to undesirable off-flavors, often described as “fusel alcohols” or “cidery” notes. Let your beer ferment undisturbed for about two weeks. During this time, the yeast actively converts sugars into alcohol and CO2. After two weeks, your beer is likely ready for bottling. While you can take a final gravity reading (Final Gravity, FG) to confirm fermentation is complete (expect a reading around 1.001 to 1.008), observing a lack of bubbling and clearer beer usually indicates readiness. Remember, the difference between your OG and FG will reveal your beer’s alcohol content.Bottling and Carbonation: Bringing Your Beer to Life
The bottling stage is where your beer truly comes to life, gaining its refreshing carbonation. As demonstrated in the video, this process is surprisingly straightforward, especially with Coopers carbonation drops. First, ensure your bottles are impeccably clean and sanitized. Any lingering contaminants can ruin your beer at this final stage. For the 740 ml Coopers bottles, place two carbonation drops into each bottle. If using smaller bottles, adjust accordingly: one drop for a 355 ml bottle and one and a half drops for a 500 ml bottle (the drops are easily broken in half). Next, attach the bottle filler to the fermenter’s spigot. Open the spigot and press the bottle filler’s “tongue” against the bottom of each bottle to initiate flow. Fill each bottle right up to the very top, as removing the filler will leave the perfect headspace for carbonation. Once filled, cap each bottle immediately and tightly. A loose cap will allow precious CO2 to escape, resulting in flat beer. After bottling, store your capped bottles in a warm place, ideally at least 18°C, for another two weeks. This secondary fermentation, known as bottle conditioning, allows the yeast to consume the sugar from the carbonation drops, producing CO2 that dissolves into the beer, creating natural fizz. Once conditioned, your homemade Coopers beer kit brew is ready to chill and enjoy!Your Coopers DIY Beer Questions, Bottled Up & Answered
What is a Coopers DIY Beer Kit?
A Coopers DIY Beer Kit is an all-in-one package designed for beginners to easily make their own beer at home, providing most of the essential equipment and ingredients.
What are the basic steps to make beer with this kit?
The main steps include preparing your unfermented beer (called wort), adding yeast for fermentation, and then bottling it with carbonation drops to create fizz.
Why is cleaning and sanitizing my brewing equipment so important?
Proper cleaning and sanitization are crucial to prevent bacterial contamination. Contaminants can introduce off-flavors and ruin your homebrewed beer.
How long does it usually take to make beer using the Coopers DIY Beer Kit?
After preparing your brew, it typically takes about two weeks for fermentation to complete, followed by another two weeks for bottle conditioning to achieve carbonation.