Have you ever brewed a beer hoping for applause, only to be met with polite silence or even a raised eyebrow? If so, you’re not alone. As you might have seen in the accompanying video, even seasoned homebrewers like Dylan can hit a few bumps on the road to brewing perfection. But fear not, because mastering the art of a crisp, clean German Pilsner lager is not just possible; it’s a game-changer for winning over even the toughest critics: friends and family.
Making a German Pilsner isn’t just about crafting a delicious beer; it’s a masterclass in brewing precision. There’s truly nowhere to hide imperfections when you brew a lager. This style demands attention to detail in every step, from selecting your grains to meticulous temperature control. It’s like painting a portrait in watercolor—every stroke, every nuance, must be deliberate. In contrast, an IPA can sometimes be more forgiving, much like a bold acrylic painting that embraces vibrant, even chaotic, blends of flavor.
The Foundation of a Fantastic German Pilsner Lager: Ingredients
Achieving that classic German Pilsner taste begins with the right ingredients. Johnny from Get Er Brewed highlighted a stellar recipe designed for success. Let’s break down the core components:
Malt Bill: Simplicity is Key
The foundation of a true German Pilsner is its malt. The video’s recipe calls for a lean, yet impactful, grain bill:
- German Pilsner Malt (3.98 kg): This makes up the vast majority, approximately 97% of the grist. It provides the pale color, clean, bready notes, and fermentable sugars essential for the style. Think of it as the canvas for your brewing masterpiece—pure, clean, and ready to highlight other elements.
- Vienna Malt (120 grams): Comprising roughly 3% of the grist, Vienna malt adds a subtle richness, a touch of malty sweetness, and a slightly deeper golden hue without overpowering the delicate Pilsner character. It’s a gentle accent, like a touch of warm glow in that watercolor portrait.
This minimalist approach ensures the subtle nuances of the hops and yeast can truly shine, giving the German Pilsner lager its signature crispness.
Hops: The Noble Trio
Hops in a German Pilsner are about balance and aromatic elegance, not aggressive bitterness. The recipe wisely chose a trio of noble hops:
- Magnum: Often used for its clean, efficient bittering properties. It sets the stage, providing the necessary backbone without introducing harsh flavors. Magnum ensures the beer has enough bitterness to counteract the malt sweetness without becoming overpowering.
- Hersbrucker: Known for its mild, earthy, and spicy notes, Hersbrucker contributes to the traditional aroma and flavor profile. It’s a classic choice that adds complexity and authenticity.
- Tettnang: A quintessential noble hop, Tettnang offers delicate floral, spicy, and slightly herbal aromas. The video emphasizes adding Tettnang when chilling the wort down to 80 degrees Celsius. This technique, often called a “hop stand” or “whirlpool addition,” allows the volatile aromatic compounds to be extracted without contributing excessive bitterness, preserving their delicate character. This step is crucial for letting those signature noble hop aromas truly sing.
Yeast: The Unsung Hero of Lager Brewing
For a crisp German Pilsner lager, yeast selection is paramount. The video recommends Lallemand Diamond Lager yeast, a highly regarded dry lager yeast known for producing clean, authentic lager profiles. While options like Wyeast and White Labs liquid yeasts, or Fermentis, are also available, the preference for Lallemand highlights its reliability and premium quality. The right yeast ensures a clean fermentation, allowing the malt and hop characters to stand out without unwanted off-flavors.
Conquering Common Homebrewing Hurdles for Better Lagers
Dylan’s journey, as detailed in the video, is a relatable tale for many homebrewers. His past “questionable beers” stemmed from a few critical areas. These are common pitfalls, but they’re also opportunities for growth in your brewing process:
Sanitization: The Unbreakable Rule
Imagine building a magnificent house, only for the foundation to crumble due to poor materials. That’s what brewing with inadequate sanitization is like. Dylan candidly admits to “bad sanitizing, or not sanitizing correctly.” This is perhaps the single most important rule in brewing: everything that touches your cooled wort or beer must be scrupulously clean and sanitized. Any stray bacteria or wild yeast can quickly turn your carefully crafted wort into a sour, off-flavored disaster.
A simple spray bottle with sanitizing fluid (like Chemipro, as Dylan uses) and a dedicated sanitizing bucket for smaller items are indispensable tools. Think of sanitization as the invisible shield protecting your beer from invaders. It’s not just cleaning; it’s eliminating microscopic threats that can spoil your hard work. Always double-check seals and connections, as Dylan discovered with his fermenter’s caps, where a loose seal allowed pressure to drop and compromised his beer.
Fermentation Temperature Control: The Lager’s Secret Weapon
Brewing lagers presents a unique challenge: precise temperature control. Lager yeasts prefer cooler fermentation temperatures, typically between 8-15°C (46-59°F), for longer periods. This cool and slow fermentation creates a clean, smooth, and crisp flavor profile, minimizing unwanted esters and fusel alcohols. Dylan highlights this as a major past struggle: “not understanding and controlling fermentation temperatures.”
His game-changing solution was investing in a temperature-controlled fermenter like the Fermentor, which he describes as an “absolute treat.” This device, often an insulated chamber with a cooling/heating unit, maintains a consistent temperature, eliminating the guesswork and wild swings that can ruin a delicate lager. Before, he was “sitting there with a thermometer” trying to regulate temperature manually, which is a common, frustrating experience for many homebrewers. Without proper temperature regulation, lagers can taste rough, yeasty, or develop off-flavors. It’s the difference between a finely tuned orchestra and a cacophony of individual instruments.
Equipment Upgrades: Investing in Consistency
While you can start brewing on a simple pot on a hob, consistent quality often comes with better gear. Dylan recounts his journey from a “pot on a hob” to an induction cooker, then brew-in-a-bag, and finally to an all-grain system. His embrace of the Beacon Brewster all-in-one system was another “game changer.” These systems offer precise temperature control for mashing and boiling, simplifying the process and ensuring repeatability. It streamlines the brewing day, allowing you to focus on the craft rather than wrestling with inconsistent heat sources. For a German Pilsner lager, precise mash temperatures (like the 63°C for about an hour in the video) are crucial for sugar conversion and body, and an all-in-one system makes this achievable.
Beyond the brew day, Dylan also praises his FermZilla pressurized fermenter and especially the Fermentor (the temperature control unit). He explains how having dedicated vessels for fermentation, including a pressurized one for lagering, significantly elevated his results. Investing in quality equipment is like upgrading your kitchen tools; it makes the cooking process smoother, more enjoyable, and ultimately, produces better dishes.
The Brewing Process: A Step-by-Step Glimpse
The video provides a clear walkthrough of preparing a homebrew recipe kit. Here’s a deeper dive into the significance of each step:
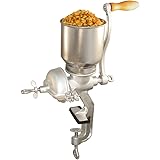
Malt Crushing and Mashing In
Get Er Brewed emphasizes crushing malt “super fresh” and performing “grist analysis.” This ensures the malt is crushed correctly, optimizing for “correct extract and correct run off.” A proper crush means the husks are mostly intact to form a filter bed, while the inner kernels are broken to expose starches for enzymatic conversion. Dylan mashed in at 20 liters instead of the suggested 15 liters, perceiving the latter as too little water for the grain volume. While the recipe suggested 15 liters, his choice to adjust was based on experience, aiming for a less “porridge-like” consistency. Mash temperature, held at 63°C for about an hour, is critical for achieving the desired fermentability and body for a German Pilsner lager.
Hop Additions and Chilling
The timed addition of hops is crucial. The Magnum and Hersbrucker would typically be added earlier in the boil for bittering and some flavor. The Tettnang, however, is added after the wort has been chilled to 80°C. This technique, as explained, is to preserve the delicate aromatic oils of these noble hops. Adding them at lower temperatures extracts aroma and flavor compounds without contributing excessive bitterness, making them “really shine through.” Rapid chilling of the wort after the boil is also vital to prevent off-flavors and minimize the risk of infection. It’s a race against time, cooling the hot liquid down to pitching temperature as quickly as possible.
Fermentation and Conditioning: The Long Wait
Lager brewing, by its nature, is a slower process. The traditional method can take up to three months. This extended period allows the yeast to slowly ferment at cool temperatures, clean up any by-products, and then condition, or “lager,” the beer for a smooth, refined taste. Dylan’s experience with pressure fermenters shows an exciting alternative for homebrewers to expedite the process, although he notes a video is coming from Johnny that will detail how to get it right. Proper lagering is like aging a fine wine; time and controlled conditions bring out the best in the beverage.
Learning from Mistakes: The Brew Log is Your Best Friend
Dylan’s advice, “write down everything you’ve done each brew so that you can look back and go, ‘that’s where we messed it up’,” is golden. Every brew is a learning opportunity. His story about the New England IPA, which was delicious initially but became “sketchy” after two weeks due to over-carbonation and improper bottling, perfectly illustrates this. By meticulously documenting your process—mash temperatures, gravity readings, hop schedules, yeast pitching rates, fermentation temperatures, and any deviations—you create a roadmap for improvement. When a brew doesn’t turn out as expected, your brew log becomes a detective’s notebook, helping you pinpoint the exact moment things went awry. It’s the difference between blindly hoping for the best and systematically refining your craft.
The Payoff: A Lager That Impresses
The ultimate goal for Dylan was to brew a beer that his wife, family, and friends would genuinely enjoy—to get their “buy-in.” His New England IPAs and stouts, while experimental, weren’t hitting the mark with them. Switching to a familiar style, the German Pilsner lager, known for its universally appealing crispness, was a strategic move.
His reaction to tasting his finished Pilsner speaks volumes: “That tastes like an actual beer… I’m super impressed with that… that’s the best beer I’ve made ever.” This enthusiasm underscores the immense satisfaction of achieving a well-made lager. Despite minor issues like needing more carbonation (which he rightly attributes to the beer only being bottled for seven days), the aroma and flavor were spot on. It’s a testament to the fact that with the right guidance, ingredients, and equipment, even a self-proclaimed “cowboy” can brew a fantastic beer.
Tapping Into Your First Lager: Questions & Answers
What kind of beer is a German Pilsner Lager?
A German Pilsner Lager is a crisp, clean, and refreshing beer known for its delicate flavors. It’s a style that highlights brewing precision, as imperfections are hard to mask.
What are the main ingredients used to brew a German Pilsner Lager?
The key ingredients for a German Pilsner Lager typically include German Pilsner malt for its pale color and bready notes, noble hops for balanced bitterness and aroma, and a clean-fermenting lager yeast.
Why is sanitization so important in homebrewing?
Sanitization is crucial because it prevents unwanted bacteria or wild yeast from contaminating your beer. Any contact with unsanitized equipment after the wort is cooled can lead to off-flavors and spoilage.
How does temperature affect lager brewing?
Lagers require precise, cool fermentation temperatures, usually between 8-15°C (46-59°F), to produce their characteristic clean, smooth, and crisp flavor. Without proper temperature control, off-flavors can develop.
What is a brew log and why should a beginner use one?
A brew log is a detailed record of every step, ingredient, and measurement taken during your brewing process. It’s essential for beginners to track what they did, learn from mistakes, and consistently improve their brewing results.