The fascinating journey of crafting your own beer at home might seem daunting at first glance. For many aspiring homebrewers, the sheer number of steps and specialized equipment can present a significant hurdle. However, as the accompanying video succinctly demonstrates, breaking down the process into manageable stages reveals that brewing your own delicious beer is not only achievable but also incredibly rewarding. This guide will elaborate on those essential steps, providing a comprehensive overview to help you understand precisely how to make beer with confidence and success.
Understanding the Homebrewing Process: Your First Batch
At its core, homebrewing follows a series of straightforward phases, each crucial for transforming simple ingredients into a complex, flavorful beverage. From selecting your grains to the satisfying pop of a freshly conditioned bottle, every step plays a vital role. Consequently, a systematic approach ensures consistency and quality in your homemade brew.
Key Ingredients for Your First Brew
Before you begin, gathering the right components is paramount. The video rightly highlights the foundational elements, but let’s explore their significance in more detail:
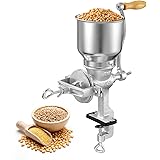
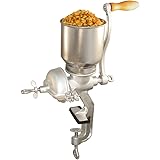
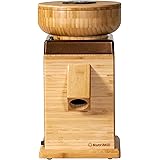
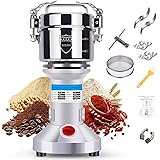
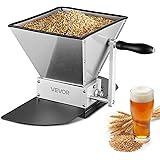
- Malted Grain: This is the backbone of your beer, providing the sugars for fermentation and contributing significantly to flavor, color, and body. Barley is most common, but wheat, rye, and oats are also used. Grinding the grain exposes its starchy interior, preparing it for the mashing process.
- Hops: These fragrant flowers are responsible for beer’s bitterness, aroma, and even preservative qualities. Different hop varieties offer distinct profiles, from citrusy and floral to earthy and spicy. The timing of their addition during the boil determines their impact on the final beer.
- Yeast: The unsung hero of fermentation, yeast consumes the sugars extracted from the grain and produces alcohol and carbon dioxide. There are countless strains of brewing yeast, each imparting unique flavor characteristics. Selecting the right yeast for your desired beer style is crucial.
- Water: Often overlooked, water is approximately 90% of your beer. Good quality tap water is a fine starting point, but understanding water chemistry can elevate your brewing. The Camden tablet mentioned in the video is typically used to remove chlorine or chloramine from tap water, which can otherwise create off-flavors.
- Priming Sugar: Added just before bottling, this small amount of sugar provides the yeast with a final meal inside the sealed bottle, creating natural carbonation. Dextrose (corn sugar) is a common choice.
The Mashing Phase: Extracting Sugars
The mashing process is where the magic begins. As the video outlines, it involves mixing your ground grain with heated water. This creates a “mash” where enzymes naturally present in the malted grain convert complex starches into fermentable sugars.
First, you will add tap water and half a Camden tablet to a kettle. It is important to heat this water to a precise temperature, around 150 degrees Fahrenheit. The on-screen text in the video provides a useful range of 142-158°F, illustrating that consistency within this window is key. Imagine if the temperature were too high; these enzymes could be denatured, unable to do their job. Conversely, if it were too low, the conversion would be inefficient, resulting in less sugar for the yeast to consume.
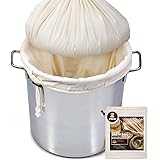
Upon reaching the target temperature, the ground grain is stirred into the water. The mash is then maintained at this temperature for approximately 60 minutes. During this hour, the enzymes diligently work to convert starches. Afterward, the grain basket is pulled, separating the sweet liquid, now called “wort,” from the spent grains.
Boiling and Hopping: Sterilization and Flavor
With the wort now separated, the next critical step is to bring this liquid to a vigorous boil. This boiling phase serves several vital purposes:
- Sterilization: The high temperature sanitizes the wort, eliminating any bacteria or wild yeasts that could spoil your beer.
- Hop Addition: Hops are added according to the recipe’s directions. Hops added early in the boil contribute bitterness, while those added later in the boil or after boiling (whirlpool additions) contribute more aroma and flavor.
- Protein Coagulation: Proteins in the wort coagulate and fall out of solution, forming what’s known as the “hot break.” This improves the beer’s clarity and stability.
- DMS Reduction: Boiling helps to drive off a compound called Dimethyl Sulfide (DMS), which can create off-flavors resembling cooked corn or cabbage if not properly managed.
After a 60-minute boil, the wort has been sterilized, flavored, and prepared for the next stage. Therefore, moving efficiently to the cooling phase is crucial to prevent contamination.
Cooling the Wort: A Race Against Contamination
Following the boil, the hot wort must be cooled rapidly. The video specifies cooling to roughly 70 degrees Fahrenheit. This rapid cooling is essential for two main reasons:
- Preventing Contamination: The wort is highly susceptible to spoilage from airborne bacteria and wild yeasts at temperatures between 80-130°F. Cooling quickly minimizes the time it spends in this danger zone.
- Optimal Yeast Health: Yeast performs best within specific temperature ranges. Pitching (adding) yeast into wort that is too hot will kill it, while wort that is too cold can shock the yeast and lead to a slow or stalled fermentation.
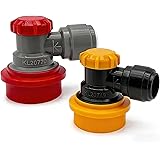
Consequently, many homebrewers use a wort chiller (an immersion or plate chiller) to achieve this rapid temperature drop. Imagine if you simply let the wort cool naturally; it could take hours, drastically increasing the risk of unwanted microbes taking hold.
Fermentation: Where the Magic Happens
Once cooled, the wort is ready for its transformation into beer. However, before transferring the liquid into the fermenter, meticulous sanitization of all equipment is non-negotiable. This cannot be stressed enough; even a speck of unwanted bacteria can ruin an entire batch. After thorough cleaning and sanitizing, the wort is carefully transferred.
Then, yeast is added, or “pitched,” into the fermenter. An airlock is installed after aeration, and the fermenter is stored for about a week at room temperature. The airlock allows carbon dioxide produced during fermentation to escape without allowing oxygen or contaminants to enter. During this week, the yeast vigorously consumes the sugars, producing alcohol, carbon dioxide, and a myriad of flavor compounds that define your beer’s character.
This primary fermentation period is a patient waiting game. It’s during this time that the complex sugars are converted, and your sweet wort slowly but surely becomes beer.
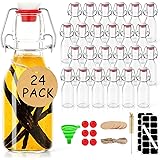
Bottling Your Homemade Beer: The Grand Finale
After the primary fermentation is complete (typically after about a week, as the video notes), it’s time to prepare your beer for consumption. This involves transferring the fermented beer to bottles.
Before bottling, however, the beer is mixed with a small amount of priming sugar. This final addition of sugar is crucial for carbonation. Once the beer and priming sugar are mixed, the bottles are sealed and stored at room temperature for an additional one and a half weeks. During this period, known as “bottle conditioning,” the residual yeast in the beer consumes the priming sugar, producing carbon dioxide that dissolves into the beer, creating that satisfying fizz.
Finally, after this patience-testing wait, you complete the most important part:
Tap Into Our Knowledge: Your Beer Brewing Q&A
What is homebrewing?
Homebrewing is the process of making your own beer at home, transforming simple ingredients into a flavorful beverage. It involves several manageable steps from start to finish.
What are the key ingredients needed to make beer?
The main ingredients for beer are malted grain (for sugars), hops (for bitterness and aroma), yeast (to convert sugars to alcohol), and water. Priming sugar is also used for carbonation.
What is ‘wort’ in homebrewing?
Wort is the sweet liquid extracted from the malted grain during the mashing process. It contains the sugars that yeast will later convert into alcohol.
Why is it important to cool the wort quickly after boiling?
Rapidly cooling the wort prevents contamination from unwanted bacteria and wild yeasts. It also ensures the wort reaches the optimal temperature for adding the brewing yeast.
What is the purpose of adding priming sugar before bottling?
Priming sugar is added before bottling to give the yeast a final meal inside the sealed bottles. This creates carbon dioxide, which dissolves into the beer to make it fizzy.