The journey of homebrewing is often marked by distinct phases. Perhaps it begins with simple extract kits, evolving into all-grain mashes. For many, a pivotal moment arrives when the sheer volume of bottles becomes a weekend chore. The endless washing, sanitizing, filling, and capping can easily consume hours. Worse, the specter of a “bottle bomb” – a literal explosion of fermented ambition – looms over every batch. Such experiences, while formative, often lead brewers to seek a more streamlined, elegant solution for enjoying their craft. That solution, for a growing number of enthusiasts, is kegging homebrew.
The video above brilliantly introduces the fundamental shift from bottling to kegging homebrew. It highlights how this upgrade simplifies the entire conditioning and serving process. No longer must one contend with dozens of individual containers. Instead, the focus shifts to a single, larger vessel. This transition is less about complexity and more about efficiency and pleasure. The ability to pull a perfectly carbonated pint from your own tap transforms the homebrewing experience. It elevates a hobby into a personal pub.
The Evolution to Homebrew Kegging
Bottling serves as an excellent starting point. It is cost-effective. Initial investments are minimal. Yet, its inherent limitations quickly become apparent. Time investment is considerable. The risk of bottling errors persists. Furthermore, achieving precise carbonation across an entire batch can be inconsistent. Homebrew kegging, however, offers a paradigm shift. It is a commitment to consistency. Effort is reduced significantly.
Consider the core advantages. Faster carbonation is possible. Precise carbonation levels are maintained. Tedious cleaning and filling tasks are minimized. The risk of bottle explosions is eliminated. Moreover, a freshly poured pint from a tap simply tastes superior. The controlled environment of a keg protects the beer. It preserves delicate flavors and aromas effectively.
Key Components for Homebrew Kegging
Stripping away the elaborate setups, a basic homebrew kegging system relies on several core elements. These are essential for any successful operation. Each component plays a vital role in the process. Understanding their function is critical.
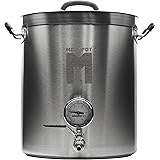
- **The Keg:** This vessel contains the fermented beverage. Cornelius kegs, or “Corny” kegs, are the industry standard for homebrewers. These former soda syrup containers are robust. They are also readily available.
- **The CO2 Tank:** This cylinder holds pressurized carbon dioxide. CO2 introduces the desired effervescence. It also serves as the propellant for dispensing beer.
- **The Pressure Regulator:** This device controls gas flow from the tank. It allows for precise pressure adjustments. Consistent carbonation and dispense are ensured.
- **The Dispensing Mechanism:** This includes gas lines, liquid lines, quick disconnects, and a tap. These parts facilitate the transfer of CO2 into the keg. They also allow beer to be served into a glass.
Selecting Your Cornelius Kegs
Cornelius kegs are favored by homebrewers. Their design is simple. Cleaning and maintenance are easy. Two primary types exist: ball lock and pin lock. Ball lock kegs feature posts with small ball bearings. These allow for quick attachment of gas and liquid lines. Pin lock kegs, conversely, use a pin system. Compatibility of connectors is the main difference. Consistency in type simplifies parts management. Most brewers choose one style and stick with it.
Capacity typically ranges from 2.5 to 5 gallons. The 5-gallon size is most common. This accommodates a standard batch of homebrew. Used kegs present a significant cost-saving opportunity. They are often found for $30 to $60. Local homebrew shops or online marketplaces are good sources. When purchasing used, inspect for rust and dents. A few dollars for new gaskets and O-rings is a wise investment. These ensure a tight, leak-free seal. A well-maintained used keg performs as well as a new one.
The Heart of Carbonation: CO2 & Regulation
Carbon dioxide is indispensable for kegging homebrew. It provides the characteristic fizz. The mouthfeel of your beer is directly impacted. CO2 tanks come in various sizes. Common sizes are 5-pound and 10-pound. A 10-pound tank often lasts six to nine months. This depends on brewing frequency. Finding used tanks, around $50, is common. Welding supply stores typically offer refills or exchanges. Homebrew shops may also provide this service. Always check a tank’s hydrotest date. Out-of-date tanks may require re-certification before filling.
The Unsung Hero: The Pressure Regulator
A reliable pressure regulator is non-negotiable. It attaches directly to the CO2 tank. This device accurately measures and controls the gas pressure. The amount of CO2 entering the keg is critical. Regulators typically cost around $70. Investing in a quality unit is paramount. An inexpensive, inaccurate regulator can lead to inconsistent carbonation. It may even result in over-carbonation. Dual-gauge regulators are often preferred. One gauge shows tank pressure. The other displays dispensing pressure. This provides complete control and monitoring. Removing the regulator before tank refills prevents damage.
Building Your Dispensing System
Moving carbonated beer from keg to glass requires a system of lines and connections. These components are relatively inexpensive. They are crucial for a perfect pour. Tubing, quick connects, and a tap form the basic setup. Proper assembly ensures efficiency and prevents leaks.
- **Gas Line:** This tubing connects the regulator to the “gas in” post of the keg. It delivers CO2. Flexible vinyl is a common material. Its length is not as critical as the beer line.
- **Gas Quick Connect:** This small fitting attaches the gas line to the keg’s gas post. Ball lock and pin lock variations exist. Ensure it matches your keg type.
- **Beer Line:** This tubing runs from the keg’s “liquid out” post to the tap. It carries the beer. Vinyl is a popular choice for beginners. Barrier tubing provides better oxygen protection.
- **Liquid Quick Connect:** Similar to the gas connect, this fitting attaches the beer line to the keg’s liquid post. Again, match your keg type.
- **Tap:** This is the final interface for pouring beer. Basic picnic taps (Cobra taps) are affordable. More sophisticated faucet taps offer better flow control and aesthetics.
- **Hose Clamps:** These small but mighty components secure all tubing connections. They prevent leaks of precious CO2 or beer. Stainless steel clamps are recommended for durability.
A simple leak test is advisable after setup. Spray Star San solution on all connection points. Any bubbling indicates a leak. Tighten connections as needed until no bubbles appear. This simple step prevents wasted gas and beer.
Mastering Carbonation Techniques
The goal is a perfectly carbonated brew. This means achieving the right balance of dissolved CO2. Several methods exist for carbonating your homebrew kegging system. Each has its own timeline and technique.
Forced Carbonation
This is the most common method for kegging. CO2 is introduced under pressure. The liquid absorbs the gas over time. Set the regulator to a desired PSI. Ten PSI is a good starting point for many styles. Full carbonation typically occurs within seven days at this pressure. Temperature plays a critical role. Colder liquid absorbs CO2 more efficiently. Therefore, a chilled keg is essential for effective forced carbonation.
Burst Carbonation
For quicker results, burst carbonation is utilized. A higher PSI is applied for a shorter period. For instance, setting the regulator to 40 PSI for 24 hours. After this initial burst, the pressure is reduced to 10 PSI. This method can significantly cut down carbonation time. Often, good carbonation is achieved within a day or two. Careful monitoring is advised to prevent over-carbonation.
The “Rock and Shake” Method
This technique offers the fastest carbonation. High pressure is applied (e.g., 30-40 PSI). The keg is then manually rocked or shaken for several minutes. This increases the surface area contact between gas and liquid. Carbonation can be achieved in as little as 30 minutes. However, this method carries risks. Over-carbonation is a common issue. Accelerated oxidation may also occur. This can negatively impact beer flavor and shelf life. Most brewers prefer slower methods for optimal quality.
Dealing with Over-Carbonation
Occasionally, too much pressure can build. This results in an overly fizzy beer. The fix is simple. Locate the pressure relief valve on your keg. A gentle pull releases excess gas. Alternatively, pressing the poppet on the gas-in post achieves the same effect. Repeat this process a few times over several hours. The internal pressure gradually decreases. The beer eventually settles into the desired carbonation range. This simple adjustment ensures a pleasant drinking experience.
The Perfect Pour: Line Length and Restriction
Achieving a smooth, foamless pour is an art. It relies on balancing pressure and flow resistance. The length and inner diameter of your beer line are crucial. A common guideline is 10 feet of 3/16-inch ID beer line for 10 PSI of serving pressure. This length creates sufficient resistance. It prevents the beer from surging out of the tap. Too short a line results in excessive foam. Too long a line slows the pour considerably. Understanding these dynamics improves serving quality. Flow control taps offer another solution. These specialized faucets allow for manual resistance adjustment. They provide greater flexibility for various beer styles and pressures.
The Kegerator: The Ultimate Homebrew Upgrade
While basic homebrew kegging can be done without a dedicated chilling unit, cold temperatures are essential. CO2 dissolves more readily in cold liquids. A standard refrigerator can temporarily house a keg. However, this limits serving convenience. The ultimate solution for any serious homebrewer is a kegerator. This specialized appliance integrates cooling and dispensing. It creates a dedicated home tap system.
DIY Kegerator Construction
Building a DIY kegerator is a popular project. It involves converting a mini-fridge or chest freezer. The process requires a few key modifications:
- **Mini-Fridge Selection:** Choose a fridge with adequate internal space. Ensure it can accommodate your kegs. Research internal dimensions carefully.
- **Temperature Controller:** An external temperature controller (e.g., Inkbird) is vital. It plugs into the fridge. A probe monitors internal temperature. This maintains precise, consistent coldness.
- **Tap Tower Installation:** A hole must be drilled into the fridge’s top or door. This allows for tap tower mounting. Take precautions to avoid drilling into cooling lines.
- **CO2 Tank Placement:** The CO2 tank can be placed inside the kegerator. If space is limited, a small hole can be drilled in the side or back. This allows the gas line to pass through. The tank then resides externally.
Thrifty sourcing of components can reduce costs significantly. Used mini-fridges are often found cheaply. With careful planning, a functional kegerator can be built economically. This DIY approach offers customization. It provides a sense of accomplishment.
The Convenience of Pre-Built Kegerators
Not everyone possesses the inclination for DIY projects. For those seeking immediate convenience, pre-built kegerators are an excellent option. These units arrive ready for assembly. They include all necessary components. Today’s partner, NewAir, offers such solutions. Their single tap kegerator, model NKR058MB00, exemplifies this. It includes a CO2 tank, pressure regulator, and temperature control panel. Pre-drilled holes for external CO2 tank placement are a thoughtful feature. These pre-fabricated systems offer peace of mind. They ensure reliable operation from day one. While a keg itself is not typically included, the comprehensive kit simplifies setup. It allows brewers to focus on brewing, not building.
Maintaining Your Kegging System
Homebrew kegging is a long-term investment. Proper maintenance extends equipment life. It ensures consistently high-quality beer. Regular cleaning and sanitization are non-negotiable. After each batch, the entire keg should be cleaned. Disassembly of posts allows for thorough cleaning. A soak with PBW (Powdered Brewery Wash) effectively removes beer residues. This is followed by a rinse and a Star San sanitizing solution. While a full tear-down may not be needed after every batch, periodic deep cleaning is advised. Tubing should be replaced annually. This prevents off-flavors and bacterial buildup. Consistent cleaning prevents contamination. It ensures every pour is as intended.
The transition to kegging homebrew dramatically enhances the brewing experience. It transforms a laborious bottling process into efficient serving. The time saved is substantial. A five-gallon batch can be kegged in about 15 minutes. Fully carbonated beer can be enjoyed in as little as 24 hours. This represents a saving of at least two weeks compared to traditional bottle conditioning. The ongoing costs are minimal: occasional CO2 refills and tubing replacement. The immediate gratification of pulling a fresh pint from a home tap is immeasurable. It fosters a desire to keep the keg full. Many brewers find themselves inspired to brew more frequently. Soon, a single tap may evolve into a multi-tap system. This journey of continuous improvement is a hallmark of the homebrewing community.
Get Your Answers on Tap
What is kegging homebrew?
Kegging homebrew is a method of storing and serving your homemade beer from a single large container called a keg, rather than using many individual bottles. It saves time by eliminating the need for endless washing, filling, and capping bottles.
What essential equipment do I need to start kegging homebrew?
To start kegging, you’ll primarily need a keg (like a Cornelius keg), a CO2 tank, a pressure regulator to control the CO2 flow, and a dispensing mechanism which includes gas lines, liquid lines, and a tap.
What is a Cornelius keg?
A Cornelius keg, often called a ‘Corny’ keg, is the standard type of robust vessel used by homebrewers to hold fermented beer. They were originally used for soda syrup and come in types like ball lock and pin lock, which refer to their connection styles.
How is beer carbonated in a keg?
Beer is carbonated in a keg by introducing pressurized carbon dioxide (CO2) from a CO2 tank into the keg. The CO2 dissolves into the cold liquid over time, giving the beer its desired fizziness, a process often called forced carbonation.