Building upon the excellent visual guide provided in the video above, this comprehensive article aims to delve deeper into the nuances of crafting a stellar English Pale Ale. Often regarded as a cornerstone style for aspiring homebrewers, the English Pale Ale offers a balanced blend of malt sweetness, fruity esters, and earthy hop character, making it an ideal canvas for mastering fundamental brewing techniques. A firm grasp of these basics, as championed by the video’s straightforward approach, ultimately unlocks the potential for producing a wide array of high-quality beers with consistency and confidence.
The Quintessential English Pale Ale: A Style Profile
When considering the brewing of an English Pale Ale, an understanding of its defining characteristics is crucial. This classic beer is traditionally known for a robust malt backbone, frequently attributed to Maris Otter malt, which imparts a distinctive bready, biscuity, or sometimes slightly toffee-like sweetness. It is often perceived that a more profound malt presence distinguishes these ales from their American counterparts, which typically lean towards a more assertive hop bitterness and aroma.
A prime example, as suggested in the video, is Fuller’s London Pride. This iconic brew exemplifies the style with its rich, complex malt profile harmoniously interwoven with a delicate balance of hop bitterness and fruitiness derived from English yeast strains. These fruity notes, often described as apple, pear, or stone fruit, are a hallmark of specific English ale yeasts and contribute significantly to the beer’s overall appeal, especially on a warm day.
The bitterness in an English Pale Ale is generally moderate, serving to balance the malt rather than overpower it. Hop aroma and flavor are typically earthy, grassy, floral, or mildly citrusy, stemming from traditional English hop varieties. The beer’s color is usually golden to copper, and its clarity can range from brilliant to slightly hazy, depending on filtration and conditioning. The overall impression is one of sessionability and complexity, where the various elements coalesce into a remarkably drinkable pint.
Crafting the Malt Bill: Foundation of Flavor
The malt bill for an English Pale Ale is frequently considered the most intricate component, as the interplay of various grains dictates much of the beer’s body, color, and fundamental flavor. The video highlights Maris Otter, which is widely recognized as the quintessential base malt for this style. Maris Otter, a heritage barley variety, is prized for its superior malting characteristics, contributing a rich, full-bodied malty flavor that is often described as biscuity or nutty.
While Maris Otter provides the bedrock, the addition of specialty malts such as aromatic malt, as alluded to in the video, further enhances complexity. Aromatic malt is a type of kilned caramel malt that contributes intense malty flavors and aromas, often described as deeply malty, slightly toffee-like, and bready. When incorporated judiciously, typically in smaller percentages, it can significantly deepen the beer’s character without becoming cloying. Other common additions might include crystal malts, which add sweetness, color, and caramel notes, or a touch of roasted barley for subtle complexity or color adjustment. It is often observed that a thoughtful selection of specialty malts, even in modest quantities, can elevate a simple malt bill into something truly memorable, contributing layers of flavor that are enjoyed by many discerning palates.
Hops: The Soul of an English Pale Ale
For an authentic English Pale Ale, the choice of hops is critical, defining its characteristic aroma and bitterness. The video specifically mentions East Kent Golding, a classic English noble hop, as the sole hop used for this particular recipe. This decision is entirely in keeping with the traditional profile of the style.
East Kent Golding is highly regarded for its delicate, refined character, which often presents as floral, earthy, and mildly citrusy, sometimes with hints of lavender or honey. Its alpha acid content is typically modest, making it suitable for both bittering and late additions without imparting harshness. It is understood by many growers that East Kent Golding can be a challenging hop to cultivate, partly due to its relatively high oil content and large cone size, factors that contribute to its distinctive aroma profile. However, its popularity persists precisely because of these unique aromatic qualities, which are essential for achieving the desired citrus and floral notes in an English Pale Ale.
The strategic use of East Kent Golding, particularly as a late addition or for dry hopping, allows these delicate aromas to shine through, complementing the malt character rather than overwhelming it. Other traditional English hops that might be considered for variations include Fuggle, Challenger, or Target, each contributing slightly different profiles while maintaining stylistic integrity.
Yeast: The Alchemist of Flavor
The selection of yeast plays a paramount role in shaping the final flavor profile of an English Pale Ale. The video specifies White Labs English Ale 002, a popular strain known for its specific contributions. This yeast is celebrated for producing a clean fermentation profile while still generating a pleasing spectrum of fruity esters, which are hallmark characteristics of English ales.
The “clean finish” mentioned in the video refers to the yeast’s ability to ferment without producing significant off-flavors such as diacetyl (buttery) or acetaldehyde (green apple), particularly when fermented at appropriate temperatures. The “little bit of sweetness” often associated with this strain can be attributed to its attenuation capabilities; it typically leaves a slightly higher residual sugar content than more aggressively attenuating yeasts, contributing to a fuller body and perceived sweetness. This balance is frequently sought after in English Pale Ales, where a certain roundness on the palate is desired.
Furthermore, English ale yeasts are generally known for their flocculation characteristics, meaning they tend to clump together and settle out of suspension relatively quickly. This contributes to clearer beer and a more compact yeast cake post-fermentation. However, as noted in the video, the visible activity of White Labs 002 might not always be as vigorous as some other strains, where a less dramatic krausen development is observed, yet fermentation progresses efficiently. It is always advised that gravity readings, rather than visual cues alone, should be used to confirm fermentation progress.
The Brewing Process: Essential Steps for Success
Executing the brewing process with precision is as crucial as selecting quality ingredients. The journey from grain to glass involves several critical stages, each demanding attention to detail.
Sanitation: The Unseen Ingredient
Throughout the video, the importance of cleanliness is subtly yet strongly emphasized. In homebrewing, sanitation is not merely about tidiness; it is the single most critical factor in preventing off-flavors and ensuring a successful brew. Any surface or equipment that comes into contact with the wort after it has been boiled must be meticulously cleaned and sanitized. This includes fermenters, airlocks, siphons, and bottles. Even a small colony of wild yeast or bacteria can quickly spoil an entire batch, producing sour, acrid, or otherwise undesirable flavors. It is often stated in the industry that good beer is made 90% in the cleaning bucket and 10% in the brew kettle, underscoring the absolute necessity of rigorous sanitation protocols.
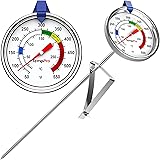
Cooling the Wort: A Race Against Time
After boiling, the wort must be cooled rapidly to pitching temperature (the ideal temperature for yeast inoculation). The video demonstrates a simple yet effective ice bath method, which is perfectly suitable for smaller batches. However, for those looking to scale up or increase efficiency, other methods are frequently employed.
- Immersion Chillers: These are coils of copper or stainless steel tubing submerged directly into the hot wort, through which cold water is circulated. They are relatively inexpensive and efficient.
- Plate Chillers/Counterflow Chillers: These more advanced systems pass hot wort and cold water through separate, intertwined channels. They are highly efficient but require a pump for transfer and thorough cleaning to prevent contamination.
The speed of cooling significantly impacts the beer’s clarity and flavor stability. Rapid cooling, also known as “cold break,” helps to precipitate unwanted proteins and tannins, leading to a clearer final product. Conversely, slow cooling can lead to “chill haze” and may also increase the risk of bacterial contamination as the wort spends more time in the temperature danger zone.
Fermentation and Gravity Readings: Monitoring Progress
The fermentation stage is where the magic happens, as yeast consumes sugars and produces alcohol, CO2, and a host of flavor compounds. Monitoring this process involves taking specific gravity readings.
- Original Gravity (OG): Taken before fermentation begins (in the video, 1040). This measures the total sugar content in the wort and is a primary indicator of the beer’s potential alcohol content.
- Final Gravity (FG): Taken after fermentation is complete (in the video, 1009). This reading indicates how much sugar has been converted by the yeast.
The difference between the OG and FG allows for the calculation of Alcohol By Volume (ABV). For this particular English Pale Ale, with an OG of 1040 and an FG of 1009, an ABV of approximately 4.2% is achieved. This calculation provides an objective measure of the beer’s alcoholic strength, allowing for consistent replication.
It is often observed that while primary fermentation may appear vigorous for the first few days, particularly with a visible krausen (a foamy head on the fermenting wort), the yeast continues to work more subtly in the background for a longer period. Adhering to the recommended two-week fermentation schedule, as outlined in the video, ensures that the yeast has sufficient time to fully attenuate the wort and clean up any undesirable by-products, leading to a more refined flavor.
Bottling and Carbonation: The Final Touch
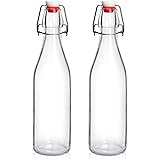
The culmination of the brewing process for many homebrewers is bottling and carbonation. The video details a classic method involving corn starch as a priming sugar. For bottling, it is paramount that bottles are not only clean but also thoroughly sanitized, mirroring the stringent hygiene observed during the brewing process.
The process involves dissolving a measured amount of priming sugar, such as 3/4 cup of corn starch boiled for five minutes, into a small amount of water. This mixture is then carefully introduced into the fermented beer before bottling. Once bottled, the yeast remaining in suspension consumes this added sugar, producing CO2 that dissolves into the beer, creating carbonation. This process, known as bottle conditioning, typically requires an additional two weeks at room temperature for adequate carbonation to develop, with further conditioning often improving flavor.
The choice of priming sugar can influence the carbonation level and flavor. While corn starch (dextrose) is a common choice, other options include table sugar (sucrose), dried malt extract, or specialized carbonation drops. Each will yield slightly different results regarding carbonation level and residual sweetness. A common complaint, as noted in the video, is over-carbonation, which typically results from adding too much priming sugar. This can lead to excessive head formation upon pouring and can sometimes mask the beer’s underlying flavors. Precise measurement of priming sugar, tailored to the specific batch size and desired carbonation level, is therefore critical for achieving a balanced final product.
Tasting the Triumph: The Final English Pale Ale
After a patient wait of over a month, encompassing primary fermentation and bottle conditioning, the reward is a truly refreshing and satisfying English Pale Ale. The tasting notes presented in the video—a pronounced fruity aroma, a balanced bitterness, and a moderate alcohol content of 4.2%—are precisely what one aims for in this style. The perceived fruitiness is a testament to the chosen yeast strain and hop variety, while the bitterness provides the necessary counterpoint to the malt, ensuring drinkability.
An English Pale Ale with a sessionable ABV is an ideal choice for prolonged enjoyment, offering flavor without excessive alcoholic impact. While minor issues like over-carbonation can occur, as thoughtfully pointed out in the video, these are often superficial and do not detract significantly from the overall pleasure of consuming a homemade brew. Such nuances become part of the learning experience, informing future brewing decisions.
The satisfaction derived from brewing an English Pale Ale is immense, not only because of the delicious outcome but also due to the foundational skills acquired. This relatively simple style allows brewers to focus on process control and ingredient understanding, skills that are transferable to more complex recipes. It is hoped that this detailed exploration, in conjunction with the visual demonstration, will empower more individuals to embark on their homebrewing journey with confidence and enthusiasm.
Pouring Over Your Pale Ale Questions
What is an English Pale Ale like?
It’s a classic beer known for a balanced mix of malt sweetness, often described as bready or biscuity, along with fruity notes from the yeast and an earthy, floral hop character. It typically has a moderate bitterness and a golden to copper color.
What are the main ingredients used to brew an English Pale Ale?
The key ingredients include Maris Otter malt for a rich body, traditional English hops like East Kent Golding for earthy and floral notes, and English ale yeast to produce fruity flavors.
Why is cleaning and sanitizing equipment so important in homebrewing?
Sanitation is the most critical step to prevent off-flavors and spoilage from unwanted bacteria or wild yeasts. All equipment that touches the beer after it’s boiled must be thoroughly cleaned and sanitized.
What are Original Gravity (OG) and Final Gravity (FG) readings for?
Original Gravity (OG) is a measurement taken before fermentation to determine the total sugar content, while Final Gravity (FG) is taken after fermentation to see how much sugar the yeast consumed. These readings help calculate the beer’s alcohol content (ABV).
How do you make homebrewed beer fizzy (carbonated)?
To carbonate your beer, you add a small amount of priming sugar to the fermented beer just before bottling. The remaining yeast in the bottles will then consume this sugar, producing CO2 that dissolves into the beer, making it fizzy.