The art of brewing, particularly when venturing into the crisp, clean world of lagers, often conjures images of specialized equipment, stringent temperature controls, and lengthy cold conditioning periods. Yet, as demonstrated in the insightful video above, it’s entirely possible to craft a commendable lager right from your kitchen stove, even bypassing the traditional lagering phase. This approach, while unconventional to purists, opens the door for homebrewers with limited space or a desire for accelerated experimentation. Our goal here is to delve deeper into the science and technique behind brewing a stovetop lager, expanding on the video’s practical guide with expert insights and technical details.
The Stovetop Lager Revolution: A Paradigm Shift in Brewing
Traditionally, a lager (from the German word “lagern,” meaning “to store”) undergoes a crucial cold storage phase, known as lagering. This extended period, typically at temperatures between 1-2°C for one to two months, is fundamental for achieving the characteristic crispness, clarity, and refined flavor profile associated with the style. During this time, yeast and proteins flocculate and settle, undesirable sulfur compounds are reduced, and fruity esters—common byproducts of ale fermentation—are reabsorbed by the yeast. The result is a clean, bright beer with a smooth mouthfeel.
However, the video brilliantly showcases an alternative path: fermenting a lager yeast at warmer, “ale-like” temperatures and conditioning it without the prolonged cold crash. This experiment leverages specific yeast strain characteristics, demonstrating that a drinkable, enjoyable lager can still be produced. While the nuanced crispness and pristine clarity of a fully lagered beer might differ, this method significantly reduces the barriers to entry for aspiring lager brewers.
Yeast Selection: The Heart of Warmer Lager Fermentation
The choice of yeast is paramount when deviating from traditional lagering protocols. The video specifically highlights SafLager W3470, a dry yeast strain lauded for its versatility and performance across a broader temperature range than many other lager yeasts. Originating from the Weihenstephan brewery in Germany, W3470 is a robust and widely used strain in commercial lager production globally.
- Broad Temperature Range: While optimal for cold fermentation (9-15°C), W3470 can produce clean lager characteristics even at room temperatures (18-22°C), exhibiting minimal diacetyl and ester production. This makes it an ideal candidate for “quasi-lager” or “warm-fermented lager” styles.
- Flocculation: It possesses medium flocculation properties, meaning it drops out of suspension reasonably well, contributing to clarity even without extended cold conditioning.
- Attenuation: W3470 typically achieves a high attenuation, ensuring a dry finish essential for lager crispness. The video’s final gravity (FG) of 1.008, combined with an original gravity (OG) for a 5% ABV beer (approximately 1.048 for 4.5 liters with 880g malt), indicates a robust fermentation, leaving a slight residual sweetness but maintaining good drinkability.
The speaker’s prior experimentation with this yeast at room temperature is a crucial data point, offering empirical evidence that this specific strain can indeed perform effectively outside its traditional parameters without yielding undesirable off-flavors.
Essential Equipment for Small-Batch All-Grain Brewing
One of the appealing aspects of this stovetop method is its minimal equipment requirement, much of which can be found in a standard kitchen. Beyond the everyday items, specific brewing tools are necessary to ensure a smooth and sanitary process. Building on the video’s list, let’s explore these items:
- Pots: Two large pots, ideally 8-liter and 5-liter capacity, are fundamental for mashing and boiling. Stainless steel is preferred for its durability and ease of cleaning.
- Thermometer: Precision in temperature control is critical, especially during mashing. A digital thermometer provides accurate readings, crucial for enzyme activity.
- Sanitizer: Non-rinse sanitizers, such as Star San or similar acid-based solutions, are indispensable. Infection is the bane of any brewer, particularly with lagers where off-flavors are highly noticeable due to the beer’s clean profile. A spray bottle can aid in application, ensuring all surfaces contacting the wort post-boil are completely sterile.
- Siphon: A pump-action siphon simplifies transferring wort and beer, minimizing oxidation and agitation. Adding a silicone tube extension allows for filling bottles from the bottom up, further reducing oxygen exposure.
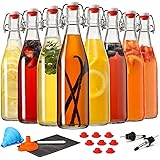
- Bottles/Kegs: Swing-top bottles (e.g., 500ml) or a 5-liter mini keg are suitable for conditioning and serving. It’s crucial that containers can withstand approximately 5 PSI of pressure to safely carbonate the beer.
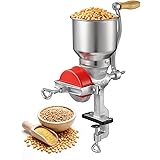
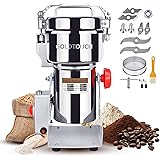
- Mashing Net: A fine-mesh bag or “brew bag” transforms a regular pot into a mash tun, allowing for “brew in a bag” (BIAB) methods. This simplifies the grain separation process significantly.
- Hydrometer: This instrument is vital for measuring specific gravity readings (OG and FG), allowing brewers to calculate the alcohol by volume (ABV) and monitor fermentation progress. For a target 5% ABV, an original gravity around 1.048-1.050 is typical for a 4.5-liter batch with 880 grams of 100% lager malt, assuming an efficient mash.
The All-Grain Process: From Malt to Wort
The journey from raw ingredients to fermented beer involves several critical stages, each demanding precision. The video outlines a simplified yet effective all-grain process.
Mashing: Extracting the Sugars
Mashing is the process where milled malt is steeped in hot water, activating enzymes that convert starches into fermentable sugars. The video targets a mash temperature of 64°C for 60 minutes. This specific temperature range (63-65°C) primarily favors beta-amylase enzymes, which produce a higher proportion of highly fermentable sugars, contributing to a drier, crisper beer. Consistency in temperature, achieved by moving the pot on and off the heat and stirring every 10 minutes, is key to maximizing sugar extraction and enzymatic activity.
Following the mash, the “sparging” process rinses the spent grains with hot water (from the second pot, also heated to 70°C). This step efficiently extracts any remaining sugars from the grain bed, ensuring optimal yield. The resulting sugary liquid is now called “wort.” The target of 6.5 liters of wort post-sparge is essential for hitting the desired ABV after boil-off and fermentation.
Boiling: Hops, Sterilization, and Concentration
The 90-minute rolling boil serves multiple purposes: sterilizing the wort, concentrating sugars, and, crucially, isomerizing hop acids for bitterness and aroma. The addition of 8 grams of Saaz hops contributes to a calculated bitterness of 15 IBU. To put this in context:
- Budweiser and San Miguel: Around 12 IBU
- Heineken: 22 IBU
- Stella Artois: 30 IBU
An IBU of 15 places this lager in the medium bitterness range, offering a pleasant balance without being overly aggressive. Saaz hops, a classic “noble hop,” are known for their delicate, spicy, and floral characteristics, perfectly suited for traditional lager profiles. Hop additions at different stages of the boil influence their impact:
- Bittering Hops (Early Boil): Added at the start of the boil for alpha acid isomerization, contributing primarily bitterness.
- Flavor Hops (Mid-Boil): Added around 15-30 minutes before the end of the boil for a balance of bitterness and flavor.
- Aroma Hops (Late Boil/Flameout): Added in the last 5-10 minutes or at flameout to preserve delicate aromatics. The video recommends checking the description for specific timing, emphasizing controlled hop utilization.
Rapid Cooling and Meticulous Sanitization
After the boil, rapid cooling of the wort to 22°C is critical for several reasons:
- Minimizing DMS: Quickly cooling reduces the formation of Dimethyl Sulfide (DMS), which can impart a cooked corn or vegetable flavor.
- Preventing Infection: The cooled wort is susceptible to spoilage organisms. Rapid chilling to pitching temperature minimizes the window for airborne contaminants to take hold.
- Yeast Health: Pitching yeast into wort that is too hot can stress or kill the yeast, leading to off-flavors or stalled fermentation.
The ice bath method described is highly effective for homebrewers. Concurrently, meticulous sanitization of all equipment that will come into contact with the cooled wort is non-negotiable. As highlighted, any trace of microbial contamination in a clean, light-bodied lager can lead to noticeable off-flavors, ranging from sourness to medicinal notes.
Fermentation, Conditioning, and Carbonation
Once cooled to 22°C, the wort is aerated by shaking—a crucial step to provide the yeast with dissolved oxygen necessary for healthy cell reproduction. Then, 4.1 grams of dried W3470 yeast are pitched, and the fermenter (demijohn) is sealed with a bung and airlock, which is half-filled with sanitizer solution. The fermenter is then placed in a dark area for two weeks.
The Role of Finings
In the absence of lagering, finings become an even more valuable tool for achieving clarity. The video mentions adding finings 24 hours before bottling. Finings, such as isinglass, gelatin (used in the video, making the beer vegan-friendly without it), or various plant-based agents like Irish Moss (added during the boil) or polyclar, work by attracting and binding to suspended yeast cells and proteins, causing them to settle out more rapidly. This helps to produce a brighter beer, compensating for the lack of extended cold conditioning. The “glowing nectar” observed after fining application underscores their effectiveness.
Bottling and Carbonation
After fermentation (or optional lagering), bottling requires a final round of thorough sanitization for bottles and the siphon. Carbonation drops, providing approximately 3 grams of priming sugar per drop, offer a convenient and precise method for carbonating. The general guideline of one drop per 330ml bottle or two per 500ml aims for a moderate carbonation level suitable for lagers. It’s crucial to minimize oxygen exposure during transfer by ensuring the siphon reaches the bottom of each bottle and filling upwards. This prevents oxidation, which can lead to stale, papery flavors over time. The bottled beer is then conditioned in a dark place for two weeks, allowing the yeast to consume the priming sugar and produce CO2, carbonating the beer.
Sensory Evaluation and Future Iterations
The tasting session in the video provides valuable feedback on the “stove-top lager” experiment. Despite not being lagered, the beer is deemed drinkable and enjoyable, with good clarity for the process employed. The final gravity of 1.008 suggests a slight sweetness, which can be a characteristic of warmer lager fermentations but is balanced by the beer’s overall crispness. The slight cloudiness is an expected outcome given the absence of cold crashing and lagering, but for many homebrewers, flavor and drinkability take precedence over absolute clarity. The carbonation issue experienced with some faulty bottles highlights the importance of reliable equipment and proper sealing, emphasizing that even small details can impact the final product.
The planned follow-up video, comparing this stove-top lager to an identically brewed batch that *will* undergo traditional lagering, promises to be an excellent comparative study, offering deeper insights into the subtle yet significant differences that cold conditioning imparts. This iterative approach to brewing is central to mastering the craft, allowing brewers to refine techniques and understand the impact of process variations on the final beer.
Brewing Up Answers for Your Kitchen Stove Lager
What is a traditional lager, and what is “lagering”?
A traditional lager is a beer that undergoes a crucial cold storage phase called lagering, typically at very low temperatures for one to two months. This process helps achieve its characteristic crispness, clarity, and refined flavor.
Can I brew a lager at home using basic kitchen equipment?
Yes, this method demonstrates how to brew a delicious lager right on your kitchen stove with minimal equipment. You can even bypass the lengthy cold storage phase known as traditional lagering.
What special yeast is used for this easy stovetop lager recipe?
This recipe uses SafLager W3470 yeast, which is known for its versatility. It can ferment at warmer, ‘ale-like’ temperatures while still producing clean lager characteristics, making it ideal for homebrewing without specialized cooling.
What are some essential pieces of equipment needed for this small-batch stovetop brewing?
You will need two large pots for mashing and boiling, a precise thermometer for temperature control, and sanitizer to prevent contamination. A siphon for transferring liquids and bottles or a mini keg for conditioning are also necessary.