Welcome, fellow homebrewers! Once you’ve successfully navigated the exciting waters of fermentation, the next crucial step in your brewing journey is bottling. As highlighted in the video above, proper bottling is not merely about getting your finished product into containers; it’s about ensuring your beer or cider won’t spoil, achieves ideal carbonation, and retains the delightful taste you’ve worked so hard to create. Mastering this stage is essential for enjoying the fruits of your labor and sharing them with friends. This guide will elaborate on the easiest methods and best practices for bottling your homebrew, ensuring a safe and satisfying result every time.
Essential Equipment for Bottling Your Homebrew
Before diving into the bottling process, gathering all necessary materials is paramount. Having everything ready saves time and prevents potential contamination issues during critical steps. Many of these items are reusable, but some must be brand new for each batch to guarantee quality and safety. Investing in reliable equipment will make your homebrewing experience much smoother and more enjoyable.
Here’s a detailed list of what you’ll need:
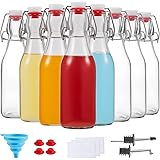
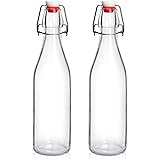
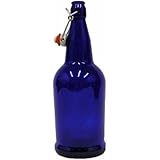
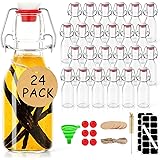
- Bottles: Standard sizes are typically 12-ounce or 22-ounce. You can recycle old commercial beer bottles, but ensure they are meticulously clean and completely free of residue. A crucial “pro tip” to remember is that screw-top bottles are unsuitable; they cannot create the airtight seal necessary for proper carbonation and safety.
- Bottle Caps: These must always be brand new. Once a cap is crimped, it cannot be reused effectively without compromising the seal. Purchasing a fresh batch for each bottling session is a non-negotiable step to maintain quality.
- Bottle Capper: You have two primary options here: a hand capper, which is more portable and budget-friendly, or a benchtop capper, which offers greater leverage and stability for easier crimping. Both accomplish the same task of securing the cap tightly onto the bottle.
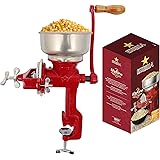
- Priming Sugar or Carbonation Tablets: These are vital for initiating secondary fermentation within the bottle, producing the desired carbonation. While traditional methods often involve dissolving corn sugar in hot water, carbonation tablets offer a convenient, pre-measured alternative.
- Sanitizer: A no-rinse sanitizer like Star San is highly recommended. This solution prevents the introduction of unwanted microorganisms that could spoil your beer. Always follow the manufacturer’s instructions for dilution to ensure its effectiveness.
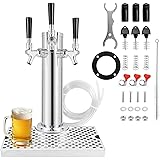
- Bottling Bucket or Fermenter with Spigot: This specialized vessel features a spigot at the bottom, allowing for a gentle transfer of beer into bottles. A bottling bucket minimizes splashing and oxygen exposure, which helps prevent oxidation and off-flavors.
- Tubing and Bottling Wand: The tubing connects to the spigot, and the bottling wand attaches to the end of the tubing. The wand features a spring-loaded tip that opens when pressed against the bottom of a bottle, allowing for precise, mess-free filling from the bottom up.
- Large Pot and Medium Bowl: These will be used for preparing your sanitizing solutions. The large pot is ideal for soaking bottles, while the medium bowl is perfect for sanitizing caps and smaller accessories.
- Your Finished Beer or Cider: This is, of course, the star of the show! Ensure your brew has completed its primary fermentation before moving on to bottling.
Ensuring Proper Fermentation Before Bottling
The single most critical factor for safe and successful bottling is confirming that your beer or cider has finished fermenting. Bottling too early can lead to disastrous consequences, specifically “bottle bombs.” These occur when residual yeast consumes unfermented sugars in the bottle, producing excessive carbon dioxide pressure, which can cause the bottle to explode with dangerous force.
There are two reliable methods to verify fermentation completion:
- Time and Airlock Activity: Most beers and ciders complete primary fermentation within two to three weeks. Over this period, you should observe active bubbling in your airlock, which indicates yeast activity. Fermentation is likely finished when airlock activity ceases entirely for several days.
- Specific Gravity Readings: For a precise measurement, use a hydrometer to check your beer’s specific gravity. Take readings over several days; if the specific gravity remains stable, typically at or below 1.010 (or 1010), fermentation is complete. This method is the most accurate way to prevent premature bottling.
Never rush this stage. A bottle bomb can result in not only a significant mess but also dangerous glass shards and potential injury. Patience here is truly a virtue, ensuring both safety and the quality of your finished product.
Step-by-Step Guide to Bottling Your Homebrew
With your equipment ready and fermentation confirmed, it’s time to move on to the practical steps of bottling. Each stage contributes to the overall success and longevity of your homebrewed beverage. Following these procedures meticulously will yield beautifully carbonated beer that tastes fantastic.
1. Cleaning Your Bottles and Equipment
The first step in bottling is thorough cleaning. Any residue, dried beer, or dust on your bottles or equipment can harbor bacteria, leading to off-flavors or spoilage. For bottles, a dishwasher on a high-temperature or sanitize setting is an incredibly effective and convenient method. Alternatively, you can use a bottle brush with hot water and a mild, unscented cleaning solution, ensuring every surface is scrubbed clean. Always rinse thoroughly to remove any cleaning agent residue.
2. The Art of Sanitization for Beer Bottles
Once clean, everything that will contact your beer must be sanitized. This includes bottles, caps, the bottling bucket, tubing, and the bottling wand. Prepare your sanitizing solution (e.g., Star San diluted according to package directions) in your large pot. Soak bottles, caps, and the bottling wand in this solution for the recommended contact time. For the spigot on your fermenter, a spray bottle filled with sanitizer works wonderfully. Sanitization eliminates invisible microbes that can ruin your batch, making it a non-negotiable part of the process. Remember, “clean” removes visible dirt, while “sanitized” eliminates microscopic threats.
3. Priming Your Homebrew for Perfect Carbonation
This is where you add the small amount of sugar needed for carbonation. As the video mentions, carbonation tablets offer a convenient method. You simply drop the specified number of tablets into each bottle according to the manufacturer’s instructions and your desired level of fizziness. If using bulk priming sugar (like corn sugar), you’ll dissolve it in a small amount of boiled water, then gently stir this solution into your bottling bucket with the finished beer. This ensures even distribution of sugar throughout the entire batch. A crucial “pro tip” when handling carbonation tablets is to wear sanitized gloves to avoid introducing any contaminants from your hands.
4. Mastering the Bottle Filling Process
Now, connect your sanitized tubing and bottling wand to the spigot of your bottling bucket. Insert the bottling wand into a bottle, pressing it against the bottom to start the flow of beer. Fill each bottle, ensuring you leave approximately one inch of headspace from the top. This headspace is critical; it allows room for the CO2 produced during carbonation and prevents excessive pressure buildup. Filling from the bottom up with the wand minimizes splashing, which is vital for reducing oxygen exposure. Too much oxygen at this stage can lead to “oxidized” beer, resulting in an undesirable wet cardboard or sherry-like flavor.
5. Securing the Caps on Your Bottles
Once a bottle is filled, place a sanitized cap firmly on top. Position your handheld or benchtop capper over the cap and apply even, downward pressure until the cap is securely crimped onto the bottle. After capping, visually inspect each bottle. The cap should be uniformly crimped around the entire rim of the bottle, creating a tight, hermetic seal. A loose seal means lost carbonation and potential spoilage, so attention to detail here is important.
Storing and Carbonating Your Bottled Beer
With all your bottles capped, the final stage before enjoyment is carbonation. This process occurs through a secondary fermentation inside the sealed bottles. It’s a waiting game, but a rewarding one.
First, store your bottles at room temperature, typically around 65-75°F (18-24°C), for at least two weeks. This temperature range is ideal for the yeast to reactivate, consume the priming sugar, and produce carbon dioxide. Placing bottles in a cold refrigerator immediately will halt this essential carbonation process. After the initial two-week period, you can test a single bottle. Chill it thoroughly in the refrigerator, then open and taste. If the carbonation level is to your liking, you can move the rest of the batch to cold storage. If it’s under-carbonated, simply give the remaining bottles another week at room temperature before testing again.
When pouring your perfectly carbonated homebrew, you might notice a thin layer of yeast sediment at the bottom of the bottle. This is completely normal and harmless; it’s simply the dormant yeast responsible for carbonation. To avoid pouring it into your glass, simply pour slowly and steadily, leaving the last half-inch or so in the bottle. Now, you can sit back, relax, and savor your delicious, homemade, and perfectly bottled beer.
Cap Off Your Queries: Your Bottling Q&A
What is the main purpose of bottling my homebrew?
Bottling is essential to prevent your beer from spoiling, ensure it gets the right amount of fizz (carbonation), and preserve the delicious taste you made.
What are the most important pieces of equipment I need to bottle beer?
You’ll primarily need bottles, new bottle caps, a bottle capper, priming sugar or carbonation tablets, sanitizer, a bottling bucket, and a bottling wand.
How do I know if my beer is ready to be bottled safely?
You must ensure fermentation is complete, which means airlock activity has stopped for several days or your hydrometer readings have been stable, preventing dangerous ‘bottle bombs.’
Why do I need to sanitize everything before bottling?
Sanitization is critical because it kills invisible microbes and bacteria that could otherwise spoil your beer, leading to off-flavors or ruined batches.
How does my beer get fizzy in the bottle?
You add a small amount of priming sugar or carbonation tablets to the bottles. The remaining yeast then consumes this sugar, producing carbon dioxide gas to create the fizz.