There is a special kind of magic in crafting your own beer, especially when it results in the coveted hazy, juicy goodness of a New England IPA. Perhaps you have dreamed of that vibrant aroma filling your kitchen, or perhaps you have simply yearned to replicate your favorite craft brew at home. Our friends Mike and Joey from Brew Hub have shown us an excellent path forward in their accompanying video, demonstrating how to embark on a New England IPA homebrew journey using a convenient Craft a Brew kit.
This detailed guide will expand upon the foundational steps presented in the video, providing additional context and insights for both novice and experienced homebrewers. Crafting a New England IPA, or NEIPA, is a rewarding experience that requires precision and an understanding of key brewing principles. We will delve deeper into each stage, ensuring your path to a delicious, hazy, and hop-forward beer is clear and enjoyable.
Understanding the Allure of the New England IPA (NEIPA)
The New England IPA stands as a modern marvel in the craft beer world, celebrated for its unique sensory profile. Unlike its West Coast counterparts, which often prioritize sharp bitterness, NEIPAs are characterized by a soft mouthfeel and an intense burst of fruity, tropical hop aromas and flavors. This distinctive profile typically features very low bitterness, allowing those complex hop characteristics to truly shine through.
The signature haze of an NEIPA is not merely for aesthetics; it plays an integral role in the beer’s overall experience. This haziness is primarily attributed to specific yeast strains, hop particulate matter, and proteins from specialty grains. Mastering this delicate balance is a hallmark of successful NEIPA homebrewing, creating a beer that is as visually appealing as it is delicious.
Essential Gear for Your NEIPA Homebrewing Adventure
Before you begin the brewing process, it is crucial to have all your equipment and ingredients readily accessible and meticulously prepared. The Craft a Brew kit provides many of the essential components, yet a few common household items and specialized brewing tools will also be necessary. Gathering everything beforehand will streamline your brewing day, allowing for a smoother and more enjoyable experience.
- **Craft a Brew NEIPA Kit Components:** Malt extract, specialty grains, yeast, multiple hop additions (hop stand and dry hops), cheesecloth, and sanitizer.
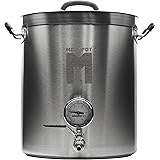
- **Key Brewing Equipment:** A large stock pot (at least 2-gallon capacity), a carboy or fermenter with a cap, an airlock, a blow-off assembly (tubing and a mason jar), a mixing spoon, a funnel with a strainer, a spray bottle for sanitizer, a hop spider, and a thermometer.
- **Measuring & Handling:** A container with measurements for sanitizer, two gallons of quality spring water, and potentially an ice bath setup for rapid cooling.
Ensuring your spring water is free from chlorine and chloramines is paramount, as these chemicals can impart undesirable off-flavors to your finished beer. Furthermore, having a reliable thermometer is non-negotiable for hitting precise temperature targets throughout the brewing process. Each piece of equipment plays a vital role in the transformation of simple ingredients into a complex and flavorful brew.
The Absolute Imperative of Sanitization
Sanitation is perhaps the single most critical step in homebrewing, often likened to a brewer’s religion. As Mike and Joey rightly emphasize, anything that touches the wort after the boil must be thoroughly sanitized. Unwanted bacteria or wild yeasts can easily contaminate your brew, leading to sour flavors, unexpected aromas, or even an unfermentable batch.
Consider sanitation as building a protective shield around your precious wort, safeguarding it from invisible intruders. The Craft a Brew kit includes a sanitizing solution, which should be mixed according to its specific instructions. A spray bottle filled with sanitizer is incredibly useful for quickly treating spoons, hydrometers, and other small tools during the process. Diligence in this step prevents heartbreaking losses and ensures the integrity of your hard work, guaranteeing a clean and enjoyable New England IPA homebrew.
Mastering the Steeping of Specialty Grains
The steeping process extracts color, flavor, and unfermentable sugars from your specialty grains, laying down a foundational layer of complexity for your NEIPA. Start by adding one and a half gallons of spring water to your stock pot, bringing it to a temperature of 155 degrees Fahrenheit. This initial volume accounts for some evaporation during the boil, aiming for a final gallon of wort.
Once the target temperature is reached, place your specialty grains into the provided cheesecloth or hop bag. Gently submerge the bag in the heated water, ensuring the grains are fully immersed. Maintain the temperature between 155 and 160 degrees Fahrenheit for a precise 20 minutes, monitoring it closely. It is essential not to exceed 160 degrees Fahrenheit, as higher temperatures can extract undesirable tannins, resulting in an astringent or tea-like flavor in your finished beer. After 20 minutes, carefully remove the grain bag, allowing it to drain naturally without squeezing, which again risks releasing those bitter tannins.
The Boil: Malt Extract and Initial Preparations
With the grains removed, the newly created sweet liquid, now called wort, is ready for the boil. Increase the heat to bring your wort to a vigorous boil at 212 degrees Fahrenheit. Once boiling, slowly incorporate the malt extract into the hot liquid, stirring continuously to prevent it from scorching or clumping at the bottom of the pot. Malt extract provides the fermentable sugars that your yeast will convert into alcohol, forming the backbone of your NEIPA.
Adding the malt extract will temporarily lower the wort’s temperature, so it is necessary to bring it back to a full boil. Allow the wort to boil for a solid 20 minutes, ensuring proper sterilization and isomerization of some hop compounds (if bittering hops were used, which is less common in NEIPA kits). After this 20-minute boil, remove the pot from the heat source and allow it to cool naturally down to 180 degrees Fahrenheit. This temperature prepares the wort for the crucial hop stand addition, a key step for the hazy IPA style.
The Critical Hop Stand: Flavor and Aroma Unveiled
The hop stand is a defining characteristic of NEIPA homebrewing, a technique that maximizes hop aroma and flavor without contributing excessive bitterness. Unlike traditional IPAs where hops are often added during the boil for bitterness, NEIPAs utilize late additions and hop stands to preserve volatile aromatic compounds. Once your wort has cooled to 180 degrees Fahrenheit, carefully add the designated “hop stand hops” into your hop spider or directly into the wort. Ensure all instruments touching the wort at this stage are thoroughly sanitized.
These hops will steep in the hot wort for 30 minutes, infusing it with their vibrant, juicy characteristics. Crucially, the pot remains off the burner during this period, allowing the wort to cool further while the hop compounds are extracted. This method highlights the delicate balance of temperature and time, creating the signature tropical and citrusy notes that define the NEIPA style. The hop stand is where a significant portion of the beer’s aromatic personality is forged, making it a pivotal moment in the brewing process.
Rapid Cooling and Yeast Pitching
After the hop stand, it is imperative to cool your wort quickly down to a temperature of 70 degrees Fahrenheit. This rapid chilling is often achieved using an ice bath, submerging the brewing pot in a sink filled with ice water. Cooling quickly helps prevent the formation of off-flavors and minimizes the risk of infection. The specific target temperature of 70 degrees Fahrenheit is vital because it is the optimal range for pitching your yeast; temperatures too high would “kill the yeast,” hindering fermentation.
Once the wort reaches 70 degrees, carefully transfer it into your sanitized carboy or fermenter using a sanitized funnel and strainer. The strainer helps remove any hop particulate or grain bits that might have made their way into the wort. After filling to the one-gallon mark, it is time to pitch the yeast. Open the yeast packet and sprinkle the contents directly onto the wort. The yeast is the true alchemist of brewing, diligently converting sugars into alcohol and carbon dioxide.
Aeration and Preventing Oxidation
Immediately after pitching the yeast, a process called aeration is necessary to provide the yeast with the oxygen it needs to multiply vigorously. Gently shake the carboy for one minute. This controlled burst of oxygen allows the yeast cells to reproduce effectively, ensuring a healthy and robust fermentation. However, vigilance is key: shaking for longer than one minute or introducing oxygen at later stages can lead to oxidation, which manifests as stale, cardboard-like flavors in your finished beer.
Consider aeration as a delicate balance, where just enough oxygen empowers the yeast without exposing your precious wort to harmful oxidative processes. The precise timing of this step is fundamental for achieving a clean fermentation and preserving the fresh, vibrant flavors of your New England IPA. Proper aeration sets the stage for a successful and flavorful brew.
Fermentation and the Art of Dry Hopping
With the yeast pitched and wort aerated, your brew is ready for its transformation. Securely attach the blow-off assembly to your carboy, ensuring a tight seal, and submerge the free end of the tubing into a mason jar filled with sanitizer. This system allows the CO2 produced during fermentation to escape without exposing your beer to outside contaminants. Move your fermenter to a cool, dark place, ideally around 65-70 degrees Fahrenheit, where it will undergo primary fermentation for two weeks.
The hazy IPA style relies heavily on multiple stages of dry hopping, which injects massive amounts of hop aroma and flavor without bitterness. The Craft a Brew NEIPA kit includes two sets of dry hops, strategically added during fermentation. On day four, introduce your first set of dry hops directly into the fermenter. Six days later, on day ten, add the second batch. These late hop additions are critical for developing the signature “juicy” and aromatic profile of a New England IPA. After the second dry hop addition, allow the beer to continue fermenting for the remaining four days, completing the two-week cycle. Upon completion, your New England IPA homebrew will be ready for bottling, a process you can explore further in dedicated videos.
Uncap Your Curiosity: NEIPA Homebrew Q&A
What makes a New England IPA (NEIPA) different from other beers?
NEIPAs are known for their hazy appearance, soft mouthfeel, and strong fruity, tropical hop aromas and flavors. They typically have very low bitterness compared to other IPA styles.
Why is sanitation extremely important when homebrewing beer?
Sanitation is critical to prevent unwanted bacteria or wild yeasts from contaminating your brew. This ensures your beer doesn’t develop sour flavors or unexpected aromas and ferments correctly.
What does it mean to “steep specialty grains” when brewing?
Steeping specialty grains involves soaking them in hot water to extract color, flavor, and unfermentable sugars. This step lays a foundational layer of complexity for your beer.
What is “dry hopping” and why is it used for NEIPAs?
Dry hopping is when hops are added to the beer after the main boil, often during fermentation, to add a lot of hop aroma and flavor without increasing bitterness. For NEIPAs, this creates their signature juicy and aromatic profile.
Why is it important to cool the wort quickly after the boil?
Rapid cooling, often with an ice bath, is essential to quickly bring the wort to the correct temperature for yeast. This process helps prevent off-flavors and reduces the risk of infection in your beer.