Setting Up for a Successful Fermentation
For the initial stages of fermentation, particularly with a vigorous brown ale, a blow-off tube is highly recommended. As the yeast actively ferments, it produces a significant amount of CO2 and a thick layer of krausen (yeast foam). A blow-off tube (a larger diameter tube extending from your stopper into a jar of sanitizer or water) prevents the pressure from blowing off your airlock and potentially exposing your fermenting beer to airborne contaminants. Mike suggests using this for the first three days, which is often when primary fermentation is most active. It’s like a safety valve for your fermenter, ensuring that as the CO2 escapes, no unwanted elements can sneak in.
After three days, when the initial vigorous fermentation has subsided, you can switch to a standard three-piece airlock, filled with sanitizer or cheap vodka, as Mike recommends. This allows CO2 to continue escaping while preventing oxygen and contaminants from entering the carboy during the remainder of the fermentation process. It creates a one-way street for gases, protecting your developing brown ale.
The Waiting Game: Patience is a Virtue
During the primary fermentation (first few days), you’ll observe bubbling in the blow-off tube or airlock – a clear sign your yeast is active. After three days with the blow-off tube, you’ll typically transition to a standard airlock for the remaining two weeks of fermentation. This secondary phase allows the yeast to clean up any off-flavors it might have produced and helps the beer clarify. This period is crucial for developing the final nuanced flavors of your brown ale. Resist the urge to constantly check or disturb your fermenter; patience is perhaps the most important ingredient in brewing.
Ultimately, homebrewing a brown ale from a kit is a journey of discovery, filled with learning opportunities and the satisfaction of creating something truly your own. Each step, from careful cleaning to precise temperature control, contributes to the character and quality of your final pour. Embrace the process, learn from each batch, and soon you’ll be enjoying your very own delicious brown ale, brewed with pride right in your kitchen.
Pouring Out Answers: Your Brown Ale Homebrew Q&A
What is homebrewing with a kit like for a beginner?
Homebrewing with a kit, like the Craft a Brew Brown Ale, makes it easy and rewarding to make your own beer at home. It simplifies the process by providing most of the necessary ingredients and equipment.
What basic equipment comes in a beginner 1-gallon homebrew kit?
A typical 1-gallon homebrew kit includes a fermenter (carboy), funnel, racking cane, malt extract, specialty grains, a grain bag, sanitizer, an airlock, a stopper, hops, yeast, and a glass thermometer.
Why is cleaning and sanitizing so important in homebrewing?
Cleaning removes visible dirt and sticky residues, while sanitizing kills invisible bacteria and wild yeasts that could infect your beer. Proper sanitation is crucial to ensure only your chosen yeast thrives and your beer tastes good.
What are the four main ingredients used to make beer?
All beer is built upon four fundamental ingredients: water, malted grain, hops, and yeast. Each ingredient plays a specific role in shaping the final taste and character of your brew.
What happens during the fermentation stage of brewing?
During fermentation, yeast consumes the sugars in your cooled wort (unfermented beer) and converts them into alcohol and carbon dioxide. This magical process transforms the sugary liquid into beer over several weeks.
The Boil: Transformation and Sterilization
After removing the grains (without squeezing to avoid tannins), you bring the wort (the sugary liquid) to a rolling boil, which occurs around 212°F. This 60-minute boil serves several critical purposes: it sterilizes the wort, killing any lingering microorganisms; it isomerizes the hop acids, converting them into bitter compounds; it concentrates the wort; and it helps coagulate proteins, which will settle out later, contributing to clarity. As soon as the wort reaches a boil, your bittering hops (Fuggle in this case) are added and boiled for the full duration. This ensures maximum bitterness extraction.
Sanitation remains paramount, even with a boiling wort. As Mike points out, while the boil itself sterilizes the liquid, it’s good practice to sanitize anything that might come into contact with the wort *before* the boil, just to reinforce good habits. However, anything touching the wort *after* the boil must be meticulously sanitized.
Fermentation: The Magic of Transformation
Sixthly, once the boil is complete, the wort needs to be cooled rapidly to yeast-pitching temperature (usually around 65-70°F for most ales). Rapid cooling, often achieved with an ice bath or a wort chiller, minimizes the risk of infection and produces a clearer beer. Once cooled, the wort is transferred to your sanitized 1-gallon carboy, and the yeast is “pitched” or added. This is where the magic truly begins as the yeast starts its work.
Setting Up for a Successful Fermentation
For the initial stages of fermentation, particularly with a vigorous brown ale, a blow-off tube is highly recommended. As the yeast actively ferments, it produces a significant amount of CO2 and a thick layer of krausen (yeast foam). A blow-off tube (a larger diameter tube extending from your stopper into a jar of sanitizer or water) prevents the pressure from blowing off your airlock and potentially exposing your fermenting beer to airborne contaminants. Mike suggests using this for the first three days, which is often when primary fermentation is most active. It’s like a safety valve for your fermenter, ensuring that as the CO2 escapes, no unwanted elements can sneak in.
After three days, when the initial vigorous fermentation has subsided, you can switch to a standard three-piece airlock, filled with sanitizer or cheap vodka, as Mike recommends. This allows CO2 to continue escaping while preventing oxygen and contaminants from entering the carboy during the remainder of the fermentation process. It creates a one-way street for gases, protecting your developing brown ale.
The Waiting Game: Patience is a Virtue
During the primary fermentation (first few days), you’ll observe bubbling in the blow-off tube or airlock – a clear sign your yeast is active. After three days with the blow-off tube, you’ll typically transition to a standard airlock for the remaining two weeks of fermentation. This secondary phase allows the yeast to clean up any off-flavors it might have produced and helps the beer clarify. This period is crucial for developing the final nuanced flavors of your brown ale. Resist the urge to constantly check or disturb your fermenter; patience is perhaps the most important ingredient in brewing.
Ultimately, homebrewing a brown ale from a kit is a journey of discovery, filled with learning opportunities and the satisfaction of creating something truly your own. Each step, from careful cleaning to precise temperature control, contributes to the character and quality of your final pour. Embrace the process, learn from each batch, and soon you’ll be enjoying your very own delicious brown ale, brewed with pride right in your kitchen.
Pouring Out Answers: Your Brown Ale Homebrew Q&A
What is homebrewing with a kit like for a beginner?
Homebrewing with a kit, like the Craft a Brew Brown Ale, makes it easy and rewarding to make your own beer at home. It simplifies the process by providing most of the necessary ingredients and equipment.
What basic equipment comes in a beginner 1-gallon homebrew kit?
A typical 1-gallon homebrew kit includes a fermenter (carboy), funnel, racking cane, malt extract, specialty grains, a grain bag, sanitizer, an airlock, a stopper, hops, yeast, and a glass thermometer.
Why is cleaning and sanitizing so important in homebrewing?
Cleaning removes visible dirt and sticky residues, while sanitizing kills invisible bacteria and wild yeasts that could infect your beer. Proper sanitation is crucial to ensure only your chosen yeast thrives and your beer tastes good.
What are the four main ingredients used to make beer?
All beer is built upon four fundamental ingredients: water, malted grain, hops, and yeast. Each ingredient plays a specific role in shaping the final taste and character of your brew.
What happens during the fermentation stage of brewing?
During fermentation, yeast consumes the sugars in your cooled wort (unfermented beer) and converts them into alcohol and carbon dioxide. This magical process transforms the sugary liquid into beer over several weeks.
The Steep: Unlocking Malt Flavors
The first step involves steeping your specialty grains in water heated to a precise 155°F (plus or minus a few degrees is acceptable, but extreme deviations can alter results). This is like steeping tea, as Mike aptly compares it. The goal is to extract color and complex sugars from the grains without extracting tannins, which can lead to an astringent, tea-like flavor. The video’s emphasis on heat on, heat off, especially with an electric stove, highlights the importance of temperature control – you’re not boiling the grains, but gently coaxing their goodness out. Steeping for 15-20 minutes is ideal for this brown ale recipe.
The Boil: Transformation and Sterilization
After removing the grains (without squeezing to avoid tannins), you bring the wort (the sugary liquid) to a rolling boil, which occurs around 212°F. This 60-minute boil serves several critical purposes: it sterilizes the wort, killing any lingering microorganisms; it isomerizes the hop acids, converting them into bitter compounds; it concentrates the wort; and it helps coagulate proteins, which will settle out later, contributing to clarity. As soon as the wort reaches a boil, your bittering hops (Fuggle in this case) are added and boiled for the full duration. This ensures maximum bitterness extraction.
Sanitation remains paramount, even with a boiling wort. As Mike points out, while the boil itself sterilizes the liquid, it’s good practice to sanitize anything that might come into contact with the wort *before* the boil, just to reinforce good habits. However, anything touching the wort *after* the boil must be meticulously sanitized.
Fermentation: The Magic of Transformation
Sixthly, once the boil is complete, the wort needs to be cooled rapidly to yeast-pitching temperature (usually around 65-70°F for most ales). Rapid cooling, often achieved with an ice bath or a wort chiller, minimizes the risk of infection and produces a clearer beer. Once cooled, the wort is transferred to your sanitized 1-gallon carboy, and the yeast is “pitched” or added. This is where the magic truly begins as the yeast starts its work.
Setting Up for a Successful Fermentation
For the initial stages of fermentation, particularly with a vigorous brown ale, a blow-off tube is highly recommended. As the yeast actively ferments, it produces a significant amount of CO2 and a thick layer of krausen (yeast foam). A blow-off tube (a larger diameter tube extending from your stopper into a jar of sanitizer or water) prevents the pressure from blowing off your airlock and potentially exposing your fermenting beer to airborne contaminants. Mike suggests using this for the first three days, which is often when primary fermentation is most active. It’s like a safety valve for your fermenter, ensuring that as the CO2 escapes, no unwanted elements can sneak in.
After three days, when the initial vigorous fermentation has subsided, you can switch to a standard three-piece airlock, filled with sanitizer or cheap vodka, as Mike recommends. This allows CO2 to continue escaping while preventing oxygen and contaminants from entering the carboy during the remainder of the fermentation process. It creates a one-way street for gases, protecting your developing brown ale.
The Waiting Game: Patience is a Virtue
During the primary fermentation (first few days), you’ll observe bubbling in the blow-off tube or airlock – a clear sign your yeast is active. After three days with the blow-off tube, you’ll typically transition to a standard airlock for the remaining two weeks of fermentation. This secondary phase allows the yeast to clean up any off-flavors it might have produced and helps the beer clarify. This period is crucial for developing the final nuanced flavors of your brown ale. Resist the urge to constantly check or disturb your fermenter; patience is perhaps the most important ingredient in brewing.
Ultimately, homebrewing a brown ale from a kit is a journey of discovery, filled with learning opportunities and the satisfaction of creating something truly your own. Each step, from careful cleaning to precise temperature control, contributes to the character and quality of your final pour. Embrace the process, learn from each batch, and soon you’ll be enjoying your very own delicious brown ale, brewed with pride right in your kitchen.
Pouring Out Answers: Your Brown Ale Homebrew Q&A
What is homebrewing with a kit like for a beginner?
Homebrewing with a kit, like the Craft a Brew Brown Ale, makes it easy and rewarding to make your own beer at home. It simplifies the process by providing most of the necessary ingredients and equipment.
What basic equipment comes in a beginner 1-gallon homebrew kit?
A typical 1-gallon homebrew kit includes a fermenter (carboy), funnel, racking cane, malt extract, specialty grains, a grain bag, sanitizer, an airlock, a stopper, hops, yeast, and a glass thermometer.
Why is cleaning and sanitizing so important in homebrewing?
Cleaning removes visible dirt and sticky residues, while sanitizing kills invisible bacteria and wild yeasts that could infect your beer. Proper sanitation is crucial to ensure only your chosen yeast thrives and your beer tastes good.
What are the four main ingredients used to make beer?
All beer is built upon four fundamental ingredients: water, malted grain, hops, and yeast. Each ingredient plays a specific role in shaping the final taste and character of your brew.
What happens during the fermentation stage of brewing?
During fermentation, yeast consumes the sugars in your cooled wort (unfermented beer) and converts them into alcohol and carbon dioxide. This magical process transforms the sugary liquid into beer over several weeks.
Yeast: The Life Force
Finally, yeast is the tiny, miraculous microorganism responsible for fermentation. It consumes the sugars in your wort and produces alcohol, carbon dioxide, and a myriad of flavor compounds. The video mentions “pitching” the yeast, which simply means adding it to the cooled wort. The type of yeast chosen dramatically influences the beer’s flavor profile. For a brown ale, an English ale yeast strain is common, contributing fruity esters and a clean finish that complements the malt character. Without healthy yeast, your sugary wort would remain just that – sugary water, never transforming into a beautiful brown ale.
The Brew Day Unfolds: Steeping, Boiling, and Hopping
Fifthly, with your ingredients and clean equipment ready, it’s time for the magic of brew day to begin. This phase involves carefully controlling temperatures and timing to extract and convert sugars, sterilize your wort, and impart hop character.
The Steep: Unlocking Malt Flavors
The first step involves steeping your specialty grains in water heated to a precise 155°F (plus or minus a few degrees is acceptable, but extreme deviations can alter results). This is like steeping tea, as Mike aptly compares it. The goal is to extract color and complex sugars from the grains without extracting tannins, which can lead to an astringent, tea-like flavor. The video’s emphasis on heat on, heat off, especially with an electric stove, highlights the importance of temperature control – you’re not boiling the grains, but gently coaxing their goodness out. Steeping for 15-20 minutes is ideal for this brown ale recipe.
The Boil: Transformation and Sterilization
After removing the grains (without squeezing to avoid tannins), you bring the wort (the sugary liquid) to a rolling boil, which occurs around 212°F. This 60-minute boil serves several critical purposes: it sterilizes the wort, killing any lingering microorganisms; it isomerizes the hop acids, converting them into bitter compounds; it concentrates the wort; and it helps coagulate proteins, which will settle out later, contributing to clarity. As soon as the wort reaches a boil, your bittering hops (Fuggle in this case) are added and boiled for the full duration. This ensures maximum bitterness extraction.
Sanitation remains paramount, even with a boiling wort. As Mike points out, while the boil itself sterilizes the liquid, it’s good practice to sanitize anything that might come into contact with the wort *before* the boil, just to reinforce good habits. However, anything touching the wort *after* the boil must be meticulously sanitized.
Fermentation: The Magic of Transformation
Sixthly, once the boil is complete, the wort needs to be cooled rapidly to yeast-pitching temperature (usually around 65-70°F for most ales). Rapid cooling, often achieved with an ice bath or a wort chiller, minimizes the risk of infection and produces a clearer beer. Once cooled, the wort is transferred to your sanitized 1-gallon carboy, and the yeast is “pitched” or added. This is where the magic truly begins as the yeast starts its work.
Setting Up for a Successful Fermentation
For the initial stages of fermentation, particularly with a vigorous brown ale, a blow-off tube is highly recommended. As the yeast actively ferments, it produces a significant amount of CO2 and a thick layer of krausen (yeast foam). A blow-off tube (a larger diameter tube extending from your stopper into a jar of sanitizer or water) prevents the pressure from blowing off your airlock and potentially exposing your fermenting beer to airborne contaminants. Mike suggests using this for the first three days, which is often when primary fermentation is most active. It’s like a safety valve for your fermenter, ensuring that as the CO2 escapes, no unwanted elements can sneak in.
After three days, when the initial vigorous fermentation has subsided, you can switch to a standard three-piece airlock, filled with sanitizer or cheap vodka, as Mike recommends. This allows CO2 to continue escaping while preventing oxygen and contaminants from entering the carboy during the remainder of the fermentation process. It creates a one-way street for gases, protecting your developing brown ale.
The Waiting Game: Patience is a Virtue
During the primary fermentation (first few days), you’ll observe bubbling in the blow-off tube or airlock – a clear sign your yeast is active. After three days with the blow-off tube, you’ll typically transition to a standard airlock for the remaining two weeks of fermentation. This secondary phase allows the yeast to clean up any off-flavors it might have produced and helps the beer clarify. This period is crucial for developing the final nuanced flavors of your brown ale. Resist the urge to constantly check or disturb your fermenter; patience is perhaps the most important ingredient in brewing.
Ultimately, homebrewing a brown ale from a kit is a journey of discovery, filled with learning opportunities and the satisfaction of creating something truly your own. Each step, from careful cleaning to precise temperature control, contributes to the character and quality of your final pour. Embrace the process, learn from each batch, and soon you’ll be enjoying your very own delicious brown ale, brewed with pride right in your kitchen.
Pouring Out Answers: Your Brown Ale Homebrew Q&A
What is homebrewing with a kit like for a beginner?
Homebrewing with a kit, like the Craft a Brew Brown Ale, makes it easy and rewarding to make your own beer at home. It simplifies the process by providing most of the necessary ingredients and equipment.
What basic equipment comes in a beginner 1-gallon homebrew kit?
A typical 1-gallon homebrew kit includes a fermenter (carboy), funnel, racking cane, malt extract, specialty grains, a grain bag, sanitizer, an airlock, a stopper, hops, yeast, and a glass thermometer.
Why is cleaning and sanitizing so important in homebrewing?
Cleaning removes visible dirt and sticky residues, while sanitizing kills invisible bacteria and wild yeasts that could infect your beer. Proper sanitation is crucial to ensure only your chosen yeast thrives and your beer tastes good.
What are the four main ingredients used to make beer?
All beer is built upon four fundamental ingredients: water, malted grain, hops, and yeast. Each ingredient plays a specific role in shaping the final taste and character of your brew.
What happens during the fermentation stage of brewing?
During fermentation, yeast consumes the sugars in your cooled wort (unfermented beer) and converts them into alcohol and carbon dioxide. This magical process transforms the sugary liquid into beer over several weeks.
Hops: The Bittering Balance
Hops are the spice of beer, providing bitterness to balance the malt sweetness, as well as aroma and flavor. The Craft a Brew brown ale kit comes with Fuggle hops, specifically designated as “bittering hops.” These are added early in the boil (typically for a full 60 minutes) to extract their alpha acids, which impart bitterness. Different hops contribute varying levels of bitterness, aroma, and flavor, much like different spices alter a dish. Later additions of other hop varieties can contribute citrus, floral, or piney notes, but for this brown ale, the Fuggle hops are essential for achieving the characteristic malty-bitter balance.
Yeast: The Life Force
Finally, yeast is the tiny, miraculous microorganism responsible for fermentation. It consumes the sugars in your wort and produces alcohol, carbon dioxide, and a myriad of flavor compounds. The video mentions “pitching” the yeast, which simply means adding it to the cooled wort. The type of yeast chosen dramatically influences the beer’s flavor profile. For a brown ale, an English ale yeast strain is common, contributing fruity esters and a clean finish that complements the malt character. Without healthy yeast, your sugary wort would remain just that – sugary water, never transforming into a beautiful brown ale.
The Brew Day Unfolds: Steeping, Boiling, and Hopping
Fifthly, with your ingredients and clean equipment ready, it’s time for the magic of brew day to begin. This phase involves carefully controlling temperatures and timing to extract and convert sugars, sterilize your wort, and impart hop character.
The Steep: Unlocking Malt Flavors
The first step involves steeping your specialty grains in water heated to a precise 155°F (plus or minus a few degrees is acceptable, but extreme deviations can alter results). This is like steeping tea, as Mike aptly compares it. The goal is to extract color and complex sugars from the grains without extracting tannins, which can lead to an astringent, tea-like flavor. The video’s emphasis on heat on, heat off, especially with an electric stove, highlights the importance of temperature control – you’re not boiling the grains, but gently coaxing their goodness out. Steeping for 15-20 minutes is ideal for this brown ale recipe.
The Boil: Transformation and Sterilization
After removing the grains (without squeezing to avoid tannins), you bring the wort (the sugary liquid) to a rolling boil, which occurs around 212°F. This 60-minute boil serves several critical purposes: it sterilizes the wort, killing any lingering microorganisms; it isomerizes the hop acids, converting them into bitter compounds; it concentrates the wort; and it helps coagulate proteins, which will settle out later, contributing to clarity. As soon as the wort reaches a boil, your bittering hops (Fuggle in this case) are added and boiled for the full duration. This ensures maximum bitterness extraction.
Sanitation remains paramount, even with a boiling wort. As Mike points out, while the boil itself sterilizes the liquid, it’s good practice to sanitize anything that might come into contact with the wort *before* the boil, just to reinforce good habits. However, anything touching the wort *after* the boil must be meticulously sanitized.
Fermentation: The Magic of Transformation
Sixthly, once the boil is complete, the wort needs to be cooled rapidly to yeast-pitching temperature (usually around 65-70°F for most ales). Rapid cooling, often achieved with an ice bath or a wort chiller, minimizes the risk of infection and produces a clearer beer. Once cooled, the wort is transferred to your sanitized 1-gallon carboy, and the yeast is “pitched” or added. This is where the magic truly begins as the yeast starts its work.
Setting Up for a Successful Fermentation
For the initial stages of fermentation, particularly with a vigorous brown ale, a blow-off tube is highly recommended. As the yeast actively ferments, it produces a significant amount of CO2 and a thick layer of krausen (yeast foam). A blow-off tube (a larger diameter tube extending from your stopper into a jar of sanitizer or water) prevents the pressure from blowing off your airlock and potentially exposing your fermenting beer to airborne contaminants. Mike suggests using this for the first three days, which is often when primary fermentation is most active. It’s like a safety valve for your fermenter, ensuring that as the CO2 escapes, no unwanted elements can sneak in.
After three days, when the initial vigorous fermentation has subsided, you can switch to a standard three-piece airlock, filled with sanitizer or cheap vodka, as Mike recommends. This allows CO2 to continue escaping while preventing oxygen and contaminants from entering the carboy during the remainder of the fermentation process. It creates a one-way street for gases, protecting your developing brown ale.
The Waiting Game: Patience is a Virtue
During the primary fermentation (first few days), you’ll observe bubbling in the blow-off tube or airlock – a clear sign your yeast is active. After three days with the blow-off tube, you’ll typically transition to a standard airlock for the remaining two weeks of fermentation. This secondary phase allows the yeast to clean up any off-flavors it might have produced and helps the beer clarify. This period is crucial for developing the final nuanced flavors of your brown ale. Resist the urge to constantly check or disturb your fermenter; patience is perhaps the most important ingredient in brewing.
Ultimately, homebrewing a brown ale from a kit is a journey of discovery, filled with learning opportunities and the satisfaction of creating something truly your own. Each step, from careful cleaning to precise temperature control, contributes to the character and quality of your final pour. Embrace the process, learn from each batch, and soon you’ll be enjoying your very own delicious brown ale, brewed with pride right in your kitchen.
Pouring Out Answers: Your Brown Ale Homebrew Q&A
What is homebrewing with a kit like for a beginner?
Homebrewing with a kit, like the Craft a Brew Brown Ale, makes it easy and rewarding to make your own beer at home. It simplifies the process by providing most of the necessary ingredients and equipment.
What basic equipment comes in a beginner 1-gallon homebrew kit?
A typical 1-gallon homebrew kit includes a fermenter (carboy), funnel, racking cane, malt extract, specialty grains, a grain bag, sanitizer, an airlock, a stopper, hops, yeast, and a glass thermometer.
Why is cleaning and sanitizing so important in homebrewing?
Cleaning removes visible dirt and sticky residues, while sanitizing kills invisible bacteria and wild yeasts that could infect your beer. Proper sanitation is crucial to ensure only your chosen yeast thrives and your beer tastes good.
What are the four main ingredients used to make beer?
All beer is built upon four fundamental ingredients: water, malted grain, hops, and yeast. Each ingredient plays a specific role in shaping the final taste and character of your brew.
What happens during the fermentation stage of brewing?
During fermentation, yeast consumes the sugars in your cooled wort (unfermented beer) and converts them into alcohol and carbon dioxide. This magical process transforms the sugary liquid into beer over several weeks.
Malted Grains: The Soul of Your Brown Ale
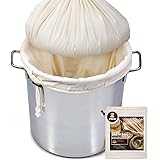
The Craft a Brew kit primarily uses malt extract, a concentrated form of wort that simplifies the brewing process. However, it also includes specialty grains, which are steeped, much like making a large batch of tea. These specialty malts contribute color, complex flavors (like nutty, caramel, or chocolate notes characteristic of a brown ale), and unfermentable sugars that add body and mouthfeel. Mike and Joey rightly emphasize using *specialty* malts for steeping in an extract kit. Unlike base malts used in all-grain brewing, specialty malts don’t require “mashing” (a process of converting starches to fermentable sugars) because their sugars are mostly non-fermentable or already accessible. The “brewer’s do-rag” (grain bag) prevents these steeped grains from floating freely in your wort, making them easy to remove.
Hops: The Bittering Balance
Hops are the spice of beer, providing bitterness to balance the malt sweetness, as well as aroma and flavor. The Craft a Brew brown ale kit comes with Fuggle hops, specifically designated as “bittering hops.” These are added early in the boil (typically for a full 60 minutes) to extract their alpha acids, which impart bitterness. Different hops contribute varying levels of bitterness, aroma, and flavor, much like different spices alter a dish. Later additions of other hop varieties can contribute citrus, floral, or piney notes, but for this brown ale, the Fuggle hops are essential for achieving the characteristic malty-bitter balance.
Yeast: The Life Force
Finally, yeast is the tiny, miraculous microorganism responsible for fermentation. It consumes the sugars in your wort and produces alcohol, carbon dioxide, and a myriad of flavor compounds. The video mentions “pitching” the yeast, which simply means adding it to the cooled wort. The type of yeast chosen dramatically influences the beer’s flavor profile. For a brown ale, an English ale yeast strain is common, contributing fruity esters and a clean finish that complements the malt character. Without healthy yeast, your sugary wort would remain just that – sugary water, never transforming into a beautiful brown ale.
The Brew Day Unfolds: Steeping, Boiling, and Hopping
Fifthly, with your ingredients and clean equipment ready, it’s time for the magic of brew day to begin. This phase involves carefully controlling temperatures and timing to extract and convert sugars, sterilize your wort, and impart hop character.
The Steep: Unlocking Malt Flavors
The first step involves steeping your specialty grains in water heated to a precise 155°F (plus or minus a few degrees is acceptable, but extreme deviations can alter results). This is like steeping tea, as Mike aptly compares it. The goal is to extract color and complex sugars from the grains without extracting tannins, which can lead to an astringent, tea-like flavor. The video’s emphasis on heat on, heat off, especially with an electric stove, highlights the importance of temperature control – you’re not boiling the grains, but gently coaxing their goodness out. Steeping for 15-20 minutes is ideal for this brown ale recipe.
The Boil: Transformation and Sterilization
After removing the grains (without squeezing to avoid tannins), you bring the wort (the sugary liquid) to a rolling boil, which occurs around 212°F. This 60-minute boil serves several critical purposes: it sterilizes the wort, killing any lingering microorganisms; it isomerizes the hop acids, converting them into bitter compounds; it concentrates the wort; and it helps coagulate proteins, which will settle out later, contributing to clarity. As soon as the wort reaches a boil, your bittering hops (Fuggle in this case) are added and boiled for the full duration. This ensures maximum bitterness extraction.
Sanitation remains paramount, even with a boiling wort. As Mike points out, while the boil itself sterilizes the liquid, it’s good practice to sanitize anything that might come into contact with the wort *before* the boil, just to reinforce good habits. However, anything touching the wort *after* the boil must be meticulously sanitized.
Fermentation: The Magic of Transformation
Sixthly, once the boil is complete, the wort needs to be cooled rapidly to yeast-pitching temperature (usually around 65-70°F for most ales). Rapid cooling, often achieved with an ice bath or a wort chiller, minimizes the risk of infection and produces a clearer beer. Once cooled, the wort is transferred to your sanitized 1-gallon carboy, and the yeast is “pitched” or added. This is where the magic truly begins as the yeast starts its work.
Setting Up for a Successful Fermentation
For the initial stages of fermentation, particularly with a vigorous brown ale, a blow-off tube is highly recommended. As the yeast actively ferments, it produces a significant amount of CO2 and a thick layer of krausen (yeast foam). A blow-off tube (a larger diameter tube extending from your stopper into a jar of sanitizer or water) prevents the pressure from blowing off your airlock and potentially exposing your fermenting beer to airborne contaminants. Mike suggests using this for the first three days, which is often when primary fermentation is most active. It’s like a safety valve for your fermenter, ensuring that as the CO2 escapes, no unwanted elements can sneak in.
After three days, when the initial vigorous fermentation has subsided, you can switch to a standard three-piece airlock, filled with sanitizer or cheap vodka, as Mike recommends. This allows CO2 to continue escaping while preventing oxygen and contaminants from entering the carboy during the remainder of the fermentation process. It creates a one-way street for gases, protecting your developing brown ale.
The Waiting Game: Patience is a Virtue
During the primary fermentation (first few days), you’ll observe bubbling in the blow-off tube or airlock – a clear sign your yeast is active. After three days with the blow-off tube, you’ll typically transition to a standard airlock for the remaining two weeks of fermentation. This secondary phase allows the yeast to clean up any off-flavors it might have produced and helps the beer clarify. This period is crucial for developing the final nuanced flavors of your brown ale. Resist the urge to constantly check or disturb your fermenter; patience is perhaps the most important ingredient in brewing.
Ultimately, homebrewing a brown ale from a kit is a journey of discovery, filled with learning opportunities and the satisfaction of creating something truly your own. Each step, from careful cleaning to precise temperature control, contributes to the character and quality of your final pour. Embrace the process, learn from each batch, and soon you’ll be enjoying your very own delicious brown ale, brewed with pride right in your kitchen.
Pouring Out Answers: Your Brown Ale Homebrew Q&A
What is homebrewing with a kit like for a beginner?
Homebrewing with a kit, like the Craft a Brew Brown Ale, makes it easy and rewarding to make your own beer at home. It simplifies the process by providing most of the necessary ingredients and equipment.
What basic equipment comes in a beginner 1-gallon homebrew kit?
A typical 1-gallon homebrew kit includes a fermenter (carboy), funnel, racking cane, malt extract, specialty grains, a grain bag, sanitizer, an airlock, a stopper, hops, yeast, and a glass thermometer.
Why is cleaning and sanitizing so important in homebrewing?
Cleaning removes visible dirt and sticky residues, while sanitizing kills invisible bacteria and wild yeasts that could infect your beer. Proper sanitation is crucial to ensure only your chosen yeast thrives and your beer tastes good.
What are the four main ingredients used to make beer?
All beer is built upon four fundamental ingredients: water, malted grain, hops, and yeast. Each ingredient plays a specific role in shaping the final taste and character of your brew.
What happens during the fermentation stage of brewing?
During fermentation, yeast consumes the sugars in your cooled wort (unfermented beer) and converts them into alcohol and carbon dioxide. This magical process transforms the sugary liquid into beer over several weeks.
Water: The Unsung Hero
While often overlooked, water constitutes over 90% of your beer. As Joey notes, tap water can be a viable option, but for consistency and to avoid potential off-flavors from old pipes or chlorine, many brewers opt for spring water. Think of water as the canvas for your painting; its quality significantly impacts the final artwork. Different mineral profiles in water can enhance or detract from certain beer styles, so while a beginner might not worry too much, understanding water’s role opens up a world of control over your final brown ale’s flavor profile.
Malted Grains: The Soul of Your Brown Ale
The Craft a Brew kit primarily uses malt extract, a concentrated form of wort that simplifies the brewing process. However, it also includes specialty grains, which are steeped, much like making a large batch of tea. These specialty malts contribute color, complex flavors (like nutty, caramel, or chocolate notes characteristic of a brown ale), and unfermentable sugars that add body and mouthfeel. Mike and Joey rightly emphasize using *specialty* malts for steeping in an extract kit. Unlike base malts used in all-grain brewing, specialty malts don’t require “mashing” (a process of converting starches to fermentable sugars) because their sugars are mostly non-fermentable or already accessible. The “brewer’s do-rag” (grain bag) prevents these steeped grains from floating freely in your wort, making them easy to remove.
Hops: The Bittering Balance
Hops are the spice of beer, providing bitterness to balance the malt sweetness, as well as aroma and flavor. The Craft a Brew brown ale kit comes with Fuggle hops, specifically designated as “bittering hops.” These are added early in the boil (typically for a full 60 minutes) to extract their alpha acids, which impart bitterness. Different hops contribute varying levels of bitterness, aroma, and flavor, much like different spices alter a dish. Later additions of other hop varieties can contribute citrus, floral, or piney notes, but for this brown ale, the Fuggle hops are essential for achieving the characteristic malty-bitter balance.
Yeast: The Life Force
Finally, yeast is the tiny, miraculous microorganism responsible for fermentation. It consumes the sugars in your wort and produces alcohol, carbon dioxide, and a myriad of flavor compounds. The video mentions “pitching” the yeast, which simply means adding it to the cooled wort. The type of yeast chosen dramatically influences the beer’s flavor profile. For a brown ale, an English ale yeast strain is common, contributing fruity esters and a clean finish that complements the malt character. Without healthy yeast, your sugary wort would remain just that – sugary water, never transforming into a beautiful brown ale.
The Brew Day Unfolds: Steeping, Boiling, and Hopping
Fifthly, with your ingredients and clean equipment ready, it’s time for the magic of brew day to begin. This phase involves carefully controlling temperatures and timing to extract and convert sugars, sterilize your wort, and impart hop character.
The Steep: Unlocking Malt Flavors
The first step involves steeping your specialty grains in water heated to a precise 155°F (plus or minus a few degrees is acceptable, but extreme deviations can alter results). This is like steeping tea, as Mike aptly compares it. The goal is to extract color and complex sugars from the grains without extracting tannins, which can lead to an astringent, tea-like flavor. The video’s emphasis on heat on, heat off, especially with an electric stove, highlights the importance of temperature control – you’re not boiling the grains, but gently coaxing their goodness out. Steeping for 15-20 minutes is ideal for this brown ale recipe.
The Boil: Transformation and Sterilization
After removing the grains (without squeezing to avoid tannins), you bring the wort (the sugary liquid) to a rolling boil, which occurs around 212°F. This 60-minute boil serves several critical purposes: it sterilizes the wort, killing any lingering microorganisms; it isomerizes the hop acids, converting them into bitter compounds; it concentrates the wort; and it helps coagulate proteins, which will settle out later, contributing to clarity. As soon as the wort reaches a boil, your bittering hops (Fuggle in this case) are added and boiled for the full duration. This ensures maximum bitterness extraction.
Sanitation remains paramount, even with a boiling wort. As Mike points out, while the boil itself sterilizes the liquid, it’s good practice to sanitize anything that might come into contact with the wort *before* the boil, just to reinforce good habits. However, anything touching the wort *after* the boil must be meticulously sanitized.
Fermentation: The Magic of Transformation
Sixthly, once the boil is complete, the wort needs to be cooled rapidly to yeast-pitching temperature (usually around 65-70°F for most ales). Rapid cooling, often achieved with an ice bath or a wort chiller, minimizes the risk of infection and produces a clearer beer. Once cooled, the wort is transferred to your sanitized 1-gallon carboy, and the yeast is “pitched” or added. This is where the magic truly begins as the yeast starts its work.
Setting Up for a Successful Fermentation
For the initial stages of fermentation, particularly with a vigorous brown ale, a blow-off tube is highly recommended. As the yeast actively ferments, it produces a significant amount of CO2 and a thick layer of krausen (yeast foam). A blow-off tube (a larger diameter tube extending from your stopper into a jar of sanitizer or water) prevents the pressure from blowing off your airlock and potentially exposing your fermenting beer to airborne contaminants. Mike suggests using this for the first three days, which is often when primary fermentation is most active. It’s like a safety valve for your fermenter, ensuring that as the CO2 escapes, no unwanted elements can sneak in.
After three days, when the initial vigorous fermentation has subsided, you can switch to a standard three-piece airlock, filled with sanitizer or cheap vodka, as Mike recommends. This allows CO2 to continue escaping while preventing oxygen and contaminants from entering the carboy during the remainder of the fermentation process. It creates a one-way street for gases, protecting your developing brown ale.
The Waiting Game: Patience is a Virtue
During the primary fermentation (first few days), you’ll observe bubbling in the blow-off tube or airlock – a clear sign your yeast is active. After three days with the blow-off tube, you’ll typically transition to a standard airlock for the remaining two weeks of fermentation. This secondary phase allows the yeast to clean up any off-flavors it might have produced and helps the beer clarify. This period is crucial for developing the final nuanced flavors of your brown ale. Resist the urge to constantly check or disturb your fermenter; patience is perhaps the most important ingredient in brewing.
Ultimately, homebrewing a brown ale from a kit is a journey of discovery, filled with learning opportunities and the satisfaction of creating something truly your own. Each step, from careful cleaning to precise temperature control, contributes to the character and quality of your final pour. Embrace the process, learn from each batch, and soon you’ll be enjoying your very own delicious brown ale, brewed with pride right in your kitchen.
Pouring Out Answers: Your Brown Ale Homebrew Q&A
What is homebrewing with a kit like for a beginner?
Homebrewing with a kit, like the Craft a Brew Brown Ale, makes it easy and rewarding to make your own beer at home. It simplifies the process by providing most of the necessary ingredients and equipment.
What basic equipment comes in a beginner 1-gallon homebrew kit?
A typical 1-gallon homebrew kit includes a fermenter (carboy), funnel, racking cane, malt extract, specialty grains, a grain bag, sanitizer, an airlock, a stopper, hops, yeast, and a glass thermometer.
Why is cleaning and sanitizing so important in homebrewing?
Cleaning removes visible dirt and sticky residues, while sanitizing kills invisible bacteria and wild yeasts that could infect your beer. Proper sanitation is crucial to ensure only your chosen yeast thrives and your beer tastes good.
What are the four main ingredients used to make beer?
All beer is built upon four fundamental ingredients: water, malted grain, hops, and yeast. Each ingredient plays a specific role in shaping the final taste and character of your brew.
What happens during the fermentation stage of brewing?
During fermentation, yeast consumes the sugars in your cooled wort (unfermented beer) and converts them into alcohol and carbon dioxide. This magical process transforms the sugary liquid into beer over several weeks.
Cleaning vs. Sanitizing: A Critical Distinction
Many beginners confuse cleaning with sanitizing, but they are distinct and equally vital steps. Cleaning removes physical debris, sticky wort, and yeast sludge – essentially, anything visible. This is where Easy Clean (1 tablespoon per gallon of water for general cleaning of spatulas, tubing, strainers, funnels, carboys, and stock pots) comes in handy. It’s designed to break down brewing residues without leaving harmful films. Once everything is sparkling clean, you move on to sanitizing.
Sanitizing, on the other hand, is the invisible war against microorganisms. It kills bacteria, wild yeasts, and molds that could infect your beer and introduce off-flavors – the dreaded “infected beer taste.” The video highlights Star San as the gold standard, and for good reason. It’s an acid-based sanitizer that works quickly (contact time of 30 seconds to 2 minutes), is effective at low concentrations (1.2 teaspoons per gallon of water, though careful measurement is key to avoid excessive suds like Mike and Joey experienced!), and crucially, it’s a “no-rinse” sanitizer. This means you don’t need to rinse it off with water after application, preventing re-contamination.
Remember Mike’s urgent advice: “If you get one thing out of this video, make sure you’re using this. If you don’t sanitize, your beer’s going to get infected and it’s going to taste like shit.” This isn’t an exaggeration; it’s a fundamental truth of homebrewing. Always sanitize anything that will touch your wort *after* it has been boiled or *after* it has cooled down. The spray bottle technique mentioned is excellent for ensuring continuous sanitation throughout your brew day.
The Four Pillars of Beer: Ingredients Explored
Fourthly, all beer, including your brown ale, is built upon four fundamental ingredients: water, malted grain, hops, and yeast. Each plays a specific, indispensable role in shaping the final character of your brew.
Water: The Unsung Hero
While often overlooked, water constitutes over 90% of your beer. As Joey notes, tap water can be a viable option, but for consistency and to avoid potential off-flavors from old pipes or chlorine, many brewers opt for spring water. Think of water as the canvas for your painting; its quality significantly impacts the final artwork. Different mineral profiles in water can enhance or detract from certain beer styles, so while a beginner might not worry too much, understanding water’s role opens up a world of control over your final brown ale’s flavor profile.
Malted Grains: The Soul of Your Brown Ale
The Craft a Brew kit primarily uses malt extract, a concentrated form of wort that simplifies the brewing process. However, it also includes specialty grains, which are steeped, much like making a large batch of tea. These specialty malts contribute color, complex flavors (like nutty, caramel, or chocolate notes characteristic of a brown ale), and unfermentable sugars that add body and mouthfeel. Mike and Joey rightly emphasize using *specialty* malts for steeping in an extract kit. Unlike base malts used in all-grain brewing, specialty malts don’t require “mashing” (a process of converting starches to fermentable sugars) because their sugars are mostly non-fermentable or already accessible. The “brewer’s do-rag” (grain bag) prevents these steeped grains from floating freely in your wort, making them easy to remove.
Hops: The Bittering Balance
Hops are the spice of beer, providing bitterness to balance the malt sweetness, as well as aroma and flavor. The Craft a Brew brown ale kit comes with Fuggle hops, specifically designated as “bittering hops.” These are added early in the boil (typically for a full 60 minutes) to extract their alpha acids, which impart bitterness. Different hops contribute varying levels of bitterness, aroma, and flavor, much like different spices alter a dish. Later additions of other hop varieties can contribute citrus, floral, or piney notes, but for this brown ale, the Fuggle hops are essential for achieving the characteristic malty-bitter balance.
Yeast: The Life Force
Finally, yeast is the tiny, miraculous microorganism responsible for fermentation. It consumes the sugars in your wort and produces alcohol, carbon dioxide, and a myriad of flavor compounds. The video mentions “pitching” the yeast, which simply means adding it to the cooled wort. The type of yeast chosen dramatically influences the beer’s flavor profile. For a brown ale, an English ale yeast strain is common, contributing fruity esters and a clean finish that complements the malt character. Without healthy yeast, your sugary wort would remain just that – sugary water, never transforming into a beautiful brown ale.
The Brew Day Unfolds: Steeping, Boiling, and Hopping
Fifthly, with your ingredients and clean equipment ready, it’s time for the magic of brew day to begin. This phase involves carefully controlling temperatures and timing to extract and convert sugars, sterilize your wort, and impart hop character.
The Steep: Unlocking Malt Flavors
The first step involves steeping your specialty grains in water heated to a precise 155°F (plus or minus a few degrees is acceptable, but extreme deviations can alter results). This is like steeping tea, as Mike aptly compares it. The goal is to extract color and complex sugars from the grains without extracting tannins, which can lead to an astringent, tea-like flavor. The video’s emphasis on heat on, heat off, especially with an electric stove, highlights the importance of temperature control – you’re not boiling the grains, but gently coaxing their goodness out. Steeping for 15-20 minutes is ideal for this brown ale recipe.
The Boil: Transformation and Sterilization
After removing the grains (without squeezing to avoid tannins), you bring the wort (the sugary liquid) to a rolling boil, which occurs around 212°F. This 60-minute boil serves several critical purposes: it sterilizes the wort, killing any lingering microorganisms; it isomerizes the hop acids, converting them into bitter compounds; it concentrates the wort; and it helps coagulate proteins, which will settle out later, contributing to clarity. As soon as the wort reaches a boil, your bittering hops (Fuggle in this case) are added and boiled for the full duration. This ensures maximum bitterness extraction.
Sanitation remains paramount, even with a boiling wort. As Mike points out, while the boil itself sterilizes the liquid, it’s good practice to sanitize anything that might come into contact with the wort *before* the boil, just to reinforce good habits. However, anything touching the wort *after* the boil must be meticulously sanitized.
Fermentation: The Magic of Transformation
Sixthly, once the boil is complete, the wort needs to be cooled rapidly to yeast-pitching temperature (usually around 65-70°F for most ales). Rapid cooling, often achieved with an ice bath or a wort chiller, minimizes the risk of infection and produces a clearer beer. Once cooled, the wort is transferred to your sanitized 1-gallon carboy, and the yeast is “pitched” or added. This is where the magic truly begins as the yeast starts its work.
Setting Up for a Successful Fermentation
For the initial stages of fermentation, particularly with a vigorous brown ale, a blow-off tube is highly recommended. As the yeast actively ferments, it produces a significant amount of CO2 and a thick layer of krausen (yeast foam). A blow-off tube (a larger diameter tube extending from your stopper into a jar of sanitizer or water) prevents the pressure from blowing off your airlock and potentially exposing your fermenting beer to airborne contaminants. Mike suggests using this for the first three days, which is often when primary fermentation is most active. It’s like a safety valve for your fermenter, ensuring that as the CO2 escapes, no unwanted elements can sneak in.
After three days, when the initial vigorous fermentation has subsided, you can switch to a standard three-piece airlock, filled with sanitizer or cheap vodka, as Mike recommends. This allows CO2 to continue escaping while preventing oxygen and contaminants from entering the carboy during the remainder of the fermentation process. It creates a one-way street for gases, protecting your developing brown ale.
The Waiting Game: Patience is a Virtue
During the primary fermentation (first few days), you’ll observe bubbling in the blow-off tube or airlock – a clear sign your yeast is active. After three days with the blow-off tube, you’ll typically transition to a standard airlock for the remaining two weeks of fermentation. This secondary phase allows the yeast to clean up any off-flavors it might have produced and helps the beer clarify. This period is crucial for developing the final nuanced flavors of your brown ale. Resist the urge to constantly check or disturb your fermenter; patience is perhaps the most important ingredient in brewing.
Ultimately, homebrewing a brown ale from a kit is a journey of discovery, filled with learning opportunities and the satisfaction of creating something truly your own. Each step, from careful cleaning to precise temperature control, contributes to the character and quality of your final pour. Embrace the process, learn from each batch, and soon you’ll be enjoying your very own delicious brown ale, brewed with pride right in your kitchen.
Pouring Out Answers: Your Brown Ale Homebrew Q&A
What is homebrewing with a kit like for a beginner?
Homebrewing with a kit, like the Craft a Brew Brown Ale, makes it easy and rewarding to make your own beer at home. It simplifies the process by providing most of the necessary ingredients and equipment.
What basic equipment comes in a beginner 1-gallon homebrew kit?
A typical 1-gallon homebrew kit includes a fermenter (carboy), funnel, racking cane, malt extract, specialty grains, a grain bag, sanitizer, an airlock, a stopper, hops, yeast, and a glass thermometer.
Why is cleaning and sanitizing so important in homebrewing?
Cleaning removes visible dirt and sticky residues, while sanitizing kills invisible bacteria and wild yeasts that could infect your beer. Proper sanitation is crucial to ensure only your chosen yeast thrives and your beer tastes good.
What are the four main ingredients used to make beer?
All beer is built upon four fundamental ingredients: water, malted grain, hops, and yeast. Each ingredient plays a specific role in shaping the final taste and character of your brew.
What happens during the fermentation stage of brewing?
During fermentation, yeast consumes the sugars in your cooled wort (unfermented beer) and converts them into alcohol and carbon dioxide. This magical process transforms the sugary liquid into beer over several weeks.
Smart Additions for a Smoother Homebrewing Experience
Secondly, while the kit is comprehensive, experienced homebrewers often recommend a few supplementary items that elevate the process from “doable” to “downright enjoyable.” Think of these as the precision instruments that turn a good chef into a great one. Mike highlights several crucial upgrades:
- Auto-Siphon: This tool, often costing around $20, is a game-changer for transferring your beer. Instead of wrestling with a basic racking cane and tubing, which can be as finicky as trying to thread a needle in the dark, an auto-siphon initiates the flow effortlessly. It’s like having a little pump that ensures a smooth, oxygen-free transfer from fermenter to bottle, protecting your beer from spoilage.
- Larger Funnel & Mesh Strainer: These two work in tandem. A wider funnel makes pouring easier, minimizing spills (because sticky wort is no fun). The mesh strainer, on the other hand, acts like a filter for your hot wort, catching any hop debris or stray grain particles before they make it into your fermenter. This step is crucial for clarity and preventing unwanted flavors in your finished brown ale.
- Spray Bottle for Sanitizer: Imagine needing to sanitize a spoon or a specific part of your fermenter during the brew. Instead of dunking everything into a large bucket of sanitizer, a spray bottle filled with Star San becomes your quick-draw sanitation partner. It ensures that every surface that touches your precious brew is instantly disinfected, like a superhero’s force field against unwanted microbes.
- Easy Clean: While not strictly necessary if you’re meticulous with soap and water, Easy Clean provides peace of mind. Regular dish soap, if not rinsed thoroughly, can leave residues that impart off-flavors to your beer, turning a delightful brown ale into something… less delightful. Easy Clean is specifically formulated for brewing equipment, making it a safer choice for truly clean gear.
- Digital Thermometer: The glass thermometer in the kit works, but a digital counterpart offers precision and durability. It’s easier to read, quicker to respond, and eliminates the anxiety of a fragile glass instrument hovering over a hot pot. Achieving and maintaining target temperatures, like the 155°F for steeping or knowing when you hit a rolling boil, is paramount to unlocking the full potential of your brown ale kit.
- Bottling Wand: If you’re planning to bottle your beer, a bottling wand is a must. This ingenious device allows you to fill bottles from the bottom up, minimizing splashing and oxygen exposure, which are the enemies of fresh-tasting homebrew. It stops the flow automatically when the bottle is removed, ensuring consistent fills and making the bottling day significantly less chaotic.
The Cornerstone of Quality: Cleaning and Sanitizing Your Gear
Thirdly, the difference between good homebrew and bad homebrew often boils down to one word: sanitation. This isn’t just about being tidy; it’s about creating a sterile environment where only your carefully selected yeast can thrive, transforming sugars into alcohol and flavor. Think of it as preparing a clean canvas for your masterpiece.
Cleaning vs. Sanitizing: A Critical Distinction
Many beginners confuse cleaning with sanitizing, but they are distinct and equally vital steps. Cleaning removes physical debris, sticky wort, and yeast sludge – essentially, anything visible. This is where Easy Clean (1 tablespoon per gallon of water for general cleaning of spatulas, tubing, strainers, funnels, carboys, and stock pots) comes in handy. It’s designed to break down brewing residues without leaving harmful films. Once everything is sparkling clean, you move on to sanitizing.
Sanitizing, on the other hand, is the invisible war against microorganisms. It kills bacteria, wild yeasts, and molds that could infect your beer and introduce off-flavors – the dreaded “infected beer taste.” The video highlights Star San as the gold standard, and for good reason. It’s an acid-based sanitizer that works quickly (contact time of 30 seconds to 2 minutes), is effective at low concentrations (1.2 teaspoons per gallon of water, though careful measurement is key to avoid excessive suds like Mike and Joey experienced!), and crucially, it’s a “no-rinse” sanitizer. This means you don’t need to rinse it off with water after application, preventing re-contamination.
Remember Mike’s urgent advice: “If you get one thing out of this video, make sure you’re using this. If you don’t sanitize, your beer’s going to get infected and it’s going to taste like shit.” This isn’t an exaggeration; it’s a fundamental truth of homebrewing. Always sanitize anything that will touch your wort *after* it has been boiled or *after* it has cooled down. The spray bottle technique mentioned is excellent for ensuring continuous sanitation throughout your brew day.
The Four Pillars of Beer: Ingredients Explored
Fourthly, all beer, including your brown ale, is built upon four fundamental ingredients: water, malted grain, hops, and yeast. Each plays a specific, indispensable role in shaping the final character of your brew.
Water: The Unsung Hero
While often overlooked, water constitutes over 90% of your beer. As Joey notes, tap water can be a viable option, but for consistency and to avoid potential off-flavors from old pipes or chlorine, many brewers opt for spring water. Think of water as the canvas for your painting; its quality significantly impacts the final artwork. Different mineral profiles in water can enhance or detract from certain beer styles, so while a beginner might not worry too much, understanding water’s role opens up a world of control over your final brown ale’s flavor profile.
Malted Grains: The Soul of Your Brown Ale
The Craft a Brew kit primarily uses malt extract, a concentrated form of wort that simplifies the brewing process. However, it also includes specialty grains, which are steeped, much like making a large batch of tea. These specialty malts contribute color, complex flavors (like nutty, caramel, or chocolate notes characteristic of a brown ale), and unfermentable sugars that add body and mouthfeel. Mike and Joey rightly emphasize using *specialty* malts for steeping in an extract kit. Unlike base malts used in all-grain brewing, specialty malts don’t require “mashing” (a process of converting starches to fermentable sugars) because their sugars are mostly non-fermentable or already accessible. The “brewer’s do-rag” (grain bag) prevents these steeped grains from floating freely in your wort, making them easy to remove.
Hops: The Bittering Balance
Hops are the spice of beer, providing bitterness to balance the malt sweetness, as well as aroma and flavor. The Craft a Brew brown ale kit comes with Fuggle hops, specifically designated as “bittering hops.” These are added early in the boil (typically for a full 60 minutes) to extract their alpha acids, which impart bitterness. Different hops contribute varying levels of bitterness, aroma, and flavor, much like different spices alter a dish. Later additions of other hop varieties can contribute citrus, floral, or piney notes, but for this brown ale, the Fuggle hops are essential for achieving the characteristic malty-bitter balance.
Yeast: The Life Force
Finally, yeast is the tiny, miraculous microorganism responsible for fermentation. It consumes the sugars in your wort and produces alcohol, carbon dioxide, and a myriad of flavor compounds. The video mentions “pitching” the yeast, which simply means adding it to the cooled wort. The type of yeast chosen dramatically influences the beer’s flavor profile. For a brown ale, an English ale yeast strain is common, contributing fruity esters and a clean finish that complements the malt character. Without healthy yeast, your sugary wort would remain just that – sugary water, never transforming into a beautiful brown ale.
The Brew Day Unfolds: Steeping, Boiling, and Hopping
Fifthly, with your ingredients and clean equipment ready, it’s time for the magic of brew day to begin. This phase involves carefully controlling temperatures and timing to extract and convert sugars, sterilize your wort, and impart hop character.
The Steep: Unlocking Malt Flavors
The first step involves steeping your specialty grains in water heated to a precise 155°F (plus or minus a few degrees is acceptable, but extreme deviations can alter results). This is like steeping tea, as Mike aptly compares it. The goal is to extract color and complex sugars from the grains without extracting tannins, which can lead to an astringent, tea-like flavor. The video’s emphasis on heat on, heat off, especially with an electric stove, highlights the importance of temperature control – you’re not boiling the grains, but gently coaxing their goodness out. Steeping for 15-20 minutes is ideal for this brown ale recipe.
The Boil: Transformation and Sterilization
After removing the grains (without squeezing to avoid tannins), you bring the wort (the sugary liquid) to a rolling boil, which occurs around 212°F. This 60-minute boil serves several critical purposes: it sterilizes the wort, killing any lingering microorganisms; it isomerizes the hop acids, converting them into bitter compounds; it concentrates the wort; and it helps coagulate proteins, which will settle out later, contributing to clarity. As soon as the wort reaches a boil, your bittering hops (Fuggle in this case) are added and boiled for the full duration. This ensures maximum bitterness extraction.
Sanitation remains paramount, even with a boiling wort. As Mike points out, while the boil itself sterilizes the liquid, it’s good practice to sanitize anything that might come into contact with the wort *before* the boil, just to reinforce good habits. However, anything touching the wort *after* the boil must be meticulously sanitized.
Fermentation: The Magic of Transformation
Sixthly, once the boil is complete, the wort needs to be cooled rapidly to yeast-pitching temperature (usually around 65-70°F for most ales). Rapid cooling, often achieved with an ice bath or a wort chiller, minimizes the risk of infection and produces a clearer beer. Once cooled, the wort is transferred to your sanitized 1-gallon carboy, and the yeast is “pitched” or added. This is where the magic truly begins as the yeast starts its work.
Setting Up for a Successful Fermentation
For the initial stages of fermentation, particularly with a vigorous brown ale, a blow-off tube is highly recommended. As the yeast actively ferments, it produces a significant amount of CO2 and a thick layer of krausen (yeast foam). A blow-off tube (a larger diameter tube extending from your stopper into a jar of sanitizer or water) prevents the pressure from blowing off your airlock and potentially exposing your fermenting beer to airborne contaminants. Mike suggests using this for the first three days, which is often when primary fermentation is most active. It’s like a safety valve for your fermenter, ensuring that as the CO2 escapes, no unwanted elements can sneak in.
After three days, when the initial vigorous fermentation has subsided, you can switch to a standard three-piece airlock, filled with sanitizer or cheap vodka, as Mike recommends. This allows CO2 to continue escaping while preventing oxygen and contaminants from entering the carboy during the remainder of the fermentation process. It creates a one-way street for gases, protecting your developing brown ale.
The Waiting Game: Patience is a Virtue
During the primary fermentation (first few days), you’ll observe bubbling in the blow-off tube or airlock – a clear sign your yeast is active. After three days with the blow-off tube, you’ll typically transition to a standard airlock for the remaining two weeks of fermentation. This secondary phase allows the yeast to clean up any off-flavors it might have produced and helps the beer clarify. This period is crucial for developing the final nuanced flavors of your brown ale. Resist the urge to constantly check or disturb your fermenter; patience is perhaps the most important ingredient in brewing.
Ultimately, homebrewing a brown ale from a kit is a journey of discovery, filled with learning opportunities and the satisfaction of creating something truly your own. Each step, from careful cleaning to precise temperature control, contributes to the character and quality of your final pour. Embrace the process, learn from each batch, and soon you’ll be enjoying your very own delicious brown ale, brewed with pride right in your kitchen.
Pouring Out Answers: Your Brown Ale Homebrew Q&A
What is homebrewing with a kit like for a beginner?
Homebrewing with a kit, like the Craft a Brew Brown Ale, makes it easy and rewarding to make your own beer at home. It simplifies the process by providing most of the necessary ingredients and equipment.
What basic equipment comes in a beginner 1-gallon homebrew kit?
A typical 1-gallon homebrew kit includes a fermenter (carboy), funnel, racking cane, malt extract, specialty grains, a grain bag, sanitizer, an airlock, a stopper, hops, yeast, and a glass thermometer.
Why is cleaning and sanitizing so important in homebrewing?
Cleaning removes visible dirt and sticky residues, while sanitizing kills invisible bacteria and wild yeasts that could infect your beer. Proper sanitation is crucial to ensure only your chosen yeast thrives and your beer tastes good.
What are the four main ingredients used to make beer?
All beer is built upon four fundamental ingredients: water, malted grain, hops, and yeast. Each ingredient plays a specific role in shaping the final taste and character of your brew.
What happens during the fermentation stage of brewing?
During fermentation, yeast consumes the sugars in your cooled wort (unfermented beer) and converts them into alcohol and carbon dioxide. This magical process transforms the sugary liquid into beer over several weeks.
Ever wondered if brewing your own delicious beer at home is truly within your reach? As the accompanying video vividly demonstrates, diving into the world of homebrewing, especially with a convenient kit like the Craft a Brew Brown Ale, is not only possible but incredibly rewarding. Crafting your own brew can feel like a grand adventure, transforming simple ingredients into a complex, satisfying beverage. Let’s expand on the video’s essential steps and insights, delving deeper into the nuances that make a successful homebrew experience.
Setting the Stage for Your Brown Ale Homebrew: Essential Equipment and Upgrades
Firstly, embarking on your homebrewing journey begins with the right tools. The Craft a Brew 1-gallon brown ale kit, as featured, provides a solid foundation. It typically includes a 1-gallon carboy (your primary fermentation vessel), a funnel, a racking cane (for transferring liquid), malt extract, specialty grains, a grain bag, sanitizer, an airlock, a stopper (or bung), bittering hops, yeast, and a glass thermometer. These components are your starter pack, the basic building blocks for your brewing castle.
Smart Additions for a Smoother Homebrewing Experience
Secondly, while the kit is comprehensive, experienced homebrewers often recommend a few supplementary items that elevate the process from “doable” to “downright enjoyable.” Think of these as the precision instruments that turn a good chef into a great one. Mike highlights several crucial upgrades:
- Auto-Siphon: This tool, often costing around $20, is a game-changer for transferring your beer. Instead of wrestling with a basic racking cane and tubing, which can be as finicky as trying to thread a needle in the dark, an auto-siphon initiates the flow effortlessly. It’s like having a little pump that ensures a smooth, oxygen-free transfer from fermenter to bottle, protecting your beer from spoilage.
- Larger Funnel & Mesh Strainer: These two work in tandem. A wider funnel makes pouring easier, minimizing spills (because sticky wort is no fun). The mesh strainer, on the other hand, acts like a filter for your hot wort, catching any hop debris or stray grain particles before they make it into your fermenter. This step is crucial for clarity and preventing unwanted flavors in your finished brown ale.
- Spray Bottle for Sanitizer: Imagine needing to sanitize a spoon or a specific part of your fermenter during the brew. Instead of dunking everything into a large bucket of sanitizer, a spray bottle filled with Star San becomes your quick-draw sanitation partner. It ensures that every surface that touches your precious brew is instantly disinfected, like a superhero’s force field against unwanted microbes.
- Easy Clean: While not strictly necessary if you’re meticulous with soap and water, Easy Clean provides peace of mind. Regular dish soap, if not rinsed thoroughly, can leave residues that impart off-flavors to your beer, turning a delightful brown ale into something… less delightful. Easy Clean is specifically formulated for brewing equipment, making it a safer choice for truly clean gear.
- Digital Thermometer: The glass thermometer in the kit works, but a digital counterpart offers precision and durability. It’s easier to read, quicker to respond, and eliminates the anxiety of a fragile glass instrument hovering over a hot pot. Achieving and maintaining target temperatures, like the 155°F for steeping or knowing when you hit a rolling boil, is paramount to unlocking the full potential of your brown ale kit.
- Bottling Wand: If you’re planning to bottle your beer, a bottling wand is a must. This ingenious device allows you to fill bottles from the bottom up, minimizing splashing and oxygen exposure, which are the enemies of fresh-tasting homebrew. It stops the flow automatically when the bottle is removed, ensuring consistent fills and making the bottling day significantly less chaotic.
The Cornerstone of Quality: Cleaning and Sanitizing Your Gear
Thirdly, the difference between good homebrew and bad homebrew often boils down to one word: sanitation. This isn’t just about being tidy; it’s about creating a sterile environment where only your carefully selected yeast can thrive, transforming sugars into alcohol and flavor. Think of it as preparing a clean canvas for your masterpiece.
Cleaning vs. Sanitizing: A Critical Distinction
Many beginners confuse cleaning with sanitizing, but they are distinct and equally vital steps. Cleaning removes physical debris, sticky wort, and yeast sludge – essentially, anything visible. This is where Easy Clean (1 tablespoon per gallon of water for general cleaning of spatulas, tubing, strainers, funnels, carboys, and stock pots) comes in handy. It’s designed to break down brewing residues without leaving harmful films. Once everything is sparkling clean, you move on to sanitizing.
Sanitizing, on the other hand, is the invisible war against microorganisms. It kills bacteria, wild yeasts, and molds that could infect your beer and introduce off-flavors – the dreaded “infected beer taste.” The video highlights Star San as the gold standard, and for good reason. It’s an acid-based sanitizer that works quickly (contact time of 30 seconds to 2 minutes), is effective at low concentrations (1.2 teaspoons per gallon of water, though careful measurement is key to avoid excessive suds like Mike and Joey experienced!), and crucially, it’s a “no-rinse” sanitizer. This means you don’t need to rinse it off with water after application, preventing re-contamination.
Remember Mike’s urgent advice: “If you get one thing out of this video, make sure you’re using this. If you don’t sanitize, your beer’s going to get infected and it’s going to taste like shit.” This isn’t an exaggeration; it’s a fundamental truth of homebrewing. Always sanitize anything that will touch your wort *after* it has been boiled or *after* it has cooled down. The spray bottle technique mentioned is excellent for ensuring continuous sanitation throughout your brew day.
The Four Pillars of Beer: Ingredients Explored
Fourthly, all beer, including your brown ale, is built upon four fundamental ingredients: water, malted grain, hops, and yeast. Each plays a specific, indispensable role in shaping the final character of your brew.
Water: The Unsung Hero
While often overlooked, water constitutes over 90% of your beer. As Joey notes, tap water can be a viable option, but for consistency and to avoid potential off-flavors from old pipes or chlorine, many brewers opt for spring water. Think of water as the canvas for your painting; its quality significantly impacts the final artwork. Different mineral profiles in water can enhance or detract from certain beer styles, so while a beginner might not worry too much, understanding water’s role opens up a world of control over your final brown ale’s flavor profile.
Malted Grains: The Soul of Your Brown Ale
The Craft a Brew kit primarily uses malt extract, a concentrated form of wort that simplifies the brewing process. However, it also includes specialty grains, which are steeped, much like making a large batch of tea. These specialty malts contribute color, complex flavors (like nutty, caramel, or chocolate notes characteristic of a brown ale), and unfermentable sugars that add body and mouthfeel. Mike and Joey rightly emphasize using *specialty* malts for steeping in an extract kit. Unlike base malts used in all-grain brewing, specialty malts don’t require “mashing” (a process of converting starches to fermentable sugars) because their sugars are mostly non-fermentable or already accessible. The “brewer’s do-rag” (grain bag) prevents these steeped grains from floating freely in your wort, making them easy to remove.
Hops: The Bittering Balance
Hops are the spice of beer, providing bitterness to balance the malt sweetness, as well as aroma and flavor. The Craft a Brew brown ale kit comes with Fuggle hops, specifically designated as “bittering hops.” These are added early in the boil (typically for a full 60 minutes) to extract their alpha acids, which impart bitterness. Different hops contribute varying levels of bitterness, aroma, and flavor, much like different spices alter a dish. Later additions of other hop varieties can contribute citrus, floral, or piney notes, but for this brown ale, the Fuggle hops are essential for achieving the characteristic malty-bitter balance.
Yeast: The Life Force
Finally, yeast is the tiny, miraculous microorganism responsible for fermentation. It consumes the sugars in your wort and produces alcohol, carbon dioxide, and a myriad of flavor compounds. The video mentions “pitching” the yeast, which simply means adding it to the cooled wort. The type of yeast chosen dramatically influences the beer’s flavor profile. For a brown ale, an English ale yeast strain is common, contributing fruity esters and a clean finish that complements the malt character. Without healthy yeast, your sugary wort would remain just that – sugary water, never transforming into a beautiful brown ale.
The Brew Day Unfolds: Steeping, Boiling, and Hopping
Fifthly, with your ingredients and clean equipment ready, it’s time for the magic of brew day to begin. This phase involves carefully controlling temperatures and timing to extract and convert sugars, sterilize your wort, and impart hop character.
The Steep: Unlocking Malt Flavors
The first step involves steeping your specialty grains in water heated to a precise 155°F (plus or minus a few degrees is acceptable, but extreme deviations can alter results). This is like steeping tea, as Mike aptly compares it. The goal is to extract color and complex sugars from the grains without extracting tannins, which can lead to an astringent, tea-like flavor. The video’s emphasis on heat on, heat off, especially with an electric stove, highlights the importance of temperature control – you’re not boiling the grains, but gently coaxing their goodness out. Steeping for 15-20 minutes is ideal for this brown ale recipe.
The Boil: Transformation and Sterilization
After removing the grains (without squeezing to avoid tannins), you bring the wort (the sugary liquid) to a rolling boil, which occurs around 212°F. This 60-minute boil serves several critical purposes: it sterilizes the wort, killing any lingering microorganisms; it isomerizes the hop acids, converting them into bitter compounds; it concentrates the wort; and it helps coagulate proteins, which will settle out later, contributing to clarity. As soon as the wort reaches a boil, your bittering hops (Fuggle in this case) are added and boiled for the full duration. This ensures maximum bitterness extraction.
Sanitation remains paramount, even with a boiling wort. As Mike points out, while the boil itself sterilizes the liquid, it’s good practice to sanitize anything that might come into contact with the wort *before* the boil, just to reinforce good habits. However, anything touching the wort *after* the boil must be meticulously sanitized.
Fermentation: The Magic of Transformation
Sixthly, once the boil is complete, the wort needs to be cooled rapidly to yeast-pitching temperature (usually around 65-70°F for most ales). Rapid cooling, often achieved with an ice bath or a wort chiller, minimizes the risk of infection and produces a clearer beer. Once cooled, the wort is transferred to your sanitized 1-gallon carboy, and the yeast is “pitched” or added. This is where the magic truly begins as the yeast starts its work.
Setting Up for a Successful Fermentation
For the initial stages of fermentation, particularly with a vigorous brown ale, a blow-off tube is highly recommended. As the yeast actively ferments, it produces a significant amount of CO2 and a thick layer of krausen (yeast foam). A blow-off tube (a larger diameter tube extending from your stopper into a jar of sanitizer or water) prevents the pressure from blowing off your airlock and potentially exposing your fermenting beer to airborne contaminants. Mike suggests using this for the first three days, which is often when primary fermentation is most active. It’s like a safety valve for your fermenter, ensuring that as the CO2 escapes, no unwanted elements can sneak in.
After three days, when the initial vigorous fermentation has subsided, you can switch to a standard three-piece airlock, filled with sanitizer or cheap vodka, as Mike recommends. This allows CO2 to continue escaping while preventing oxygen and contaminants from entering the carboy during the remainder of the fermentation process. It creates a one-way street for gases, protecting your developing brown ale.
The Waiting Game: Patience is a Virtue
During the primary fermentation (first few days), you’ll observe bubbling in the blow-off tube or airlock – a clear sign your yeast is active. After three days with the blow-off tube, you’ll typically transition to a standard airlock for the remaining two weeks of fermentation. This secondary phase allows the yeast to clean up any off-flavors it might have produced and helps the beer clarify. This period is crucial for developing the final nuanced flavors of your brown ale. Resist the urge to constantly check or disturb your fermenter; patience is perhaps the most important ingredient in brewing.
Ultimately, homebrewing a brown ale from a kit is a journey of discovery, filled with learning opportunities and the satisfaction of creating something truly your own. Each step, from careful cleaning to precise temperature control, contributes to the character and quality of your final pour. Embrace the process, learn from each batch, and soon you’ll be enjoying your very own delicious brown ale, brewed with pride right in your kitchen.
Pouring Out Answers: Your Brown Ale Homebrew Q&A
What is homebrewing with a kit like for a beginner?
Homebrewing with a kit, like the Craft a Brew Brown Ale, makes it easy and rewarding to make your own beer at home. It simplifies the process by providing most of the necessary ingredients and equipment.
What basic equipment comes in a beginner 1-gallon homebrew kit?
A typical 1-gallon homebrew kit includes a fermenter (carboy), funnel, racking cane, malt extract, specialty grains, a grain bag, sanitizer, an airlock, a stopper, hops, yeast, and a glass thermometer.
Why is cleaning and sanitizing so important in homebrewing?
Cleaning removes visible dirt and sticky residues, while sanitizing kills invisible bacteria and wild yeasts that could infect your beer. Proper sanitation is crucial to ensure only your chosen yeast thrives and your beer tastes good.
What are the four main ingredients used to make beer?
All beer is built upon four fundamental ingredients: water, malted grain, hops, and yeast. Each ingredient plays a specific role in shaping the final taste and character of your brew.
What happens during the fermentation stage of brewing?
During fermentation, yeast consumes the sugars in your cooled wort (unfermented beer) and converts them into alcohol and carbon dioxide. This magical process transforms the sugary liquid into beer over several weeks.