Have you ever considered diving into the rewarding world of crafting your own beer, but felt intimidated by the sheer amount of equipment or the perceived complexity? As Paul shares in the video above, embarking on a homebrewing journey doesn’t have to break the bank or be overly complicated right from the start. Whether you’re aiming for a simple kit brew or dreaming of an advanced all-grain setup, understanding the fundamental equipment and processes is your first step. This guide will expand on the insights from the video, walking you through the essential gear you need at every stage of your homebrewing adventure.
The Essential Starter Kit for Homebrewing: Budget-Friendly Beginnings
For newcomers to homebrewing, the initial investment can seem daunting, especially during economically challenging times. However, as highlighted in the video, you can begin with minimal expenditure. The core philosophy here is simplicity and functionality, focusing on items that directly contribute to making palatable beer without unnecessary frills.
Foundational Equipment for Basic Brewing
- Fermenter: A simple food-grade plastic pail with a lid will suffice for your first batch. These are incredibly versatile and easy to clean, proving that expensive vessels aren’t a prerequisite for a successful fermentation. Imagine if you could produce delicious beer using just a bucket – it’s entirely possible!
- Cleaners & Sanitizers: This is arguably the most critical component of your basic setup, as stressed by Paul. You’ll need a dedicated brewing cleaner like Diversol or PBW, followed by a no-rinse sanitizer such as Star San or iodophor. While cleaning removes visible grime, sanitizing eliminates microscopic organisms that could spoil your beer. Skipping this step is a recipe for off-flavors, so strict adherence to a cleaning and sanitizing regimen is non-negotiable for any successful homebrewing experience.
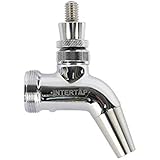
- Bottling Wand & Spigot: To transfer your fermented beer from the primary fermenter into bottles, a simple $4 bottling wand and a spigot attached to your pail offer an economical solution. This setup allows for direct bottling, minimizing contact with air. However, if you’re carbonating with priming sugar, this method means stirring sugar into the entire batch, which can unfortunately rouse sediment.
- Carbonation Solutions: Instead of dealing with priming sugar, Coopers carbonation drops (around $5) offer a convenient alternative. These pre-measured sugar tablets are simply dropped into each bottle before capping, eliminating the need for a separate bottling bucket and reducing the risk of disturbing yeast sediment. This method significantly streamlines the bottling process for beginners.
- Bottles & Caps: You have a choice between plastic twist-cap bottles, which are durable and require no extra tools, or traditional glass bottles, which necessitate crown caps and a capper. Both options are food-grade and won’t impart off-flavors, so your preference for convenience versus tradition will guide your decision.
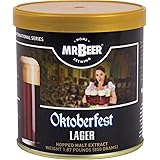
Once you have these essentials, all you need is a beer kit, such as a Festa or Coopers kit, and some clean water. These kits provide pre-hopped malt extract and yeast, making the brewing process incredibly straightforward.
Stepping Up to Partial Grain Brewing: Intermediate Techniques
As your confidence in homebrewing grows, you might consider advancing to partial grain brewing. This intermediate method uses the same basic fermenting and bottling equipment but introduces a crucial new step: steeping specialty grains. This technique allows for greater control over flavor, aroma, and color, moving beyond the pre-determined profiles of basic kits.
Key Additions for Partial Grain Brewing
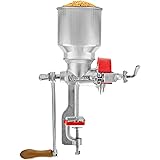
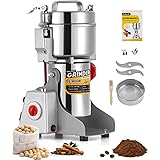
- 5-Gallon Brew Pot: A large pot, typically 5 gallons or 19 liters, is required to steep your grains and boil your wort. This can often be managed on a standard kitchen stovetop.
- Ingredients: You’ll be working with liquid or dry malt extract, specialty steeping grains (often in a mesh bag), yeast, and hops. The combination of malt extract with steeped grains offers a more complex flavor profile than extract alone.
The process involves steeping grains in about 3 gallons (12 liters) of water for around 30 minutes, then removing the grains. Next, you add your malt extract and bring the mixture to a boil, adding hops at various stages according to your recipe. After the boil, the wort must be cooled rapidly. For those on a budget, an ice bath in your kitchen sink is an effective, albeit slower, method to bring the wort down to pitching temperature. Once cooled, the wort is transferred to your fermenter, topped up with water to the desired volume, and allowed to ferment.
Mastering All-Grain Homebrewing: Advanced Control and Customization
All-grain brewing represents the pinnacle of homebrewing, offering complete control over every aspect of the beer-making process. This method, while more involved, unlocks endless possibilities for recipe creation and flavor customization. Paul notes that this level of brewing initially seemed intimidating due to the amount of equipment involved. However, various approaches make it more accessible than ever.
Brew-in-a-Bag (BIAB): Simplicity in All-Grain
BIAB is an excellent gateway into all-grain brewing, simplifying the process by combining mashing and lautering into a single vessel. This method eliminates the need for a separate mash tun and often sparging, making it significantly less complex than traditional three-vessel systems.
- Large Boil Pot & Nylon Bag: For a 5 US gallon (19 liter) batch, a 10-gallon (38 liter) pot is recommended to accommodate both the mash water and the grains without sparging. A large nylon bag lines the pot, holding the grains.
- Heat Source: Your kitchen stovetop likely won’t provide enough heat for boiling 6+ gallons (23-25 liters) of wort. A powerful propane burner, like the KAB4 mentioned in the video, is a common upgrade for efficient boiling.
- Immersion Chiller: Rapid cooling is essential for all-grain batches to prevent off-flavors and minimize the risk of infection. An immersion chiller, circulated with cold tap water, can cool your wort from boiling to pitching temperature in 15-20 minutes, depending on your water temperature. Paul notes that cold Canadian groundwater, for instance, makes chilling much faster than in warmer climates.
The BIAB process involves heating your mash water to temperature, adding the grains in the bag, and mashing for about an hour. After mashing, the grain bag is lifted out, allowing the wort to drain. Some brewers gently squeeze the bag to extract more liquid, a practice Paul believes doesn’t typically lead to tannin extraction in homebrewing setups. The wort is then brought to a boil, and hops, Whirlfloc tablets (for clarification), and yeast nutrient (for healthy fermentation) are added. Finally, the wort is quickly chilled and transferred to the fermenter.
The Traditional Three-Vessel System: Classic Craftsmanship
Historically, the three-vessel system was the standard for all-grain homebrewing, involving a hot liquor tank (HLT), a mash tun, and a boil kettle. While more equipment-intensive, it offers ultimate control and the capacity for larger batches. Imagine if you had separate vessels for each stage – it’s a very precise, albeit space-consuming, approach.
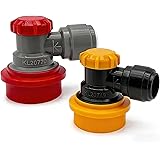
- Hot Liquor Tank (HLT): Used to heat mash and sparge water.
- Mash Tun: Often a converted cooler with a ball valve and a bazooka screen or false bottom, preventing grains from entering the boil kettle. This vessel holds the grains and hot water for mashing.
- Boil Kettle: Where the wort is boiled and hops are added.
The process starts by heating water in the HLT, which is then transferred to the mash tun with the grains. After mashing, the wort drains into the boil kettle. Sparging, either fly sparging (continually rinsing grains) or batch sparging (adding and draining sparge water in batches), is then performed to extract more sugars. While highly effective, the complexity and footprint of this system have led many homebrewers to explore more streamlined options in recent years.
The Modern All-In-One Electric Brewers: Convenience Meets Efficiency
Today, systems like the BrewZilla and Grainfather have revolutionized all-grain brewing by integrating multiple functions into a single electric unit. These all-in-one brewers combine a boiler, mash tun, and often a pump and chiller, offering convenience and impressive efficiency.
- Integrated System: These units feature a control panel for setting mash and boil temperatures, as well as controlling a built-in pump. They include a false bottom to prevent hop chunks from clogging the pump and a grain basket for mashing.
- Recirculation Arm: A recirculation arm helps maintain consistent mash temperatures and improves efficiency by continuously circulating wort through the grain bed. This leads to typical efficiencies of 75-80%, maximizing sugar extraction from your grains.
- Built-in Chiller: Most all-in-one systems come with a counterflow or immersion chiller, further streamlining the process. This means your entire brew day, from mash to chill, can often be managed within one compact unit.
With these electric brewers, you simply add mash water, heat it to temperature, and stir in your grains within the grain basket. After an hour-long mash with recirculation, the grain basket is raised, allowing the wort to drain. Sparging is usually done by pouring hot water over the grains. Once the grains are removed, the wort is brought to a boil for hop additions, then quickly chilled using the integrated system, and finally transferred to your fermenter. Their portability means you can brew anywhere with an electrical outlet, even on your deck while barbecuing, as Paul mentions.
Understanding these different levels of homebrewing equipment and processes empowers you to choose the path that best suits your budget, space, and commitment. Whether you’re making your very first batch with a simple kit or meticulously crafting a complex recipe on an all-in-one system, the joy of homebrewing lies in the creation itself.
Raise a Glass: Your Brewing Questions Answered
What essential equipment do I need to start homebrewing?
To begin homebrewing, you primarily need a food-grade fermenter (like a plastic pail), cleaners and sanitizers, bottling equipment (wand and spigot), bottles, and bottle caps. A basic beer kit will provide the ingredients you need.
Why is cleaning and sanitizing crucial for homebrewing?
Cleaning removes visible grime, while sanitizing eliminates microscopic organisms that can spoil your beer or cause off-flavors. Skipping this step is a recipe for an unsuccessful batch.
What is the simplest way for a beginner to make beer at home?
The easiest way to start is by using a basic beer kit, such as a Festa or Coopers kit. These kits come with pre-hopped malt extract and yeast, making the brewing process very straightforward with minimal equipment.
What are carbonation drops and how do they help with bottling?
Carbonation drops are pre-measured sugar tablets that you add to each bottle before capping. They provide a convenient way to carbonate your beer in the bottle, eliminating the need to stir priming sugar into the entire batch and reducing the disturbance of yeast sediment.