Brewing your own beer at home is a rewarding journey, transforming simple ingredients into a delicious, personalized beverage. The process, as demonstrated in the video above, might initially appear complex, yet it is merely a sequence of manageable steps: boiling, transferring, sanitizing, and waiting for yeast to perform its natural alchemy. For those embarking on this fascinating hobby, understanding the fundamental principles and meticulous execution of each stage is paramount, paving the way for consistent, high-quality results.
Unlike merely assembling a pre-made meal, homebrewing demands a measure of precision and patience, fostering a unique connection to the craft. This guide is designed to complement the visual instructions, delving deeper into the ‘why’ behind each action and offering additional insights that will elevate your brewing prowess from beginner to a more confident intermediate level. As you gain proficiency, the initial mystery surrounding beer creation will undoubtedly be replaced by an appreciation for the subtle art and science involved in producing your own distinctive brews.
Understanding the Homebrewing Process: From Wort to Craft Beer
The journey of homebrewing is typically delineated into three core stages: brewing day, fermentation, and bottling. Each stage, while distinct, is intricately linked, demanding attention to detail for a successful outcome. On brew day, raw ingredients are converted into “wort,” the sweet, unfermented liquid that will eventually become beer. This initial phase involves heating water, steeping grains for flavor and color, and boiling malt extract and hops to develop bitterness, aroma, and preservation qualities.
Subsequently, the cooled wort is introduced to yeast, initiating the transformative process of fermentation, where sugars are converted into alcohol and carbon dioxide. This biological conversion is often perceived as the most magical part of brewing, yet it is fundamentally a controlled scientific reaction. Finally, the fermented beer is packaged, typically in bottles, with a small addition of priming sugar to facilitate bottle conditioning, thus naturally carbonating the beer. Each of these phases, though seemingly straightforward, is governed by specific chemical and biological interactions that, when understood, demystify the entire procedure.
Essential Equipment for Home Beer Brewing
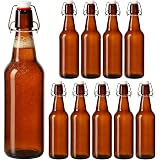
Before any brewing can commence, the right tools must be assembled. A comprehensive starter kit, like the Northern Brewer Big Mouth Bubbler system highlighted in the video, forms the bedrock of your homebrewing operation. However, several other items are indispensable. A large boil kettle, ideally capable of holding at least four to five gallons, is crucial for accommodating the boiling wort; stainless steel is often preferred for its durability and even heat distribution. Additionally, two cases of clean, pry-off, 12-ounce brown beer bottles are required for packaging your finished product. Brown glass is specifically recommended because it offers superior protection against UV light, which can cause “skunky” off-flavors in beer.
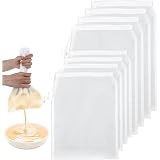
Beyond these foundational elements, a recipe kit provides all the necessary consumables: malt extract, hops, and yeast. Malt extract, which comes in both liquid (LME) and dry (DME) forms, supplies the fermentable sugars. Hops contribute bitterness, flavor, and aroma, with specific varieties chosen for different beer styles. Yeast, the microscopic heroes of brewing, are available as either liquid cultures or dry packets, each offering unique fermentation characteristics. Furthermore, specialty grains, often included in a muslin bag, contribute additional layers of color, body, and complex flavors to your beer, allowing for subtle customization of the final product.
Mastering Your Brew Day: From Steeping to Cooling
Brew day is an exhilarating period, filled with anticipation and the aromatic promise of future beers. The initial preparations, such as unboxing your starter kit and carefully reviewing the recipe instructions, are crucial for a smooth process. If liquid yeast is to be used, especially a “smack pack,” activating it early by rupturing the inner nutrient pouch ensures the yeast is vibrant and ready for pitching. This preliminary step significantly contributes to a vigorous and healthy fermentation.
Heating two and a half gallons of quality drinking water in your boil kettle marks the beginning of the brewing sequence. For recipes incorporating specialty grains, these are steeped in a muslin bag as the water heats. This process, often referred to as “mashing in a bag,” extracts complex sugars and desirable flavor compounds without the need for a full mash tun. Steeping should ideally continue for about 20 minutes or until the water temperature reaches approximately 170 degrees Fahrenheit, whichever occurs first. It is important that the grain bag is lifted and allowed to drain without squeezing; squeezing can extract undesirable tannins, leading to an astringent taste in the finished beer. Once the grains are removed, the kettle is brought to a boil.
Before the wort reaches a rolling boil, the heat must be turned off to safely incorporate the malt extract. Liquid malt extract, in particular, has a tendency to scorch if it settles on the hot bottom of the kettle, resulting in burnt flavors that can ruin an entire batch. After the extract is thoroughly dissolved by stirring, the heat is reapplied, bringing the mixture to a vigorous boil for the stipulated 60 minutes. Throughout this boil, hop additions are precisely timed according to the recipe sheet, typically added at various intervals to achieve different effects: early additions for bitterness, middle additions for flavor, and late additions for aroma. Vigilance is advised during the boil, as sugary wort can easily foam over, creating a sticky and hazardous mess. Should a boil-over occur, the heat must be immediately reduced or removed, and the area cleaned before resuming. Once the 60-minute boil is complete and all additions have been made, the wort must be rapidly cooled to 80 degrees Fahrenheit or below. This quick cooling, often accomplished with a cold-water bath, is vital for several reasons: it minimizes the risk of bacterial infection and helps to create a clear beer by encouraging proteins to coagulate and settle out, a phenomenon known as the “cold break.”
The Crucial Role of Sanitization in Homebrewing Success
While the wort is cooling, attention must be shifted to the most critical step in the entire brewing process: sanitization. Neglecting this stage inevitably leads to off-flavors or even spoiled batches. Every piece of equipment that will come into contact with the cooled wort or beer—from the fermenter and airlock to the siphon and bottling bucket—must be meticulously cleaned and sanitized. Sanitization, contrary to popular belief, is distinct from mere cleaning; cleaning removes visible dirt and grime, whereas sanitization eradicates microscopic organisms that could otherwise contaminate your brew.
A typical no-rinse sanitizer, such as those included in most starter kits, requires only a brief contact time, often around two minutes, to be effective. It is absolutely imperative that once equipment has been sanitized, it is not rinsed with plain water, as this would reintroduce potential contaminants. Some sanitizers, when diluted, produce a substantial amount of foam; however, this foam is harmless to your beer and will not impart any unwanted flavors or aromas. Therefore, there is no need to fear the foam. Ensuring every surface is adequately exposed to the sanitizing solution is a non-negotiable step that underpins the entire brewing endeavor, safeguarding the integrity and flavor profile of your homemade beer.
Navigating Fermentation for Your Homebrew
With the wort cooled and the equipment sanitized, the transformation truly begins. The cooled wort is carefully transferred into the primary fermenter, leaving behind any thick sludge (trub) accumulated at the bottom of the kettle. This initial volume is then topped up to five gallons with cool, potable water, ensuring the fermenter is at room temperature to prevent thermal shock to the yeast. Oxygenation, typically achieved by rocking the fermenter back and forth for several minutes, is also crucial at this stage; yeast require oxygen initially to reproduce and grow strong cell walls before they begin anaerobic fermentation.
The chosen yeast strain, whether dry or pre-activated liquid, is then pitched into the wort. Dry yeast can be sprinkled directly, whereas liquid yeast, if previously activated, should show signs of inflation in its smack pack, indicating its vitality before being poured in. An airlock, filled with sanitizer solution, is then fitted to the fermenter, allowing carbon dioxide to escape while preventing airborne contaminants from entering. Within a day or two, evidence of fermentation becomes visible: a foamy head, known as “krausen,” will form on the beer’s surface, and bubbles will steadily emerge from the airlock. Krausen is a positive sign of healthy yeast activity; however, excessive krausen can lead to “blow-off,” where foam escapes through the airlock. Should this occur, a sanitized blow-off hose can be attached, diverting the foam into a separate bucket of sanitizer, protecting the beer from external exposure.
Primary fermentation typically lasts one to two weeks, during which the majority of sugars are converted. Following this, the beer may be transferred to a secondary fermenter, a process known as “racking.” While not strictly necessary for all beers, secondary fermentation, usually lasting an additional two to four weeks, allows the beer to clarify further, mellow, and age without being exposed to the yeast sediment (trub) from primary fermentation. Minimizing splashing during racking is critical to prevent oxygen uptake, which can lead to unwanted oxidative flavors, often described as papery or stale. By understanding these stages and their nuances, the brewer ensures a robust and clean fermentation, setting the stage for a truly exceptional homebrew.
Bottling and Conditioning Your Homemade Beer
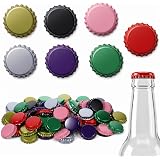
The final stage in the homebrewing journey involves bottling and conditioning your beer, a process that imbues it with effervescence and helps refine its flavor profile. As with previous stages, meticulous sanitization of all bottling equipment – including the bottling bucket, siphon, bottle filler, hose, bottles, and caps – is non-negotiable. Glass bottles must be pry-off type, clean, and thoroughly sanitized for the recommended contact time before being filled. Brown bottles, as mentioned, are preferred for their protective qualities against light. Importantly, sanitized equipment should not be rinsed with plain water, to avoid reintroducing potential contaminants.
Before transferring the beer, a priming solution must be prepared. This typically involves dissolving five ounces of priming sugar (such as corn sugar or dextrose) in 16 ounces of water, bringing it to a boil, and then allowing it to cool slightly before adding it to the sanitized bottling bucket. This measured dose of sugar will facilitate a small, controlled secondary fermentation within the sealed bottles, generating the carbon dioxide necessary for carbonation. The fermented beer is then carefully siphoned from the fermenter into the bottling bucket, ensuring minimal splashing to prevent unwanted oxidation. Once transferred, the primed beer is gently stirred to ensure an even distribution of the sugar solution, which is crucial for uniform carbonation across all bottles.
Bottles are then filled using a bottle filler attached to the bottling bucket spigot, leaving approximately one inch of headspace in each bottle. This headspace is vital for allowing the CO2 to accumulate and for preventing pressure buildup that could potentially burst the bottles. Each bottle is then sealed with a sanitized cap using a bottle capper, ensuring a tight crimp. Post-capping, the bottles are moved to a dark space, ideally around 68 degrees Fahrenheit, for one to two weeks for conditioning. During this period, the yeast consumes the priming sugar, carbonates the beer, and allows flavors to meld. Your homebrew, being “bottle conditioned,” will contain a thin layer of yeast sediment at the bottom of each bottle; this is a natural byproduct and a hallmark of unfiltered, living beer. When serving, the beer should be poured slowly and carefully into a clean glass, leaving the yeast layer behind, allowing the full clarity and intended flavors of your handcrafted beer to be enjoyed.
Brewing Up Answers: Your Homebrewing Q&A
What is homebrewing?
Homebrewing is the rewarding process of making your own beer at home by transforming simple ingredients into a delicious, personalized beverage through various steps like boiling, fermentation, and bottling.
What are the main stages of making beer at home?
The homebrewing journey is typically divided into three core stages: brewing day (creating the unfermented liquid called ‘wort’), fermentation (where yeast converts sugars to alcohol), and bottling (packaging and carbonating the beer).
Why is sanitization so important in homebrewing?
Sanitization is the most critical step because it removes microscopic organisms that can contaminate your beer, preventing off-flavors or even spoiling an entire batch. It is different from just cleaning.
What is ‘wort’ in homebrewing?
Wort is the sweet, unfermented liquid that is created on brew day by steeping grains and boiling malt extract and hops. It is essentially unfermented beer before yeast is added to it.
Why do you add priming sugar when bottling homemade beer?
Priming sugar is added to the beer before bottling to facilitate a small, controlled secondary fermentation inside the sealed bottles. This process naturally generates carbon dioxide, which carbonates the beer and gives it effervescence.