For many passionate homebrewers, the quest for a more efficient and enjoyable brewing experience is perpetual. In fact, a significant portion of time and effort in homebrewing is often dedicated to tasks that, with a few clever adjustments, could be made considerably simpler. The video above highlights five fantastic ways to achieve just this, but the underlying principles and expanded applications of these homebrewing hacks offer even greater advantages for simplifying your entire brewing process.
Whether you are a newcomer to the craft or an experienced brewer seeking to refine your methods, embracing smart homebrewing hacks can transform your brew day from a lengthy chore into a streamlined, satisfying endeavor. Rather than contending with tedious tasks, your focus can be shifted to the creative aspects of beer making. Let’s delve deeper into how these practical tips can be integrated into your routine, offering not just ease but also improved consistency and quality in your homemade brews.
Streamlining Transfers: The Power of Spigots and Ball Valves
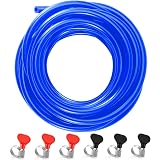
The traditional auto-siphon, while functional, is often a point of frustration for many homebrewers. It involves priming, careful manipulation to avoid disturbing sediment, and often leads to a messy transfer experience. However, a far more elegant solution is available: installing spigots or ball valves directly onto your brewing vessels. This seemingly simple upgrade significantly enhances the ease and hygiene of liquid transfers.
For plastic fermenters, such as food-grade buckets, the installation of plastic spigots is surprisingly straightforward and inexpensive. A hole of the appropriate diameter is drilled near the bottom, and the spigot, complete with rubber gaskets and a nut, is securely fastened. This modification allows for gravity-fed transfers, eliminating the need for siphoning entirely. Similarly, kettles can be outfitted with durable stainless steel ball valves, which offer precise control over the flow of wort or water. This upgrade, while requiring slightly more effort and potentially a specialized drill bit, is a permanent fixture that pays dividends in convenience, as wort can be easily drained into a fermenter or chiller. Without the need for manual siphoning, less equipment is required for cleaning, and the risk of aeration or infection during transfer is inherently reduced.
Beyond Transfers: Unexpected Benefits of Spigots
The utility of spigots extends beyond just transferring large volumes of liquid. A key advantage is the ability to easily draw small samples of your fermenting beer without having to open the main lid. This minimizes oxygen exposure, which is detrimental to beer flavor and stability, and also reduces the risk of introducing airborne contaminants or wild yeasts. When samples are taken, the beer’s progress can be monitored more frequently, allowing for better tracking of fermentation and more accurate gravity readings. This capability is invaluable for maintaining strict quality control throughout the brewing process.
Furthermore, spigots simplify the process of “cold crashing” or adding fining agents, as the clarified beer can be drawn off cleanly from above the yeast cake. Rather than struggling with cumbersome lifting or tilting of heavy vessels, a gentle opening of the valve is all that is needed. The process of cleaning vessels with spigots is also made easier, as rinsing and drainage are far more efficient. It is often observed that cleaning tasks, which are a major part of the brewing process, are significantly expedited when vessels are equipped for easy drainage.
Sanitation Simplified: The Spray Bottle Game-Changer
Sanitation is, without question, the most critical aspect of homebrewing. A batch of beer, no matter how perfectly crafted, will quickly be ruined by unwanted bacteria or wild yeast if proper sanitation protocols are not followed. While large buckets of sanitizer solution are often prepared, they can be inefficient and wasteful for smaller, localized applications. In contrast, the use of a simple spray bottle filled with diluted sanitizer solution is a truly revolutionary homebrewing hack.
This method allows for “spot sanitizing,” providing a quick and effective way to treat specific pieces of equipment just before they come into contact with wort or beer. For instance, if a piece of tubing is dropped or a lid is briefly removed, a quick spray can instantly re-sanitize the surface. Tubing, airlocks, stoppers, and the rims of fermenters can all be swiftly treated with a fine mist. Unlike dipping items into a large bucket, where excess solution is often wasted, a spray bottle delivers a precise, controlled application. It is generally recommended that distilled water be used when preparing sanitizer solutions for spray bottles, as the absence of minerals extends the effective life of the solution, ensuring it remains active and ready for use for an extended period. This small investment can prevent many headaches down the line.
The Everyday Utility of a Sanitizer Spray Bottle
Think of the spray bottle as your brewing day utility tool. It allows for quick, on-the-fly sanitation, much like a superhero’s quick-draw gadget. Imagine this: a fitting is about to be connected, or a hydrometer is needed for a gravity reading. Instead of interrupting your flow to find a sanitizer bucket, a swift spritz from the bottle ensures the item is ready. This seamless integration of sanitation into every step of the brew day significantly reduces the chance of contamination. When small parts or tools are needed, they can be given a quick sanitizing mist rather than being fully submerged.
Moreover, the spray bottle is invaluable during bottling or kegging. Bottle necks can be misted right before filling, and keg parts can be easily sanitized as they are assembled. The convenience and efficiency gained from this simple tool far outweigh its minimal cost, which is typically around $1 for the bottle itself. Rather than constantly making fresh batches of sanitizer, a well-prepared spray bottle can be kept on deck, always ready to protect your precious brew from microbial invaders. Its presence simplifies a critical, often cumbersome, step in the homebrewing process.
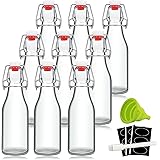
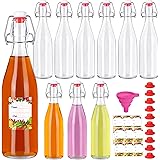
Effortless Bottle Prep: PBW’s Label Magic
Many homebrewers embrace the eco-friendly and cost-saving practice of reusing glass bottles. However, the enthusiasm often wanes when it comes to label removal. Hot water soaking can be somewhat effective for some adhesives, but it frequently leaves stubborn residue, requiring laborious scraping and scrubbing. This tedious task can easily consume hours, dampening the joy of bottling. Fortunately, a powerful ally in the form of Powdered Brewery Wash (PBW) offers a miraculous solution to this common frustration.
PBW is a highly effective, oxygen-based cleaner designed for brewing equipment, but it possesses a unique property that makes it exceptionally good at dissolving bottle label adhesives. When bottles are soaked in a hot PBW solution for approximately 15 minutes, a remarkable transformation occurs: labels, even the most recalcitrant ones, simply slide off with minimal effort. This process is not just about convenience; it also ensures that bottles are thoroughly cleaned and ready for sanitization, addressing both exterior and interior cleanliness in one swift operation. The chemical action of PBW safely breaks down organic residues and adhesives, leaving behind pristine glass surfaces ready for their next batch of beer.
Optimizing Your Bottle Cleaning Routine
The efficiency of PBW for label removal truly shines when it is incorporated into a batch cleaning process. Instead of struggling with labels one by one as bottles are collected, it is far more effective to save a quantity of bottles and tackle them all at once. A large bucket or tote can be filled with a hot PBW solution, and bottles can be submerged. After the recommended soaking time, the labels will easily detach, often floating free in the solution. This method dramatically reduces the time and physical effort previously associated with bottle preparation.
The dual action of PBW—cleaning the inside of bottles while simultaneously stripping labels—makes it an indispensable tool for any homebrewer who reuses bottles. This eliminates the need for separate scrubbing agents or abrasive pads, which could potentially scratch the glass. Rather than dreading the bottling process due to label woes, the satisfaction of perfectly clean, label-free bottles can now be a reality. This simple homebrewing hack not only saves time but also promotes a more consistent and professional aesthetic for your bottled beers, reflecting the care taken in their creation.
Reclaiming Your Time: Shortening Your Brew Day
For many homebrewers, the length of a typical brew day—often stretching to five hours or more—is a significant barrier. Fitting such a commitment into a busy schedule can be challenging, with much of that time spent waiting during the mash and boil phases. However, through modern brewing science and practical experience, it has been shown that these traditional timeframes can often be significantly reduced without compromising beer quality. This particular homebrewing hack is about intelligent optimization, not cutting corners.
Modern beer grains are highly modified, meaning the enzymes within them are very efficient at converting starches to fermentable sugars. Research and practical trials indicate that a substantial portion of this conversion in the mash occurs within the first 20-30 minutes, rather than the traditional 60-90 minutes. Similarly, while a 60-90 minute boil is standard, its primary functions are to isomerize hops for bitterness, sanitize the wort, and concentrate the liquid. If specific bitterness levels and volume targets can be achieved in less time, a shorter boil is perfectly acceptable. For example, a 30-45 minute boil can often suffice, especially when using modern hop products that offer efficient bitterness extraction. Reducing these lengths slightly is often unnoticed in the final product, but the time savings are substantial.
Strategies for a More Efficient Brew Day
To successfully shorten your brew day, a strategic approach is recommended. If mash efficiency is a concern with a reduced mash time, a slight increase in the grain bill (perhaps 5-10%) can easily compensate for any minor drop in sugar conversion. This minimal adjustment often costs very little in terms of ingredients but saves considerable time. In terms of the boil, if less bitterness from hops is a concern due to a shorter boil, the addition of a few extra hop pellets can easily boost the International Bitterness Units (IBUs) to the desired level. This targeted adjustment allows for flavor profiles to be maintained even with a reduced boil length.
It is worth noting that some styles, particularly those requiring specific complex mash schedules or very high hop utilization, might still benefit from longer periods. However, for the vast majority of common beer styles, these time reductions can be implemented with confidence. The key is to experiment gradually, perhaps by reducing mash and boil times by 10-15 minutes initially, and observing the results. The time saved can free up your schedule, making homebrewing a more accessible and less daunting hobby. Rather than rigidly adhering to historical norms, a flexible approach to mash and boil times can unlock a world of brewing convenience, allowing more time for enjoyment or other pursuits.
Precision Flavor: Dosing Adjuncts with a Syringe
Adding adjunct flavors to beer, such as fruit extracts, vanilla, spices, or tinctures, is a popular way to customize brews. However, achieving the perfect balance of flavor can be challenging. Many homebrewers either “wing it,” adding ingredients by intuition, or struggle with imprecise measurements, often leading to over- or under-dosing. Over-dosing, in particular, can be devastating, masking all the hard work that went into brewing the base beer. To avoid this common pitfall, a precision tool, often found in pharmacies or culinary settings, offers an elegant solution: the dosing syringe.
Dosing syringes, which measure in milliliters, provide an extremely accurate way to scale up flavor additions. The method is straightforward and highly effective. First, several equal samples of the finished beer are taken (e.g., 50ml each into separate small glasses). Then, using the syringe, exact milliliters of the flavor adjunct are added to each sample in varying amounts (e.g., 0.1ml to the first, 0.2ml to the second, and so on). This controlled experiment allows for a precise taste test to identify the ideal ratio of adjunct to beer. Once the perfect dose is determined for the sample, it can be mathematically scaled up to the entire batch, ensuring consistency and preventing disappointment.
Mastering Flavor Profiles with Precision
This method transforms the addition of adjuncts from a speculative step into a scientific one. The guesswork is removed, replaced by empirical data derived from sensory evaluation. For delicate flavors like vanilla bean extract or specific fruit purees, where a little goes a long way, this precision is indispensable. Without a precise method, it is often difficult to replicate successful batches or adjust recipes with confidence. The consistency achieved through syringe dosing allows for a deeper understanding of how different adjuncts impact the beer’s overall profile.
Moreover, the cost of a dosing syringe is negligible, typically just a few dollars, making it an accessible upgrade for any homebrewer. Rather than risking an entire batch of beer by guessing, a small investment in a syringe ensures that your carefully crafted flavors are perfectly balanced. This homebrewing hack ensures that the integrity of the base beer is preserved while the intended flavor additions enhance, rather than overwhelm, the drinking experience. The result is a more polished and enjoyable beer, precisely tailored to your desired taste.
Uncorking Answers: Your Home Brewing Hack Q&A
Why should I use homebrewing ‘hacks’?
Homebrewing hacks can make your brewing process simpler, more efficient, and more enjoyable. They help streamline tasks, allowing you to focus on the creative aspects of making beer.
How can I make transferring my beer or wort easier?
You can install a spigot or ball valve directly onto your brewing vessels. This allows for gravity-fed transfers, eliminating the need for traditional siphoning and reducing mess.
What’s an easy way to sanitize small pieces of brewing equipment?
Keep a spray bottle filled with diluted sanitizer solution handy. This allows for quick ‘spot sanitizing’ of items like tubing, airlocks, or container rims just before use.
Is there a simple method to remove labels from bottles I want to reuse?
Yes, soak your bottles in a hot solution of Powdered Brewery Wash (PBW) for about 15 minutes. The labels will often slide right off, and the bottles will be cleaned inside and out.