Unlocking Efficient Brew Days: Advanced Time-Saving Tips for Home Brewers
It happens to almost every homebrewer. You block out a precious Saturday, ingredients are meticulously laid out, and the kettle begins to heat, only for an unexpected family emergency, a sudden work obligation, or simply the relentless march of daily life to demand your attention. Consequently, that eagerly anticipated brew day often feels rushed, incomplete, or perhaps even postponed indefinitely. This scenario, unfortunately, is a common frustration for enthusiasts who simply wish to indulge in their passion without sacrificing every other aspect of their busy lives. Fortunately, there are many effective strategies to streamline the homebrewing process, enabling you to enjoy your hobby without constant stress or time pressure. The accompanying video, presented by Trent Musho, delves into practical techniques designed to significantly shorten your homebrewing schedule. These aren’t just minor adjustments; they are impactful shifts in process that can reclaim hours from what traditionally has been a very lengthy endeavor. By implementing these ingenious **time-saving tips for home brewing**, you can transform your approach to beer making, ensuring that a quick brew day becomes a regular, enjoyable possibility rather than a rare, stressful event. Let us explore these methods further, expanding upon how each can contribute to a more efficient and enjoyable brewing experience.Strategic Pre-Brew Preparation: The Power of ‘Mise en Place’
One of the most profound ways to enhance brew day efficiency is through diligent preparation the night before. This concept, often referred to as “mise en place” in the culinary world, involves having all your ingredients and equipment meticulously prepared and organized before the primary action begins. For an all-grain brewer, this might entail a significant amount of upfront work, including weighing and crushing specialty grains, precisely measuring hop additions, preparing any necessary salt adjustments, and even making a yeast starter. Consequently, dedicating time to these tasks the evening before can prevent frantic searching or potential errors on the actual brew day. Such meticulous pre-planning ensures that when the morning arrives, your focus can remain entirely on the brewing process itself, rather than on gathering scattered components. It is worth noting that crushing grains in advance will not compromise the flavor or quality of your final beer, as long as they are stored properly. Furthermore, having your water ready in the kettle can shave off significant heating time. This preparatory phase effectively shifts time-consuming steps from the heart of your brew day to a less critical period, thereby allowing for a smoother, quicker, and more enjoyable overall brewing experience.Optimizing Mash and Boil Durations: Challenging Brewing Dogma
Traditional homebrewing wisdom frequently dictated a minimum 60-minute mash and a subsequent 60-minute boil, treating these durations as sacrosanct. However, contemporary brewing practices reveal considerable flexibility within these parameters, offering substantial opportunities for **speeding up homebrewing**. For instance, the conversion of starches to fermentable sugars during the mash primarily occurs within the initial 15 to 20 minutes. Therefore, while a shorter mash might slightly impact mash efficiency, necessitating a minor adjustment to your grain bill, the overall flavor profile of the beer can remain exceptional. Similarly, the conventional 60-minute boil is not an unbreakable rule and can often be shortened without detrimental effects. The length of the boil is primarily determined by your desired hop characteristics and the need to reduce DMS (dimethyl sulfide), an off-flavor often described as cooked cabbage or creamed corn. However, with modern, highly modified malts, the risk of DMS formation is significantly reduced, even with shorter boils. If your primary goal is hop flavor and aroma rather than bitterness extraction, a shorter boil is certainly viable, though it may require increasing the quantity of later hop additions to achieve the desired International Bitterness Units (IBUs). Experimentation with these timings can reveal a surprisingly quick brew day without compromising beer quality.Maximizing Downtime: The Efficiency of Concurrent Cleaning
Cleaning is an undeniable, yet often dreaded, aspect of homebrewing. The prospect of tackling extensive cleaning tasks at the culmination of a long and satisfying brew day can be particularly unappealing, frequently leading to procrastination or a less thorough job. Therefore, integrating cleaning into the brewing process during periods of inactivity, or “downtime,” is an exceptionally effective strategy for **homebrew efficiency**. For example, while your wort is boiling, even if for a reduced 10-minute duration, there are ample opportunities to wash and put away smaller tools, containers, or even begin tidying your brewing area. This proactive approach ensures that by the time the actual brewing concludes, a substantial portion of the cleanup is already complete. The psychological benefit of this method is also considerable; finishing a brew day knowing that the majority of the cleanup is behind you can significantly enhance the overall enjoyment of the hobby. Consequently, a seemingly small act of washing a few items during a short waiting period accumulates into substantial time savings, contributing to a much faster and less arduous completion of your homebrewing tasks.Accelerating Cooling: The Role of Wort Chillers and No-Chill Methods
The chilling phase, following the boil, can often feel like an interminable wait, especially when anticipation for pitching yeast is high. Investment in a high-quality wort chiller is a significant step towards **faster beer brewing**. Immersion chillers, plate chillers, or counterflow chillers are designed to rapidly reduce the temperature of your hot wort to yeast-pitching levels. While the initial financial outlay for superior chilling equipment might seem daunting, the time saved on each brew day can quickly justify the expense for those who highly value their time. Conversely, for brewers seeking to completely eliminate the active chilling process, the “no-chill” method offers an intriguing alternative. This technique involves transferring the hot wort directly into a sanitized, heat-resistant container, which is then sealed and allowed to cool slowly over several hours, often overnight, in a controlled environment like a fermentation chamber or refrigerator. This method drastically reduces active brew day time, eliminating the need for constant monitoring of water flow and temperature. However, careful handling of hot wort is paramount for safety, and minor adjustments to hop schedules may be considered to account for the extended hot contact time in the sealed vessel.Revolutionizing Fermentation: The Power of Kveik Yeast
Fermentation, traditionally, is a waiting game. Typical ale yeasts might require a week or more at standard temperatures, while lagers demand even longer durations at cooler temperatures. However, the advent of Kveik yeast has dramatically reshaped expectations for fermentation timelines, offering an unprecedented opportunity for **quick brewing**. Kveik, a unique family of Norwegian farmhouse yeasts, thrives at unusually warm temperatures, often ranging from 70°F to over 90°F (21°C to 32°C), without producing undesirable off-flavors commonly associated with other yeasts fermenting at high temperatures. The most remarkable characteristic of Kveik is its incredibly rapid fermentation rate; some strains can complete primary fermentation in as little as 24 to 48 hours. This accelerated activity is due to Kveik’s highly efficient metabolic processes at elevated temperatures, converting sugars to alcohol with astonishing speed. For instance, a cider could be fully fermented in just a day and a half, a timeline previously considered impossible. Consequently, utilizing Kveik yeast is a game-changer for brewers aiming to produce beer with unparalleled speed, enabling a significantly faster turnaround from brew day to tasting.Expedited Carbonation: The Advantages of Kegging Over Bottling
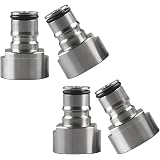
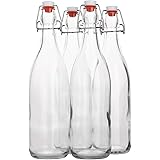
For many beginner brewers, bottling serves as an accessible and cost-effective method for packaging their finished beer. While bottling can be practically free if used bottles are readily available, the process itself is time-intensive, requiring individual filling and capping of each bottle. Furthermore, the natural carbonation process in bottles typically necessitates a waiting period of approximately two weeks for adequate pressure buildup and fizziness. This extended wait can be a significant hurdle for those desiring a swift enjoyment of their homebrew. In contrast, kegging offers a vastly superior option for **streamlining brew day** and accelerating carbonation. A single keg can be filled much faster than dozens of bottles, drastically reducing packaging time. More importantly, using a CO2 tank and regulator allows for forced carbonation, which is profoundly quicker than bottle conditioning. Even at the slowest setting, a kegged beer can be fully carbonated within a week. For even faster results, burst carbonation techniques, such as setting the pressure to 50 PSI for 12 hours or 30 PSI for 24 hours, can yield a nearly perfectly carbonated beer within a single day. The “crank and shake” method, involving shaking the keg at 30 PSI for merely 10 minutes, represents perhaps the most dramatic **time-saving tips for home brewing** in terms of carbonation, delivering immediate results.Your Home Brewing Efficiency: Questions & Answers
What does ‘mise en place’ mean for home brewing?
‘Mise en place’ means preparing all your ingredients and equipment the night before brew day, such as weighing grains and hops, so you can focus entirely on brewing when you start.
Can I reduce the time spent mashing or boiling my beer?
Yes, you can shorten the mash to 15-20 minutes, as most starch conversion happens early, and the boil can also be reduced, especially with modern malts, without sacrificing quality.
What is Kveik yeast and how does it save time?
Kveik is a special Norwegian yeast that ferments beer incredibly fast, often in 24-48 hours, even at warm temperatures, which drastically reduces the fermentation waiting period.
How can I carbonate my homebrewed beer more quickly?
Kegging your beer allows for forced carbonation using a CO2 tank, which is much faster than bottle conditioning and can carbonate beer in as little as a day using quick techniques.