Have you ever considered diving into the rewarding world of crafting your own beer? As you’ve seen in the accompanying video, brewing a delicious American Amber Ale at home using a kit like Brewer’s Best can be an accessible yet deeply satisfying endeavor. While the video provides an excellent visual guide to the practical steps involved, understanding the underlying principles can elevate your brewing game and ensure consistently high-quality results.
This comprehensive guide delves deeper into the intricacies of brewing an American Amber, expanding on the techniques demonstrated in the video. We will explore the critical scientific and technical considerations at each stage, from preparing your wort to the final conditioning and enjoyment of your homemade brew. By grasping these expert-level insights, you can move beyond simply following instructions to truly mastering the art of homebrewing.
The Foundations of an Exceptional Homebrew
Before any wort is boiled or yeast is pitched, successful homebrewing hinges on two fundamental pillars: preparation and sanitization. The Brewer’s Best American Amber kit provides a solid starting point, equipping brewers with essential ingredients. However, the brewer’s meticulous attention to detail during setup dictates the purity and character of the final product.
Unpacking Your Brewer’s Best American Amber Kit
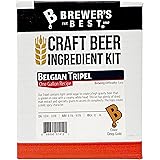
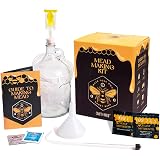
The Brewer’s Best American Amber kit, as highlighted in the video, typically includes key components vital for crafting this popular style. These usually encompass malt extract (liquid and/or dry), specialized grains for steeping, Willamette hops, brewing yeast, and priming sugar for carbonation. Each element plays a crucial role: the malt extracts and steeped grains provide fermentable sugars, body, and color; the Willamette hops contribute bitterness, flavor, and aroma; the yeast converts sugars into alcohol and carbon dioxide; and the priming sugar facilitates natural carbonation in the bottle.
The Imperative of Sanitization in Homebrewing
A critical, non-negotiable step in homebrewing is thorough sanitization. As demonstrated in the video, cleaning and sanitizing all equipment that will come into contact with your wort post-boil is paramount. While cleaning removes visible debris, sanitization eliminates microscopic organisms like wild yeasts and bacteria that could otherwise spoil your beer, leading to off-flavors, haze, or even complete loss of the batch. The brewer’s use of a 1:16 dilution ratio for their sanitizer is a standard practice, ensuring a hostile environment for contaminants.
Crafting the Wort: From Steep to Boil
The initial phase of brewing involves creating the “wort” – the sugary liquid that will eventually become beer. This process extracts sugars and flavors from grains and integrates hop characteristics, establishing the foundational profile of your American Amber.
Precision Grain Steeping for Flavor and Color
The video demonstrates the steeping of specialty grains, a technique crucial for developing the characteristic color and nuanced malt flavors of an American Amber. During this process, grains are submerged in hot filtered water, ideally maintained between 150-165°F (65-74°C), for approximately 20-30 minutes. This temperature range is optimal for extracting complex sugars, dextrins, and melanoidins that contribute to the beer’s body, mouthfeel, and rich amber hue without extracting undesirable tannins. It is advisable not to squeeze the grain bag excessively, as this can release astringent tannins, imparting an undesirable harshness to the beer.
The Vigorous Boil and Strategic Hop Additions
Following grain steeping, the wort is brought to a slow rolling boil. The boil serves multiple critical functions: it sterilizes the wort, coagulates proteins that can cause haze (the “hot break”), drives off undesirable volatile compounds like dimethyl sulfide (DMS), and facilitates hop isomerization. Hop isomerization is the chemical process where alpha acids in hops are converted into iso-alpha acids, primarily responsible for bitterness. The video details two hop additions: the first early in the boil for bitterness, and the second after 30 minutes, likely contributing more to flavor and aroma. A typical total boil time for such kits is often around 60 minutes, with the timing of hop additions precisely dictating the balance of bitterness, flavor, and aroma in the final American Amber.
Cooling and Fermentation: The Yeast’s Domain
Once the boil is complete, the wort transitions into the fermentation phase, where yeast transforms the sugary liquid into alcoholic beer. This stage requires careful temperature control and proper yeast management.
Rapid Wort Chilling for Optimal Fermentation
After the boil, the wort must be cooled rapidly to a suitable temperature for yeast pitching, typically between 60-70°F (15-21°C). While the video’s brewer opts for a passive cooling method, recommending an ice bath or, ideally, a wort chiller, rapid cooling is preferred. Prompt chilling minimizes the risk of bacterial contamination during the vulnerable cooling phase and facilitates the “cold break,” where proteins and polyphenols precipitate out, contributing to clearer beer. Slower cooling can also produce off-flavors, so expediting this step is a professional brewing practice.
Setting Up Primary Fermentation and Yeast Pitching
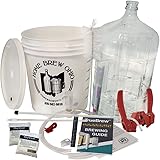
With the wort chilled, it is siphoned into a sanitized fermenter, which, as demonstrated, can be topped off with filtered water to reach the target volume, often around 23 liters. This ensures the correct specific gravity for the target ABV. Pitching the yeast—introducing it to the wort—is a pivotal moment. The video highlights rehydrating the yeast in a bowl with water for five minutes before stirring it into the wort. This rehydration process revitalizes the dormant yeast cells, preparing them for an efficient and healthy fermentation, crucial for preventing sluggish fermentation and off-flavors like diacetyl or acetaldehyde. The fermenter is then sealed with an airlock, allowing CO2 to escape while preventing oxygen and contaminants from entering, initiating a primary fermentation period of “a couple weeks.”
Bottling and Conditioning: The Final Transformation
After primary fermentation concludes, the beer is prepared for packaging. This involves priming for carbonation and allowing it to condition, a crucial phase for flavor development.
Sanitization for Bottling and Priming Sugar Preparation
Just as with the initial brewing equipment, all bottling equipment, including bottles, caps, and any siphoning tubes, must be meticulously sanitized. The video shows bottles being rinsed and air-dried after sanitization, a best practice to prevent contamination that could spoil the finished product. The priming sugar, typically dextrose, is then prepared by dissolving it in a small amount of hot water to create a syrup. This solution is introduced to the fermented beer (before bottling), providing a small amount of additional fermentable sugar. When bottled, the residual yeast consumes this sugar, producing carbon dioxide that carbonates the beer naturally within the sealed bottles.
Bottle Conditioning and Tasting Your American Amber
The beer, once bottled and capped, undergoes a crucial conditioning period. The brewer recommends “at least two weeks,” with “three to four weeks preferable” for optimal results. During this time, the yeast consumes the priming sugar, generating CO2 and carbonating the beer, while also refining its flavors. The initial tasting in the video, even after only a couple of weeks, reveals a “rich taste” and “decent amount of carbonation,” characteristic of a well-made American Amber. This style typically offers a balanced profile with noticeable malt sweetness, often caramel or toffee notes, and a moderate hop bitterness, with an estimated ABV around 5%.
Tapping into Knowledge: Your Homebrewing Q&A
What is included in a Brewer’s Best American Amber kit?
The kit typically includes malt extract, specialty grains for steeping, Willamette hops, brewing yeast, and priming sugar. These ingredients provide the sugars, flavor, bitterness, and carbonation for your beer.
Why is sanitization so important in homebrewing?
Sanitization is crucial to eliminate wild yeasts and bacteria that could spoil your beer. It prevents off-flavors, haze, and ensures the purity and quality of your homemade brew.
What is ‘wort’ in the brewing process?
The ‘wort’ is the sugary liquid created in the initial phase of brewing by extracting sugars and flavors from grains. This liquid is what the yeast will eventually ferment into beer.
Why do I need to cool the wort rapidly after boiling?
Rapid cooling minimizes the risk of bacterial contamination before fermentation and helps precipitate proteins for a clearer beer. Slow cooling can also lead to undesirable off-flavors.
How long does the beer need to condition after bottling?
After bottling, the beer needs to condition for at least two weeks, with three to four weeks being preferable. This period allows the beer to naturally carbonate and its flavors to fully develop.