The journey to crafting your own beer, from basic ingredients to a bubbling glass, might seem daunting at first. Yet, with the right guidance and a premium homebrew starter kit, it’s a wonderfully rewarding process. Did you know the entire beer-making process, including brew day, fermentation, and bottling, typically spans just three to four weeks? The initial “brew day” itself can be completed in about four hours, making it an accessible hobby for many.
This comprehensive guide complements the video above, offering a detailed look at how to make beer at home with your MoreBeer Premium Homebrew Starter Kit. We’ll break down each critical step, providing insights and practical tips to ensure your first batch is not only successful but also incredibly delicious. Imagine the satisfaction of pouring a cold, refreshing beer that you crafted yourself!
Embarking on Your Homebrewing Adventure
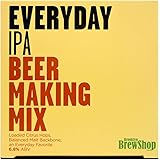
Before the real fun begins, meticulous preparation is essential. The video emphasizes reviewing your kit and instructions, but it’s worth reiterating: treating brewing like baking or any detailed craft ensures better results. Lay out all your components and familiarize yourself with the recipe. While the video showcases brewing a pale ale, the core steps remain consistent across various beer styles like IPAs, so understanding the process is key.
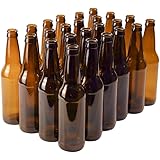
One crucial item not included in your kit is bottles. You’ll need about 50-54 standard glass bottles for a 5-gallon batch, preferably those designed for bottle caps rather than twist-offs. Start collecting these early from local breweries or recycling centers; you’ll have approximately two to three weeks before they’re needed for bottling day.
The Golden Rule: Cleaning and Sanitizing
Among all the steps in homebrewing, none is as vital as cleaning and sanitizing. Vito correctly hammers home this point, explaining that these are two distinct actions. Cleaning removes visible dirt and debris, while sanitizing eliminates unseen microorganisms like bacteria and wild yeast that could spoil your beer.
Imagine if you built a magnificent house but forgot to clean the foundations; eventually, problems would arise. Similarly, failing to properly clean *and then* sanitize your equipment can lead to off-flavors, infections, or even a completely undrinkable batch. Always clean thoroughly first, then sanitize. Keep your Star San solution (one ounce to five gallons of water) handy throughout the entire process. Remember, “don’t fear the foam” – Star San is a no-rinse sanitizer, and its foam is a sign it’s working effectively, dissipating harmlessly without impacting your beer’s flavor.
Brew Day Breakdown: From Water to Wort
Brew day is where the magic begins, transforming simple ingredients into a sweet liquid called wort. This takes roughly four hours. Here’s a deeper dive into the initial phases:
Selecting Your Water
Water constitutes the majority of your beer, making its quality paramount. As the video suggests, if you enjoy the taste of your tap water, it’s likely suitable. However, if your tap water has a strong chlorine taste or other undesirable notes, consider filtered or bottled water. A refrigerator’s built-in filter often effectively removes chlorine, which is beneficial since chlorine can interact with yeast to create medicinal off-flavors. You’ll need about six gallons for the entire brew day.
Steeping Grains: Infusing Flavor and Color
Once your water is in the kettle and heating, the next step is adding your steeping grains. These grains, usually specialty malts like crystal malt for a pale ale, contribute significantly to your beer’s flavor, aroma, and color. Think of it like making a large batch of tea: the grains infuse the hot water with their character.
It’s crucial to keep the temperature below 170 degrees Fahrenheit during this phase. Why? Exceeding this temperature can extract tannins from the grain husks, leading to an undesirable astringent or bitter taste in your finished beer. After about 30 minutes, or once the water approaches 170°F, remove the grain bag. Resist the urge to squeeze the bag too hard, as this can also extract tannins; simply let it drain over the kettle.
The Vigorous Boil: Malt Extract and Hops
With the steeping grains removed, it’s time to bring your “grain tea” up to a rolling boil, around 212°F at sea level. A rolling boil is characterized by vigorous, continuous bubbling, much like boiling pasta. Before adding your liquid malt extract (LME), turn off the heat source. This is vital to prevent scorching the thick, sugary LME as it sinks to the bottom of the kettle. Stirring gently as you pour helps integrate the extract and prevents it from sticking.
Once the LME is fully dissolved, turn the heat back on and return to a rolling boil. During this boil, you’ll observe what’s called the “hot break” – proteins in the wort coagulating and foaming at the surface. A gentle stir can help it settle. Crucially, never cover your kettle during the boil. Boiling allows volatile compounds to escape and concentrates the wort, both of which are essential for a clean-tasting beer.
Hops are added at various stages of the boil, each contributing different characteristics:
- Bittering Hops (60-minute addition): These are added early in the boil, usually for the full 60 minutes. The long boil time allows the alpha acids in the hops to isomerize, creating the bitterness that balances the sweetness of the malt.
- Aroma Hops (20-minute, 5-minute additions): Hops added later in the boil contribute more to the beer’s aroma and less to its bitterness, as their volatile aromatic compounds aren’t boiled off as extensively.
- Flameout Hops (0-minute addition): These hops are added immediately after the heat is turned off. With no boiling time, they contribute intense hop aroma and flavor without adding significant bitterness. Many kits, especially those for hoppy styles, will include these.
About 15 minutes before the end of the boil, you’ll often add a wort clarifier like Irish moss or a “kick tablet.” This helps bind proteins, leading to a clearer finished beer.
Chilling the Wort: Rapid Cooling for Clarity and Health
After the boil, the hot wort needs to be rapidly cooled to below 80°F before transferring to the fermenter. Your kit’s wort chiller, a heat exchanger, facilitates this by circulating cold water through a copper coil submerged in the hot wort. The slower the cold water flows, the more heat is extracted. While chilling, ensure the kettle remains covered once the temperature drops below 180°F. This is when the wort becomes susceptible to airborne bacteria and wild yeasts, making immediate coverage with a sanitized lid or foil essential to prevent infection. Imagine a pristine surgical environment; your cooled wort needs similar protection!
Fermentation: Where Wort Becomes Beer
Once chilled, the wort is transferred to your sanitized fermenter. It’s important to take an Original Gravity (OG) reading at this stage using your hydrometer. This measurement, taken at around 65-70°F, indicates the initial sugar content and is crucial for calculating your beer’s Alcohol By Volume (ABV) later on. The hydrometer measures the density of the liquid; a higher reading means more sugar.
Pitching the Yeast and the Fermentation Process
Yeast are the unsung heroes of brewing; they convert the sugars in the wort into alcohol and CO2. After sanitizing the yeast packet and scissors, carefully open the packet and add the yeast to the wort. Secure the lid and airlock, ensuring the airlock is filled with sanitizer or vodka. Give the fermenter a good shake for a minute or two; this aerates the wort, providing the oxygen yeast needs to multiply rapidly in its initial growth phase.
Place your fermenter in a cool, dark place. For most ales, an ideal temperature range is 65-68°F. Temperatures that are too high can cause yeast to produce undesirable off-flavors (like fruity esters or solventy notes), while temperatures that are too low can lead to sluggish fermentation. Consider placing your fermenter in a tub of cool water with a damp towel draped over it to help maintain a steady temperature, especially during the initial active fermentation phase.
Fermentation typically begins within 24-48 hours. You’ll see a foamy layer, known as the “krausen,” form on top of the beer, and bubbles will pass through your airlock. This active phase lasts roughly 3-4 days. Over the next week or so, the krausen will subside, and bubbling will slow. This is the “cleanup” phase, where yeast reabsorb some of the compounds they produced earlier, refining the beer’s flavor. Don’t rush this; letting it condition for the full two weeks helps ensure a well-rounded flavor profile.
Bottling: Capturing the Fizz
After two weeks of fermentation, it’s time to prepare for bottling. Before starting, move your fermenter to a slightly elevated position, like a tabletop, and let it sit for at least 20 minutes. This allows any disturbed sediment to settle, preventing it from transferring to your bottles.
The key to carbonated beer is “priming sugar,” a small amount of sugar that will undergo a mini-fermentation in the sealed bottles, creating CO2. Boil two cups of water with the priming sugar packet from your kit, then allow it to cool, covering it to maintain sanitation. Sanitize your bottling bucket (one ounce of Star San to five gallons of water), bottling wand, vinyl tubing, and all your bottle caps.
First, take a Final Gravity (FG) reading from a sample of your fermented beer. This reading, along with your OG, will be used to calculate your beer’s ABV. Ensure you take two consistent FG readings over 24-48 hours to confirm fermentation is truly complete.
Pour the cooled priming sugar solution into the sanitized bottling bucket. Then, using sanitized tubing, transfer your beer from the fermenter into the bottling bucket, allowing it to mix gently with the priming sugar. Avoid splashing to minimize oxygen exposure, which can lead to stale flavors.
Next, sanitize your bottles for at least one minute, then drain them thoroughly. Attach the sanitized bottling wand to your bottling bucket’s spigot. Fill each bottle, leaving about an inch of headspace, and then cap them immediately using your bottle capper. After capping, rinse any spilled beer from the outside of the bottles.
Store your bottled beer in a dark, cool place (around 65-70°F is ideal) for another one to two weeks. This “bottle conditioning” allows the yeast to consume the priming sugar, generating the beloved carbonation and fizz. Sunlight can cause a “skunked” off-flavor, so keeping them in cases or a dark closet is crucial. After two weeks, chill a bottle for 24 hours, then open it up to check for proper carbonation. If it’s fizzy with a nice head, your homemade beer is ready to be enjoyed!
Brewing Up Answers to Your Homebrew Questions
How long does it typically take to make beer at home?
The entire beer-making process, including brewing, fermentation, and bottling, usually spans three to four weeks. The initial ‘brew day’ itself can be completed in about four hours.
What is the most important rule in homebrewing?
The most vital rule is thoroughly cleaning and then sanitizing all your equipment. This removes unseen bacteria and wild yeast that could spoil your beer.
What are steeping grains and what do they do?
Steeping grains are specialty malts that infuse hot water with flavor, aroma, and color for your beer, similar to making tea. It’s important to keep the water temperature below 170°F during this step.
What happens during fermentation?
During fermentation, yeast converts the sugars in your sweet liquid (wort) into alcohol and carbon dioxide. This process typically lasts about two weeks in a cool, dark place.
Why do I need to add sugar when bottling my homemade beer?
You add a small amount of ‘priming sugar’ during bottling to create carbonation. This sugar undergoes a mini-fermentation inside the sealed bottles, generating the beloved fizz.