Embarking on the journey of homebrewing can often feel like navigating a complex labyrinth, with a myriad of equipment, ingredients, and processes to master. For many aspiring brewers, the initial hurdle seems formidable, making the dream of crafting their own beer appear out of reach. However, the advent of comprehensive brewing kits has effectively demystified this intricate hobby, transforming it into an accessible and immensely rewarding endeavor for beginners. The accompanying video provides an excellent visual walkthrough for those just starting out, illustrating how to brew a delightful American Pale Ale with ease.
This article serves as a deeper dive into the foundational principles and techniques showcased in the video, offering expanded insights into each crucial step of the ale brewing process. While the video presents the practical application, here, the underlying science and rationale behind each action are explored, enhancing one’s understanding of how quality ingredients and meticulous execution culminate in a truly satisfying homebrewed beer. From the critical importance of sanitization to the nuanced impact of hop additions, every element plays a pivotal role in creating a robust and flavorful brew.
Understanding Your Homebrewing Kit
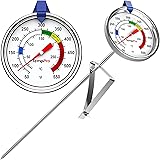
A typical homebrewing kit is meticulously assembled to provide all the specialized components required for a successful first batch, making the initial investment manageable and the learning curve gentle. As demonstrated in the video, essential items like a one-gallon demijohn (carboy) serve as the primary fermentation vessel, while a thermometer is indispensable for precise temperature monitoring. Specialized tools such as a racking cane, tubing, and an airlock are integral for transferring liquids and creating a sealed, anaerobic environment necessary for fermentation. These tools, though seemingly simple, are engineered for efficiency and hygiene in the **beer brewing** process.
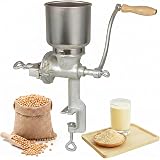
Beyond the hardware, the kit also contains the core ingredients that define your beer’s character. Dry Malt Extract (DME) provides the fermentable sugars that yeast will convert into alcohol and carbon dioxide, forming the very foundation of your brew. Specialty grains, typically steeped, contribute subtle flavors, aromas, and the desired color profile to the finished product. Hops are included to impart bitterness, aroma, and act as a natural preservative, their specific varietals dictating much of the beer’s aromatic complexity. Lastly, a packet of high-quality brewer’s yeast is supplied, containing the microorganisms vital for the fermentation process. Understanding the role of each component is key to appreciating the alchemy of **homebrewing**.
The Critical First Step: Sanitization
The cardinal rule of **homebrewing** is unwavering: sanitize, sanitize, sanitize. This step cannot be overemphasized, as it represents the most critical determinant of your beer’s quality and longevity. Unwanted microorganisms, such as wild yeasts or bacteria, are pervasive in the environment and, if introduced into your wort or beer, will lead to off-flavors, spoilage, or even a completely undrinkable batch. As shown, the process involves mixing a potent sanitizing solution—often a no-rinse formula—with water, typically at a ratio that yields one gallon of prepared sanitizer, half of which is reserved for bottling later.
Every piece of equipment that will come into contact with your wort *after* the boil, or your fermented beer, must be thoroughly cleaned and then immersed in or sprayed with this solution for the recommended contact time. Items such as the fermentation vessel, airlock, stopper, racking cane, tubing, and even bottle caps all require rigorous treatment. The rationale is simple: the boil sterilizes the wort initially, but once cooled, it becomes a highly nutritious medium for *any* microorganism. Consequently, meticulous sanitization acts as the gatekeeper, ensuring that only your chosen brewer’s yeast has the opportunity to thrive and transform the wort into delicious beer.
Steeping Grains for Flavor and Color
The steeping of specialty grains is a foundational technique in **ale brewing**, serving to extract desirable non-fermentable sugars, complex carbohydrates, and aromatic compounds that enhance the beer’s flavor profile, body, and visual appeal. This process, ideally performed at a controlled temperature of around 155 degrees Fahrenheit, allows for the gentle infusion of characteristics from the grains without extracting excessive starches or tannins that can lead to an astringent taste. A timer is typically set for 20 minutes once the grains are submerged, ensuring optimal extraction.
During steeping, the specific grain varieties chosen, such as crystal malts or roasted malts, release their unique contributions. Crystal malts, for example, impart caramel and toffee notes, while roasted malts can provide coffee, chocolate, or even smoky nuances. It is imperative that the temperature does not rise too high during this stage, as excessive heat can lead to undesirable tannin extraction from the grain husks, resulting in a puckering sensation in the finished beer. Once the steeping period is complete, the grain bag is gently lifted and allowed to drain naturally without squeezing. Squeezing can force out those very tannins, alongside starchy material, which can contribute to a cloudy beer and off-flavors. The resulting liquid, now colored and flavored, is integrated into the brewing process, signifying the transformation into a nascent wort.
The Boil: From Wort to Hopped Goodness
The boiling phase is a transformative stage in **beer brewing**, encompassing several critical functions that shape the final product. Initially, the wort, enriched from the steeped grains, is brought to a vigorous boil, a process that serves to sterilize the liquid, removing any potential contaminants introduced before this point. This extended heat also facilitates the isomerization of hop acids, contributing to the beer’s characteristic bitterness, and helps to precipitate unwanted proteins, leading to a clearer final product. Maintaining a steady, non-aggressive boil is essential to prevent boil-overs, especially as the liquid thickens with the addition of malt extract.
Introducing the Wort and Dry Malt Extract
Following the initial sterilization, the heat is temporarily reduced, and the Dry Malt Extract (DME) is carefully incorporated into the hot wort. DME, being a concentrated form of fermentable sugars derived from malted barley, is the primary source of nutrition for the yeast and, consequently, the main contributor to the beer’s alcohol content. It is crucial to stir the DME slowly and thoroughly to ensure complete dissolution, breaking up any clumps against the side of the pot. Undissolved clumps can scorch on the bottom of the pot, creating off-flavors, and will not contribute their sugars to the fermentation, potentially resulting in a lower alcohol by volume (ABV) than intended. Once fully dissolved, the wort is returned to a boil.
The Significance of the Hot Break
As the wort approaches boiling temperature and then begins to boil, a phenomenon known as the “hot break” occurs. This involves the coagulation and precipitation of proteins and other undesirable compounds, which rise to the surface as a foamy, particulate mat. Allowing this hot break to fully complete—typically within the first two to three minutes of a rolling boil—is crucial for improving the clarity and stability of the finished beer. Adding hops *after* the hot break ensures that these compounds do not interfere with the hop bitterness extraction or contribute to unwanted haze in the final product. Monitoring the boil’s intensity is important, as excessive vigor can lead to unnecessary volume reduction, impacting the final batch size.
Hop Additions and Their Impact
The timing of hop additions during the boil is a sophisticated art that dramatically influences the beer’s bitterness, flavor, and aroma. Hops contain alpha acids, which isomerize (change their chemical structure) when boiled, becoming soluble and imparting bitterness to the wort. As shown in the video, for an American Pale Ale, a “bittering” hop addition (e.g., Perle hops) is made at the beginning of the boil, typically for a full 60 minutes. This extended contact time allows maximum isomerization, contributing a clean and prominent bitterness to balance the malt sweetness.
Conversely, “aroma” or “flavor” hop additions (e.g., Cascade hops) are made much later in the boil, often in the final minutes (such as the 2-minute addition demonstrated). These shorter contact times are designed to preserve the delicate volatile oils responsible for the vibrant citrus, floral, or piney characteristics typical of many **ale brewing** styles. Boiling these hops for too long would cause these aromatic compounds to evaporate, diminishing their impact. By carefully timing each hop addition, brewers can meticulously sculpt the hop profile, creating layers of flavor and aroma that define the beer’s character.
Cooling and Fermentation Preparation
Following the boil, the wort must be rapidly chilled to a temperature suitable for yeast pitching—typically between 60-70°F (15-21°C) for most ales. This rapid cooling, often achieved with ice baths or dedicated wort chillers, is critical for several reasons. Firstly, it minimizes the risk of infection by quickly bringing the wort out of the “danger zone” where airborne contaminants are most likely to proliferate. Secondly, it reduces the formation of Dimethyl Sulfide (DMS), an off-flavor compound that can manifest as a cooked corn or cabbage aroma. Thirdly, it ensures the yeast is introduced at an optimal temperature, preventing thermal shock that can stress the yeast and lead to sluggish fermentation or off-flavors.
Once cooled to the appropriate temperature, the wort is transferred to the sanitized fermentation vessel. This is the moment when the yeast is “pitched,” or added to the wort. Yeast is the biological engine of **beer brewing**, metabolizing the fermentable sugars into ethanol, carbon dioxide, and a host of secondary flavor compounds. The ideal fermentation temperature for ales, usually around room temperature, fosters the yeast’s healthy activity. A consistent temperature during this phase is crucial; fluctuations can cause the yeast to produce undesirable flavors. While the video focuses on the brewing steps, understanding the principles of yeast health and temperature control is paramount for achieving a clean, well-attenuated **homebrewed beer**.
The Bottling Process: Carbonation and Conditioning
Sanitization for Bottling
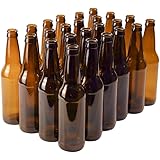
Just as sanitization is paramount before fermentation, it remains critically important during the bottling phase. Every bottle, cap, and piece of bottling equipment—including the racking cane and tubing—must be meticulously cleaned and sanitized. Reusing commercial beer bottles, as suggested, requires thorough washing to remove residual beer and then sanitization to eliminate any microbial life. The diligent application of sanitizer at this stage safeguards your finished **homebrewed beer** from spoilage organisms that could otherwise introduce off-flavors, turbidity, or even cause bottles to explode due to uncontrolled secondary fermentation.
Achieving Natural Carbonation
The goal of bottling is to create naturally carbonated beer through a process known as bottle conditioning. After primary fermentation, most of the fermentable sugars have been consumed by the yeast. By adding a small, precise amount of new fermentable sugar—in this case, convenient carbonation drops—to each bottle (one drop per 12-oz bottle), a secondary fermentation is initiated within the sealed container. The residual yeast in the beer consumes these new sugars, producing a small amount of additional alcohol and, crucially, carbon dioxide. Because the bottles are sealed, this CO2 has nowhere to escape and dissolves into the beer, creating the effervescence synonymous with a refreshing brew. Filling bottles from the bottom up, leaving a couple of fingers’ width of headspace, helps minimize oxygen exposure, which can lead to stale flavors.
Patience is a Virtue: Conditioning Your Ale
Once bottled and capped, the beer requires a period of bottle conditioning, typically around four weeks, during which the secondary fermentation occurs and the carbonation builds. During this time, the bottles should be stored in a cool, dark place to protect the beer from light-struck flavors (“skunking”) and maintain a consistent temperature for optimal yeast activity. While it can be tempting to crack open a bottle prematurely, patience is truly a virtue in **homebrewing**. This conditioning period allows the carbonation to fully develop, the flavors to meld and mature, and any harsh notes to mellow. A properly conditioned **homebrewed beer** will present a clear, effervescent, and well-rounded flavor profile, a testament to the brewer’s dedication and understanding of the entire process.
Hoppy Hour Q&A: Your Homebrewing Questions Answered
What is homebrewing?
Homebrewing is the process of making your own beer at home, which has become an accessible and rewarding hobby for beginners, often using specialized kits.
Why is sanitization so important when making beer at home?
Sanitization is crucial to prevent unwanted microorganisms from spoiling your beer or causing off-flavors. All equipment that touches the beer after it’s been boiled must be thoroughly cleaned and sanitized.
What is the purpose of steeping specialty grains?
Steeping specialty grains extracts desirable flavors, aromas, and color that enhance the beer’s overall character. This step contributes to the unique profile of your brew.
How does homebrewed beer become fizzy after it’s bottled?
After bottling, a small amount of sugar (like carbonation drops) is added to each bottle. This causes a secondary fermentation in the sealed bottle, producing carbon dioxide that dissolves into the beer, creating fizz.