Crafting your own brew can be an immensely rewarding experience, transforming simple ingredients into complex flavors. As demonstrated in the accompanying video, the journey to a perfectly carbonated English Brown Ale involves careful temperature control, precise measurements, and a healthy dose of patience. From steeping grains at a crucial 68°C (155°F) for 20-30 minutes to achieving the perfect 23-liter fermenter volume, each step builds towards the final, satisfying pour. The process, while detailed, is accessible to homebrewers ready to elevate their craft.
Deconstructing the Brewer’s Best English Brown Ale Kit
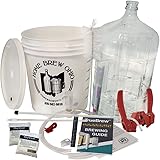
Diving into a brewing kit is like opening a treasure chest for aspiring brewers. These kits provide a curated selection of ingredients, streamlining the initial setup. The Brewer’s Best English Ale kit, for instance, includes several components crucial for defining the characteristic profile of an English Brown Ale.
Specific ingredients like Willamette hops lend a distinct floral, spicy, and slightly fruity aroma, balancing the rich malt base. Beyond this, the kit featured crushed Cara Munich dark malt, a specialty grain renowned for contributing robust malty flavors, caramel notes, and a deep reddish-brown hue. Furthermore, the inclusion of chocolate barley introduces subtle roast and cocoa undertones, adding complexity without overwhelming the palate.
Liquid malt extract and amber spray-dried malt form the fermentable sugar backbone, providing the necessary sugars for yeast to convert into alcohol. The kit also bundles high-quality brewing yeast, specialized to ferment English ale styles and produce desirable esters, alongside the all-important priming sugar for bottle conditioning. Understanding these components helps a brewer appreciate the synergy at play in their fermenter.
The Art of Steeping Grains for an Authentic English Brown Ale
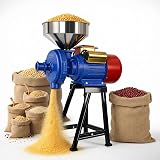
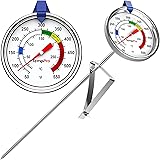
Steeping grains is a foundational step in brewing many beer styles, including the traditional English Brown Ale. It involves soaking specialty grains in hot water to extract their color, flavor, and unfermentable sugars, which contribute to body and mouthfeel. The video highlighted steeping at approximately 68-69°C (155°F) for 20-30 minutes, a temperature range critical for optimizing flavor extraction without converting starches to fermentable sugars, as would happen in a full mash.
Consider the process akin to brewing a robust cup of tea. Just as specific water temperatures extract different compounds from tea leaves, maintaining a precise temperature for grain steeping is vital. Too hot, and you risk extracting unwanted tannins, leading to astringency; too cold, and you won’t fully unlock the grain’s potential. This gentle extraction of color and complex sugars from specialty malts like Cara Munich and chocolate barley is paramount for the rich character of a homebrewed English Brown Ale.
Using a grain bag during steeping simplifies removal and cleanup, preventing grain particles from entering the wort and potentially causing off-flavors. Once steeping is complete, allow the grains to drain naturally without squeezing the bag. Squeezing can release undesirable tannins, introducing harshness to your beer, much like over-steeping tea.
Wort Production: From Boil to Chill
After steeping, the next major phase involves bringing the wort to a boil and adding hops. The boil serves multiple purposes: it sterilizes the wort, extracts bitterness and aroma from hops, and helps concentrate the sugars. As the wort approaches a rolling boil, the first addition of hops typically contributes bitterness to balance the malt sweetness.
The liquid malt extract, often thick and viscous, benefits from being run under warm water before adding it to the boiling wort. This loosens its consistency, allowing for easier pouring and preventing it from scorching on the bottom of the pot. Stirring thoroughly ensures the extract dissolves completely, creating a uniform wort.
Following the boil, cooling the wort rapidly is a critical step, much like a chef swiftly chilling a delicate sauce. This rapid cooling, known as “cold break,” helps precipitate proteins, leading to clearer beer. More importantly, it minimizes the window for airborne bacteria and wild yeasts to contaminate the wort before the brewer’s chosen yeast takes hold. Common cooling methods include an immersion chiller, a counter-flow chiller, or simply placing the brew kettle in an ice bath. The video demonstrated an ice bath approach, an effective method for smaller batches.
Fermentation and the Journey to Flavor
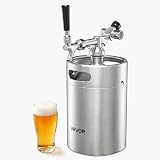
Once cooled to pitching temperature (typically around 18-22°C or 65-72°F for most ale yeasts), the wort is transferred to a sanitized fermenter, like the Coopers DIY fermenter shown. This is when the magic of fermentation truly begins with the addition of yeast. Yeast is a living organism, and like any creature, it thrives under optimal conditions. Pitching yeast into wort that is too hot can shock it, leading to off-flavors or stalled fermentation. Conversely, wort that is too cold can cause sluggish activity, leading to incomplete fermentation and potentially sweet, under-attenuated beer.
The 23-liter mark is a standard batch size for many homebrewing kits, ensuring proper headspace for the active fermentation (the krausen) and a suitable yield for bottling. Over the next “couple weeks,” as the video notes, the yeast will consume the sugars in the wort, producing alcohol, carbon dioxide, and various flavor compounds (esters, phenols, etc.) that define the character of the English Brown Ale. Maintaining a consistent fermentation temperature is crucial during this period to guide the yeast in producing the desired flavor profile.
Priming and Bottling Your English Brown Ale
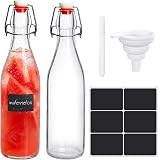
The final act of homebrewing involves carbonation and packaging. While carbonation drops offer simplicity, using priming sugar provides greater control over the carbonation level. The video demonstrated a precise method: 1 ounce of priming sugar per gallon, mixing with a pint of filtered water, boiling for 7-10 minutes, and then cooling. This boiling step is vital for sanitization, ensuring no wild microbes are introduced along with the sugar.
Once cooled, the priming sugar solution is gently added to the fermenter, then carefully stirred to distribute evenly without disturbing the yeast cake (trub) at the bottom. This even distribution is paramount; uneven sugar can lead to some bottles being flat and others over-carbonated, potentially even exploding. The sugar provides a small amount of fermentable material for the residual yeast in the beer to consume in the bottle, creating the natural carbonation that gives beer its fizz and head retention.
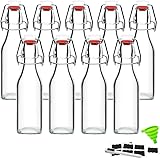
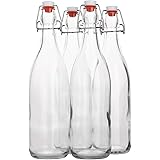
Sanitation remains critical during bottling. All bottles, caps, and bottling equipment must be meticulously sanitized, as any contamination at this stage can ruin the batch after weeks of effort. Filling bottles without introducing excessive oxygen is also important, as oxygen can quickly stale beer. After bottling, the beer needs to condition at room temperature for a “few weeks” to allow the secondary fermentation for carbonation to complete. This conditioning period is essential for your English Brown Ale to truly develop its characteristic taste and effervescence, transforming a flat liquid into a lively, flavorful beverage.
From Recipe Kit to Perfect Pint: Your English Brown Ale Q&A
What is a beer brewing kit?
A brewing kit provides all the pre-selected ingredients needed to make a specific type of beer, like an English Brown Ale. It helps streamline the initial setup for homebrewers.
What does it mean to ‘steep grains’ when brewing beer?
Steeping grains involves soaking specialty grains in hot water to extract their color, flavor, and unfermentable sugars. This process, similar to brewing tea, adds body and mouthfeel to the beer.
Why is it important to cool the wort quickly after boiling?
Rapidly cooling the wort helps make the beer clearer and, more importantly, minimizes the chance of airborne bacteria or wild yeasts contaminating it before your brewing yeast is added.
What is priming sugar used for when bottling homebrew?
Priming sugar is added to the beer just before bottling to create natural carbonation. Residual yeast in the bottle consumes this sugar, producing the fizz and head retention of the beer.
Why is sanitation so important in homebrewing?
Sanitation is critical at every stage, especially during fermentation and bottling, to prevent contamination from unwanted microbes. Contamination can introduce off-flavors or ruin your entire batch of beer.