Learning how to make beer at home may seem complicated, but brewing a delicious brown ale can be simpler than you think. As demonstrated in the video above, with basic ingredients and a few key steps, you can craft your own small batch of custom beer. This guide expands on the video, breaking down each stage into easy-to-understand concepts for the beginner homebrewer.
Understanding Your Brown Ale Ingredients
Every great beer starts with quality ingredients. For a simple brown ale, like the one Brian crafts, you need just a few essentials. Malted barley forms the foundation, providing the sugars yeast will transform into alcohol. Think of it as the main character in your brewing story.
Specifically, two-row barley is the primary grain. It’s the most common base malt, offering a light, clean flavor. Next, crystal malt, particularly a 60L variety, adds a darker color. This special malt also brings delightful caramel and toffee notes. It really enhances the beer’s body and sweetness.
Hops are another crucial ingredient. Brian uses Cascade hops, an American classic known for its floral and citrusy aroma. Hops balance the sweetness from the malt and act as a natural preservative. Finally, SafeAle S-04 yeast is a reliable ale yeast. It efficiently ferments your sugary liquid into alcoholic beer. Each ingredient plays a vital part in your final brown ale.
Scaling Your Brew for Success
The video features a one-gallon batch, perfect for beginners. Starting small minimizes equipment needs and space. It also makes cleanup much easier. Brian highlights that making one gallon is almost as easy as making five. This shows brewing is flexible for any kitchen size.
However, if you wish to brew five gallons, simply multiply all ingredients by five. This includes your grains and hops. Even the yeast quantity scales up; a full packet of SafeAle S-04 yeast generally suits a five-gallon batch. Scaling up allows for more beer without changing the process. This adaptability makes homebrewing a fun hobby.
The Essential Mash: Turning Starch to Sugar
The first significant step in making a brown ale is called mashing. Here, you steep your crushed, malted barley in hot water. This process activates special enzymes naturally present in the malt. These tiny biological helpers work to convert complex starches into fermentable sugars. Imagine them as tiny workers, diligently changing one substance into another.
Maintaining the correct temperature during the mash is crucial. Brian aims for 155°F (about 68°C), though any temperature between 150-165°F (65-74°C) is acceptable. Lower temperatures tend to produce more fermentable sugars, resulting in higher alcohol content but lighter body. Higher temperatures yield more unfermentable sugars, leading to a richer mouthfeel but slightly lower alcohol. Brian prioritizes mouthfeel, making 155°F his preferred sweet spot.
You must stir the grains well at the start to prevent clumps. Dry spots mean un-mashed grains and lost sugars. The mixture will resemble oatmeal, a sign you’re on the right track. After mixing, maintain the temperature for about an hour. Insulating your pot with a towel helps prevent heat loss. This crucial hour allows enzymes to do their work. It’s the “cooking” phase for your brown ale.
Straining and Sparging: Collecting the Sweet Wort
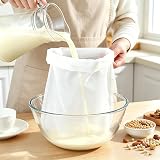
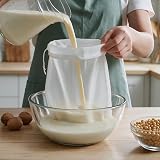
After the mash, you’ll have a thick, sugary liquid mixed with spent grains. This liquid is called “wort.” Separating the wort from the grains is the next step. This involves straining the mixture through a sieve. This process removes the solid grain husks, leaving behind the sweet liquid. It’s like brewing a giant cup of tea, where the grains are your tea leaves.
Following the initial strain, you perform a “sparge.” Sparging means rinsing the spent grains with more hot water. This extracts any remaining sugars clinging to the grain husks. Think of it as giving your grains a final shower to wash off every last bit of sweetness. This maximizes your sugar yield, ensuring a more flavorful and alcoholic beer.
Brian emphasizes using filtered tap water for sparging and brewing. Tap water often contains minerals beneficial for yeast health and beer flavor. Reverse osmosis (RO) water lacks these minerals, which can result in a “flat” tasting beer. After straining and sparging, you should have about 1.5 gallons of wort. This volume allows for reduction during the boil. The collected wort is now ready for its next transformation.
The Boil: Bitterness, Flavor, and Aroma
Boiling the wort is a vital stage, serving multiple purposes. First, it sanitizes the liquid, killing any unwanted bacteria. Second, it helps clarify the beer by coagulating proteins. Most importantly, boiling extracts bitterness, flavor, and aroma from the hops. This one-hour process transforms the sweet wort into true beer. Brian emphasizes keeping the pot uncovered during the boil.
Hops are added at different times during the boil for specific effects. The first addition, right at the start of the 60-minute boil, contributes bitterness. These hops stabilize the beer and act as a natural preservative. The story of India Pale Ale (IPA) illustrates this well: British brewers added extra hops to their beer. This helped it survive long sea voyages to India. The hops prevented spoilage, creating a very hoppy beer style.
A second hop addition, typically around the middle of the boil, provides flavor. These hops contribute more subtle characteristics to the beer’s taste profile. Finally, a third addition, usually five minutes before the end of the boil, imparts aroma. These volatile hop oils contribute to the beer’s fragrant bouquet. Brian uses 0.3 ounces of Cascade hops for his one-gallon batch, split into three 0.1-ounce additions. Each addition makes a unique contribution to the brown ale.
Cooling and Pitching the Yeast
After an hour of boiling, your wort is hot and ready for cooling. Rapidly cooling the wort is important for several reasons. Quick chilling helps create what brewers call a “cold break.” This process removes unwanted proteins, leading to a clearer final beer. More critically, rapid cooling minimizes the risk of bacterial infection. The wort is highly susceptible to contamination at this stage.
Brian cools his one-gallon batch in a bathtub filled with cold water. This simple method works perfectly for smaller volumes. The goal is to bring the wort temperature down to under 100°F (38°C). Ideally, it should be even cooler, closer to 70°F (21°C), for optimal yeast health. Once cooled, you strain the wort again, this time to remove the spent hop pellets. This leaves a cleaner liquid for fermentation.
Next, it is time to “pitch” the yeast. Brian pre-hydrates his SafeAle S-04 yeast in a small amount of wort. This helps activate the yeast cells before they go into the main batch. Think of it as waking up your tiny workers and giving them a snack. Pouring the wort into the fermenter from a height helps to oxygenate it. Oxygen is vital for yeast reproduction in the early stages. This strong start ensures a healthy and vigorous fermentation for your brown ale.
Gravity Readings and Fermentation
Before sealing your fermenter, you take an initial gravity reading. This measurement, known as Original Gravity (OG), tells you the concentration of sugars in your wort. It’s like taking a baseline reading before a big race. Brian’s brown ale showed an OG of 1034. While he initially aimed for 1070, a slightly lower reading is perfectly fine for a sessionable beer. This OG suggests an alcohol content of about 4-5%. Many brown ales are traditionally lower gravity.
Tasting the wort at this stage is also recommended. If you enjoy the sweet, hoppy taste of the wort, you will likely enjoy the finished beer. This gives you a preview of your brew’s potential. Brian notes his wort tasted hoppy with a pleasant grain sweetness. This is a good sign for the final product.
Finally, seal your fermenter with an airlock. An airlock allows carbon dioxide (CO2) to escape during fermentation. However, it prevents outside air and contaminants from entering. Think of it as a one-way valve for your beer. Place your fermenter in a cool, dark place. Give it one to two weeks to ferment. If you don’t see activity within a couple of days, a gentle shake can sometimes restart fermentation. The yeast will slowly convert the sugars into alcohol and CO2, transforming your wort into a delicious brown ale.
Beyond the Brew: Utilizing Spent Grains
After brewing, you’ll be left with a substantial amount of spent grains. These grains still contain nutrients and fiber, making them highly reusable. Dereka and Brian plan to save their grains for future culinary experiments. This highlights a great way to reduce waste in homebrewing.
There are many creative uses for spent grains. They can be added to bread dough, giving a rustic texture and flavor. You can also incorporate them into dog treats for a healthy snack. Some people even use them as compost or feed them to chickens. To store spent grains, you must dry them thoroughly. Spreading them on a cookie sheet in a low oven or using a dehydrator prevents mold. This step ensures they remain fresh for future projects.
Brewing Up Answers: Brown Ale Q&A
What are the main ingredients for making beer at home?
The essential ingredients for making beer are malted barley, hops, and yeast. Malted barley provides the sugars, hops add balance and preservation, and yeast converts sugar into alcohol.
What is ‘mashing’ in the beer-making process?
Mashing is the first step where you steep crushed malted barley in hot water. This activates enzymes that convert the starches in the grains into fermentable sugars.
What is ‘wort’ in homebrewing?
Wort is the sweet, sugary liquid that is separated from the grains after mashing and sparging. It is essentially unfermented beer that the yeast will later transform.
Why is it important to boil the wort?
Boiling the wort serves several purposes: it sanitizes the liquid, helps clarify the beer, and extracts bitterness, flavor, and aroma from the hops. This one-hour process is vital before fermentation.
What does the yeast do when making beer?
The yeast is responsible for fermentation; it consumes the sugars present in the wort. As it does, it converts these sugars into alcohol and carbon dioxide, turning the sweet liquid into beer.